Anya has been asking a lot of questions about infinity lately. I’ve tried explaining the concept to her but it isn’t an easy concept for a six year old to understand – I only just about understand it myself! :). Her interest in infinity started when she asked what the biggest number in the world was. I told her about infinity and for a while she thought that the biggest number in the world was infinity because she just couldn’t grasp the idea that numbers never finish. But then I came across this book called Infinity and Me and it seemed like just the book to help in explaining infinity to children.
Infinity and Me is about a little girl who gazes up at the night sky and starts to feel very small in the vastness of the sky. She begins to wonder about infinity and just what exactly infinity means. She starts asking everyone she meets and soon realises that maybe there are infinite ways to explain infinity. Infinity and Me is a very simple and sweet book with illustrations that are equally adorable. It’s a great first book to give some meaning and relevance to the concept of infinity to kids. While the main character in the book happens to be a girl, I think this book is equally suited for boys as it is for girls. Any child curious about infinity would enjoy Infinity and Me.
I have been looking for a maxi dress for Anya for ages. I really wonder why maxi dresses for little girls are so rare. They may not be the most practical for playing in a park or running around but they are great for other occasions like a meal out or even a birthday party. I finally found one last week and I had to snap it up. They look so cool and stylish and Anya loved wearing it and twirling around. In fact it’s been a struggle to get it off her – she even wanted to sleep with it on!
We decided to pair it with orange ankle boots to give the maxi dress a bit more of an edgier look. Sandals would have been the obvious choice but I didn’t want too girly a look. And besides we’re still waiting for proper sandal weather in London – will it ever come? While out in the dress so many people stopped us and asked where the dress was from. We were mostly stopped by mums who also wanted a long dress for their little girls. Have you come across any maxi dresses for little girls? I’d love to hear as I would like to get a couple more for the Summer.
The other day I was told a story about a three year old girl who was given a book. She opened the book and she tried to press it. She then started sliding her finger to get the pages to move. She continued pressing, sliding, scrolling and got increasingly frustrated when nothing happened. This child had never seen a real book before. Her only experience of books had been electronic. I haven’t made this up even though I wish I had. This was told to me by someone who knew the little girl, while we were discussing technology and kids. And that got me thinking, how much tech is too much but also is there such a thing as too little?
People often ask me if I let Anya use my ipad and other devices and how much I let her use them. The answer is yes, I do let her use the devices but there are rules and restrictions. Since I’m asked a lot I thought I would share some of the things I do to limit her use of iphones and ipads. I do believe that our kids are growing up in an age where technology is everywhere and that they need to be exposed to it as it is so much a part of our lives. And there are a lot of good things about technology so I want it to be a part of her life but not take over and or become her main source of entertainment. So here are a few things I do to limit her ipad time:
1. She has to ask before using the ipad/iphone. She can’t just help herself!
2. We treat the ipad like a treat! So just like any treat, she knows that it’s not something she can have everyday but instead it’s something that can only be used once in a while. But I never use it as a reward.
3. If she asks for it when I don’t think she should have it, I suggest another activity rather than just saying no. So I’ll suggest colouring, dressing up or anything else that she loves doing and this often works because thankfully children forget easily! Or if that fails, I will suggest reading together or something else we can do together.
4. When she does get to use it, I usually limit her time and tell her that upfront. Then when times up, it’s up. Sticking to your resolve really counts here because the inevitable ‘5 more minutes, please, please, please’ will always happen. (Of course , there are times I’ve given in to extra time especially when I’ve got stuff to do myself – naughty mama!).
5. Buy books. Lots of them – story books, activity books, colouring books. And keep books accessible so your kids can reach them easily. I’ve found that a new book for Anya is far more exciting than a new app.
6. There are certain situations where I don’t allow the ipad at all like mealtimes and car journeys because once you allow it, I think it can easily become the norm. So sticking to never is easier for me and for Anya because she doesn’t ever expect it at these times.
7. Obviously don’t buy them their own device because that’s just asking for trouble. This might sound very obvious but I actually know 5, 6, 7 year old kids who have their own ipad and it never fails to shock me no matter how many times I come across a kid with one.
There is one exception I make to all the above and that’s when she wants to listen to music because she loves music. Right now the ipad and iphone are our only sources of music so if she wants to listen to something I never stop her. In fact I encourage it.
We all know kids learn by example so the amount of screen time you have will have an influence. I rarely watch TV but I am guilty of spending too much time on my laptop and this has naturally influenced Anya and her tech consumption. I’m trying to make sure that once she comes home from school I shut off and then do anything pending after she’s gone to bed. There are days when I manage this but there are others where I fail miserably. What can I say – I’m still a work in progress!
Having said all that, there are times when rules go out the window. I’m not perfect at following my rules and especially recently with all our house renovation upheaval she has had more ipad time than I would have normally allowed. But sometimes you just have to do what makes life easier and not feel guilty about it.
What do you do to limit your kids screentime? Any tips for all of us? Or do you prefer your kids never to use ipads and iphones? I’d love to hear in the comments.
P.S. This is a fun book on tech vs. real books to read with kids.
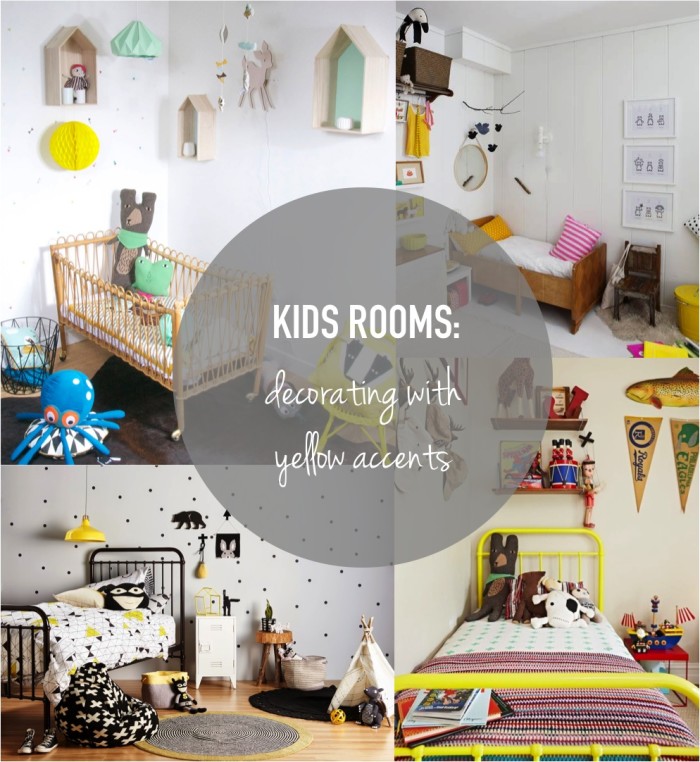
Yesterday, my friend’s 70-something dad came to the school gates wearing yellow trousers and a purple sweater. I can’t tell you how cool he looked! I think yellow is such a striking colour but so under-used in clothing, in decor and everywhere. I love kids in yellow and one of the best places to use yellow is in a kids room – boy, girl or baby room. It’s a colour that transcends gender and age and above all it is such a happy colour. In a kids room I wouldn’t go so far as painting walls yellow because for me a little yellow goes a long way. But adding little yellow touches can quickly brighten even the dullest of rooms. And any kind of decor – modern, vintage, retro – can benefit with a bit of yellow. Here are some inspiring kids rooms that show how stunning decorating with yellow can be:
This baby nursery isn’t all about the yellow but just the smallest touches of yellow really brighten this room. And the yellow works so well with the minty green too.
How cool is this room? This room has the smallest yellow accents and yet the yellow adds so much cheer to the room. This is a boys room but black, white and a little yellow thrown in is a winning combination for for any gender or age.
This is another boys room where the yellow comes in the form of the metal bed – such a great way to add your splash of yellow. If you can’t find a yellow metal bed, you can always get a white one and paint it. This vintage inspired room looks so fun and cosy and the yellow bed would work just as well in a girls room.
How gorgeous is this girls room? The yellow is used sparingly by adding just the odd cushion, storage basket and a few objects but that’s all this room needs. The colour combination of soft pink with light grey and touches of bright yellow really is beautiful.
Last is this sweet vintage room which again uses lots of yellow decorations in different shades of yellow. Imagine this room without the yellow – it would look quite bland. The yellow brings the white walls to life but still doesn’t overpower.
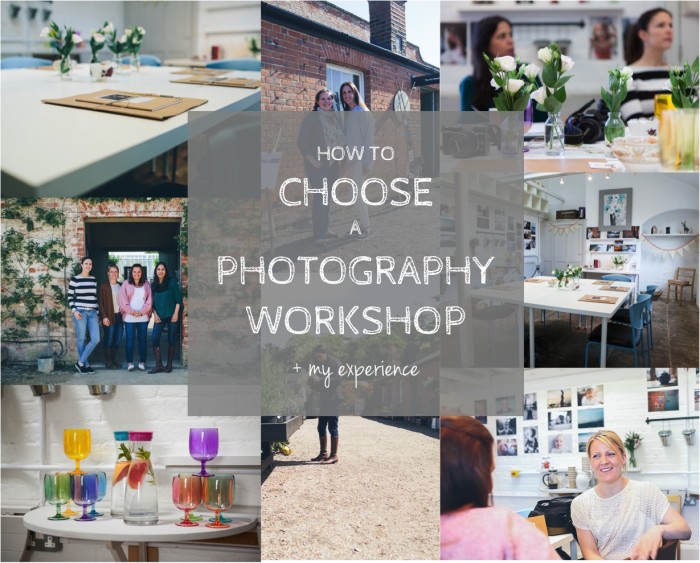
Over the last few months I have really enjoyed sharing some fabulous photography tips and ideas and even more so because so many of you have come out and told me how useful you’ve found it – thank you for that! Today is the last post of this series and I wanted to share my recent experience of attending an inspiring photography workshop and my tips for choosing one for yourself. I knew I wanted to attend a course as I really want to improve my photography skills. Learning to improve your photography skills from written tips and e-courses is possible and can help a lot, but there is no substitute for going to a workshop and being taught in person, especially by photographers you already admire. So if like me you want to take your photography to the next level, then I highly recommend taking a beginners course which will get that expensive camera off auto mode – sound familiar?
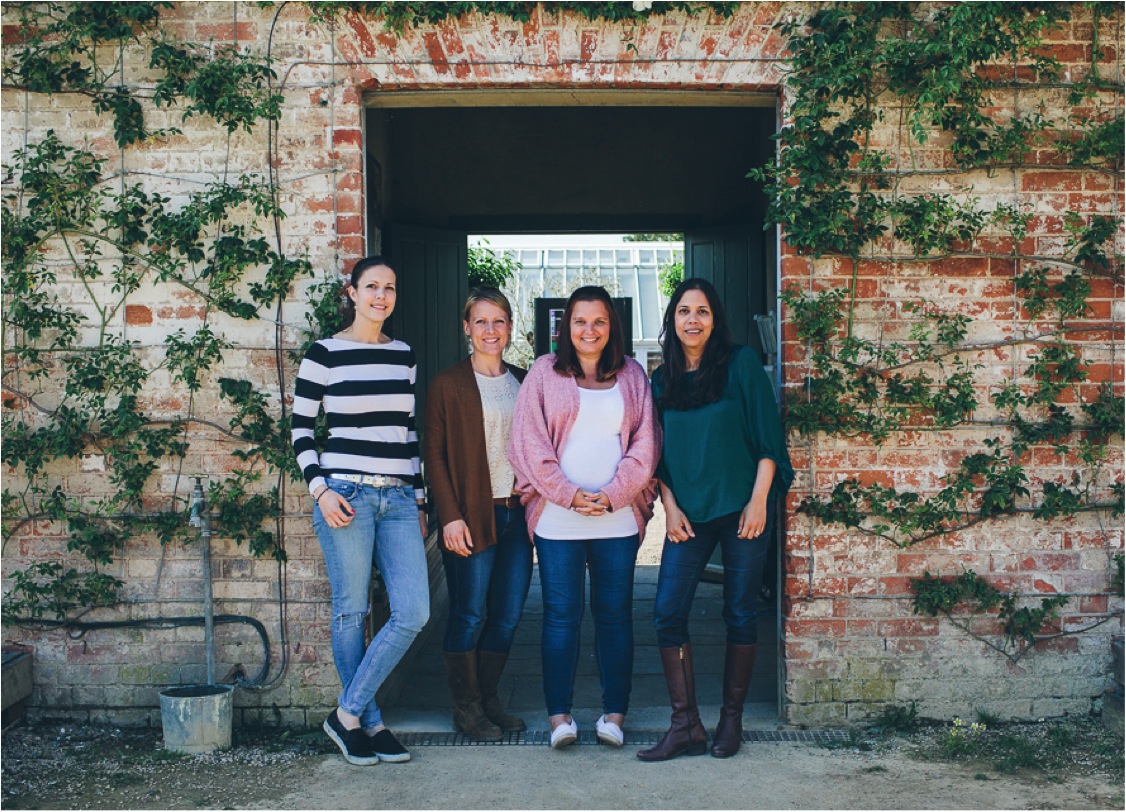
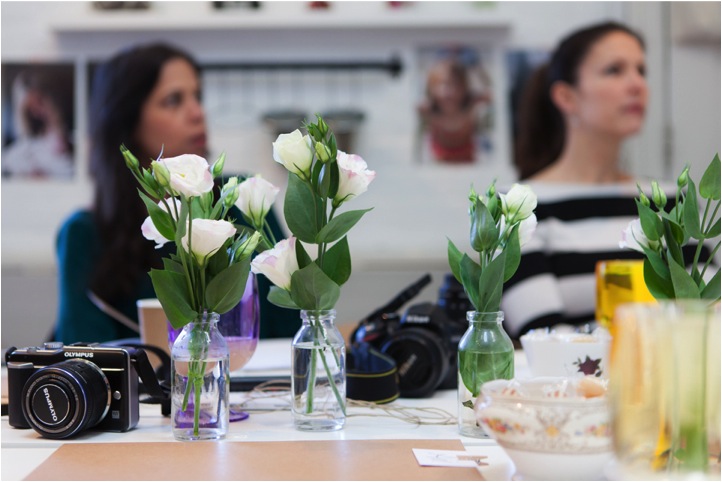
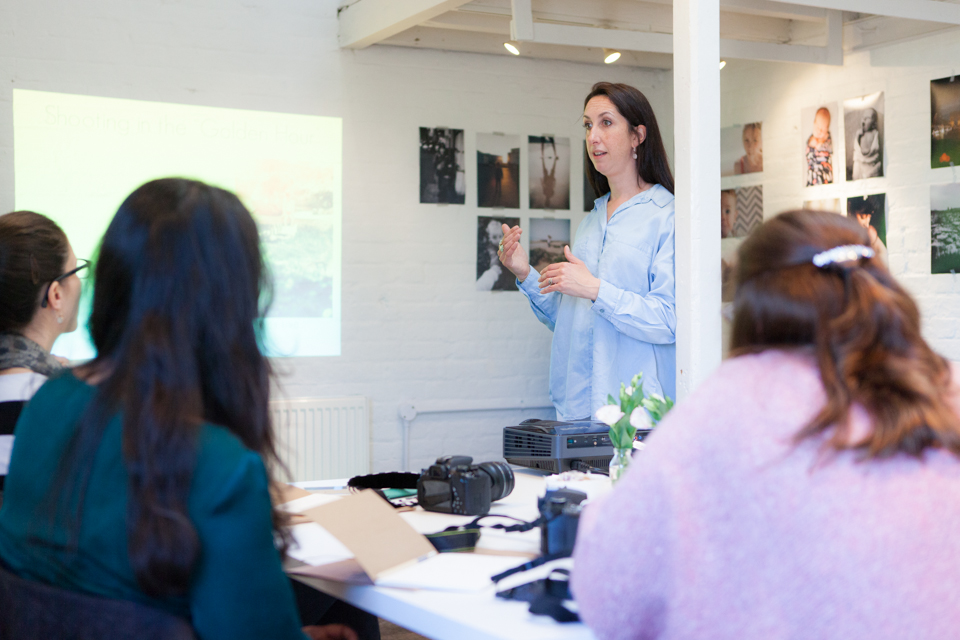
Last weekend I went to A Happy Capture workshop which is taught by Abigail Fahey and Suzi Bowles both of whom are very talented family photographers with very different styles. Both have contributed tips to my photography series so I already knew and loved their work. They’ve recently started workshops held in Cobham, Surrey – a suburb just outside South West London. The workshop was held in a beautiful venue called the Medicine Gardens which is a walled Victorian garden with quaint cafe’s, workshops and art galleries tucked behind the garden walls. It was a full day course and had me engaged from the moment we started till the very end. I’m so glad I chose to go on it and if you’re thinking of a course, I totally recommend it but if you’re not in the area then I have some suggestions on how to find a course that’s right for you.
Photography courses can be expensive and you’re not likely to do more than one or two (unless of course you want to go pro). So it’s worth taking a little time to choose the right one for you and it will really pay off. I’ve done one before A Happy Capture which was completely un-inspiring and I ended up learning nothing. It probably wasn’t a bad course but was not the right fit for me being too techy and focusing too much on technique and numbers rather than creativity. So here are some tips on how to choose a photography workshop to make sure you get the most out of it:
1. It might sound obvious but look at the work of the photographer/s behind the course. Does his/her style inspire you? Do they photograph subjects that are similar to what you want to photograph? Read their website and any information you can find about them to check that they are the right match for you.
2. Most of us here are mums who may also be bloggers so our aim is to improve our everyday photos of our kids, our holidays and our life to keep as memories and perhaps share on our blogs. We don’t want too much technical knowledge or technical speak that will just mean nothing to us. So read the course details to see what’s covered and always check the level of the course – beginner, intermediate or advanced.
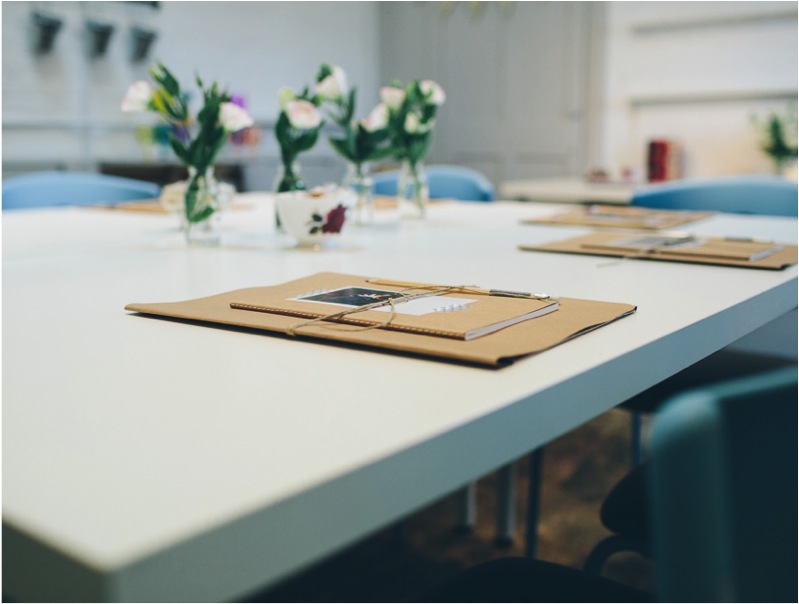
3. The venue is almost as important as the teacher as it tells you so much about what the photography workshop is going to be like. And if the workshop is held in an inspiring place it will help you get your creative juices flowing too. The first course I did was held in a small dark room with bare walls and one small window where everyone sat facing one of those bare walls! As you can imagine it did nothing to inspire me at all. But A Happy Capture was held in a beautiful room contained within a stunning walled Victorian Garden – this venue had me excited from the moment I got there.
4. Think about what you want to get out of the course and write down questions before you go otherwise you are likely to forget. If you’re an absolute beginner and don’t know what exactly you want, write a basic list and take along pictures that inspire you. Also carry photos you’ve clicked that you want to improve on. I loved that Suzi and Abigail asked us each to send them one or two photos we’re proud of before the workshop – this really made me think about what I like about my photography and what I don’t and helped me think about my questions.
5. Find out what happens after the workshop. With A Happy Capture Suzi and Abigail have set up a facebook group for past students to interact with each other and help each other and Suzi and Abigail pop in too and answer questions and critique your photos. I’ve already been taking part in the group and been learning even more.
6. Preferably always go by a recommendation rather than just picking a course off the internet. By recommendation I mean a like-minded friends suggestion but also your own experience of a photographer. Perhaps you have had photos taken by a pro you really admire and they do courses or you have just admired somebody’s work from afar, maybe on instagram. I have known and admired Abigail’s work for a long time and recently discovered Suzi’s both of which I like a lot. So when they recently launched their courses, I knew I had found the course for me and I wasn’t wrong.
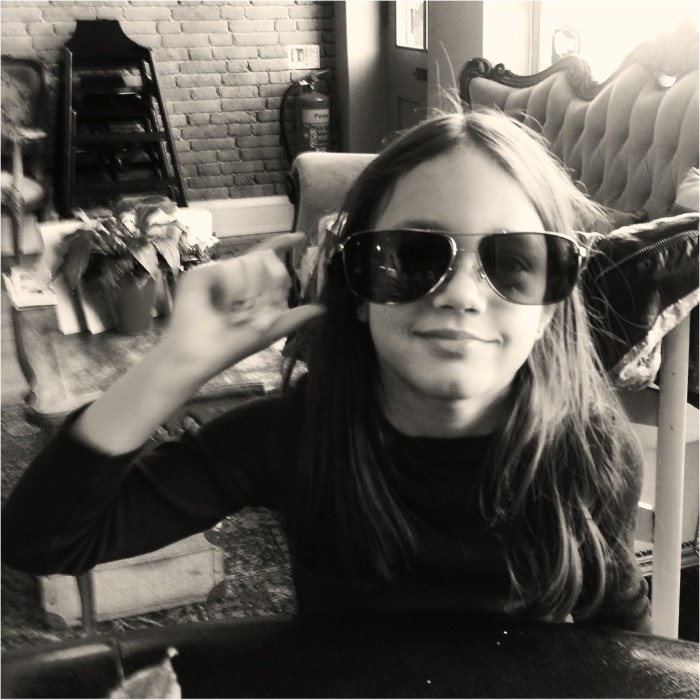
So that’s what I would suggest on how to choose a photography workshop. Don’t make my initial mistake and attend a photography course that isn’t suited to you. I have seen the difference of what the right workshop can do for you. One of the things I wanted to get better at was taking dark and moody shots especially of Anya. I wanted to capture her face, her personality and her expressions in a natural, un-posed way but with a strong element of moodiness in the pictures. Above are a few shots I took after attending the workshop and while they’re not perfect I can honestly say they are far better than anything I have taken before (compare these to the one I shared on this post which was taken before the workshop when trying to do something similar). So a little research beforehand can really go a long way in finding the right workshop for you.
If you’re interested in learning more about A Happy Capture workshops, visit the website and feel free to get in touch with Abigail or Suzi – they’re both really helpful and very approachable. And if you haven’t already guessed, I couldn’t recommend them more. I learned so much in such a friendly, relaxed and creative environment which has given me the skills to experiment far more with my DSLR.
A very big thank you to all the talented photographers who contributed to my photography series and gave us such useful photography tips – Julia, Abigail, Lucy and Suzi. Gosh imagine getting all four of them in a room and learning from them?! Shame that can’t happen but the good news is that you can get two!
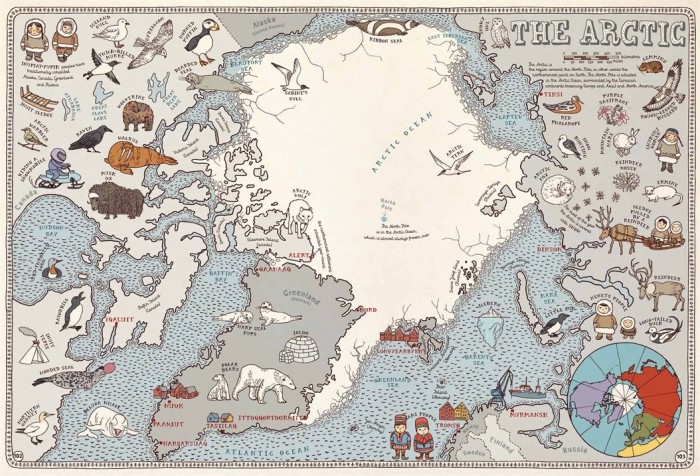
If money were no object I think I would practically buy every single kids book out there. But since I can’t do that, I have to be selective about what I buy. And when I come across a fab book I always like to share it here. While browsing for new books today, I remembered a book that I bought a while ago but hadn’t shared here. And it’s definitely one worth recommending. It’s simply called Maps and is a series maps of a range of countries.
Traveling is a big part of our lives and with that goes learning about different countires, different food, different cultures and different people. This atlas book is a great introduction to learning more about the world we live in without leaving your home! When we first got the book Anya poured over it and was especially interested in looking for places she has visited. But since then both us of us often went back to the book and discovered something completely new about a country we haven’t visited. Each country’s map has many details of things like famous landmarks, animals that are local to that country, national food dishes and so much more all beautifully illustrated often with humour thrown in too. The book is large – nearly 40cms tall – making it easy for 2-3 kids to pour over it together or for you to snuggle up on the sofa and enjoy it with your kids. Also this large format adds to the striking looks of this book and this book is indeed very beautiful – think coffee table looks.
Maps by Aleksandra Mizielinska is a book that we’ll keep and enjoy for a long time. It’s the kind of book that once you have on your shelf, you’ll always go back to and it’s so enjoyable for adults and kids alike. This book makes a great gift too – I must have already gifted it about 3 or 4 times and have had great feedback from the recipients. Maps is definitely the best atlas book for kids that I’ve come across.
It’s Friday! To end the week I wanted to share some recent conversations I’ve been having with Anya. Some are funny and sweet while others are brutally honest – kids have no editing facility do they?!
On the theory of evolution: Me explaining that many people believe that we started off as apes and evolved in to humans. A: That’s wrong. Me: Why? A: We all start off as babies and become grown-ups. (Can’t argue with that!)
Latest excuse not to sleep: A: I’ve forgotten how to sleep. I really have.
Out of the blue one day: A: Mama, why do you always have bags under your eye’s? (That made me feel good – not! And how does she even know what under-eye bags are?)
We are in the midst of house renovations and living in one room. A lot of the rest of our home is still a building site so we can’t use it. I overheard her telling her teacher: A: I have a broken house and my mum keeps me locked in one room. (Oops! Luckily her teacher knows the situation!)
What are some of the funniest things your kids have said or even brutally honest things? I’d love to hear in the comments.
Have a wonderful weekend and lets hope for some sunshine! – nomita x
Ever since I can remember I’ve been drawn to minimal, simple, monochrome style. When Anya was born and someone wanted to gift me a blanket for her, they asked what colour I wanted expecting a reply like pink or yellow. My reply was off white or black and white. My mum was horrified! Horrified that I was subjecting my child to a colourless life! But you know what – black, white and neutral tones can be so stunning in a kids room just like these decorations show us. I can’t help but be drawn to things like that cat poster and that gorgeously simple pear pillow. They can always be mixed with pops of colour so you can add as little or as much brightness as you like. I won’t be giving up my black and white obsession any time soon so I’ve found some gorgeous black and white kids room decorations to share with you:
Over the last several weeks, I’ve shared lots and lots of tips on taking better photos on iphones and DSLR’s. I’ve also shared tips on editing and organising your digital photos. But perhaps the most important thing is what we do with all those thousands of photos. Ultimately we all want to take photo’s for one reason and one reason only – to capture and immortalise those fleeting moments of our lives. Those moments that mean so much to us. Big life moments like the birth of a child or a wedding somehow always manage to get captured and usually put in to albums. But it’s the hundreds of everyday photo’s and everyday memories that often get left sitting on a hard drive somewhere. And those are the very moments that make up our lives.
When Anya was born I decided I would make a photo book or album to document each year of her life. One book, once a year – how hard can that be? I did it for the first two years and then just gave up for lack of time and even laziness. But starting this photo series made me realise just how precious our photos are and how I needed to get them off my laptop and phone and on to paper. A few weeks ago I shared some mini photo books which are great for quick little albums especially for giving to friends and family. Today it’s about making forever photo books that I will hand down to Anya and hopefully one day my grandchildren (and beyond) will see it too. And there’s a special reader discount for you too.
I’ve searched high and low for the best and most beautiful photo books around and I think it has to be Artifact Uprising. Making a book from there has probably been on my to do list for two years and I finally did it. I chose the 8.5″ square format photo book because I love that shape but there is also a beautiful hardback cloth bound book that I will probably choose to make next time. I made a book documenting our life for a year from when Anya turned five. This included any holidays we took in that year and also just moments we want to remember like her Halloween costume, her 5th birthday party, her first school performance and so much more.
Artifact Uprising keep it simple and that’s why their photo books and other photo products are so stunning. I also love the matte, recycled paper they use – no shine in sight! I want my forever photo books to last forever and I know these will. These books are special and take time to make so it’s not about making them all the time but instead, just one a year. I’m feeling inspired to do something with all my important photo’s so that I can touch and hold them whenever I want. I hope today you too are inspired to get printing those beautiful memories of yours. Whatever you do, don’t leave them on that hard drive!
Artifact Uprising don’t often do sales but have offered my readers 10% off any of their photo offerings. The discount is valid for a week from today and ends on 20.05.2015. At checkout, just use the code: AUEBB10 This offer is open to readers worldwide. Enjoy!
Did you know that in Finland every expectant mother gets a baby box as a gift from the government? The box contains all the newborn essentials she’s likely to need including clothes, bath products, nappies, a sleeping bag and even a mattress. This is such a lovely idea and for those of us not in Finland I’ve always thought it would make a great gift idea for a mum to be. It’s as if Almondella, a Finnish company read my mind because that’s exactly what they’ve done but taken it a step further. They’ve put together a range of monthly gift boxes for kids that aren’t just for newborns but for babies and toddlers.
Now they’ve gone even further and partnered with Peggy (the super stylish blogger behind Paul et Paula) and together created this great box of delights. Peggy thought why are these boxes for babies only, why not for older kids too? So she put together a gift box that is unisex and perfect not only for babies but for all kids up to 6 or 7 years old. The box contains fun decor items that will work in a nursery, a playroom or a kids room.
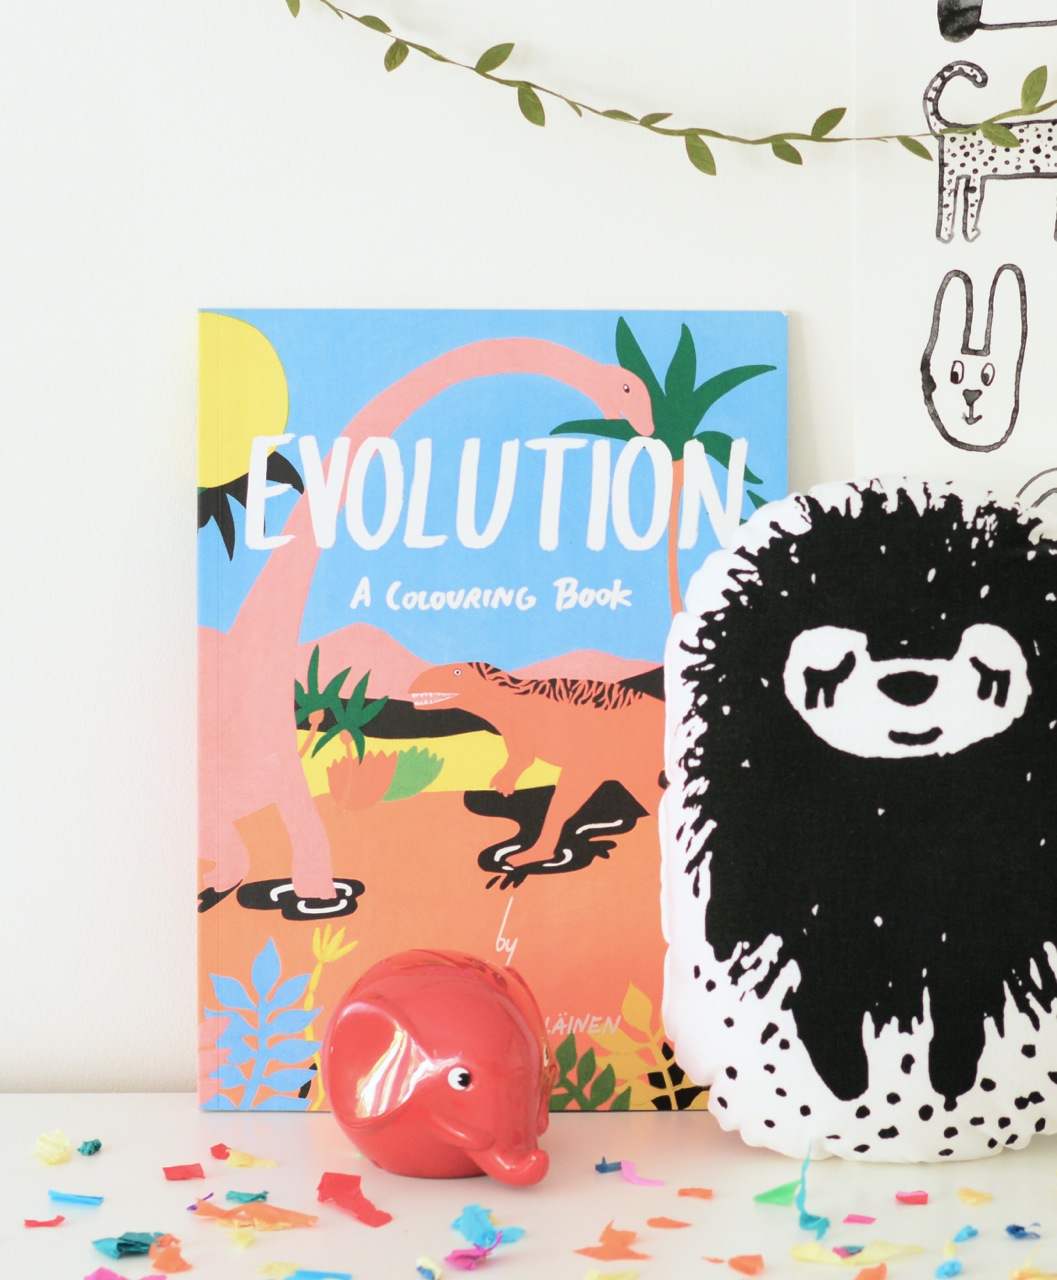
Peggy kindly sent me a box for Anya and when I opened it there was much excitement from Anya and me. Anya was immediately drawn to the iconic elephant money box (which needs no introduction) and the Evolution colouring book. The Evolution colouring book is a colouring book but so much more too. As well as colouring in the pages there are more interactive elements like flaps to lift, die-cut holes and stencils that can be drawn through and decorated. And then there is text that describes the evolution of life. So the book is fun to read, interact with and colour.
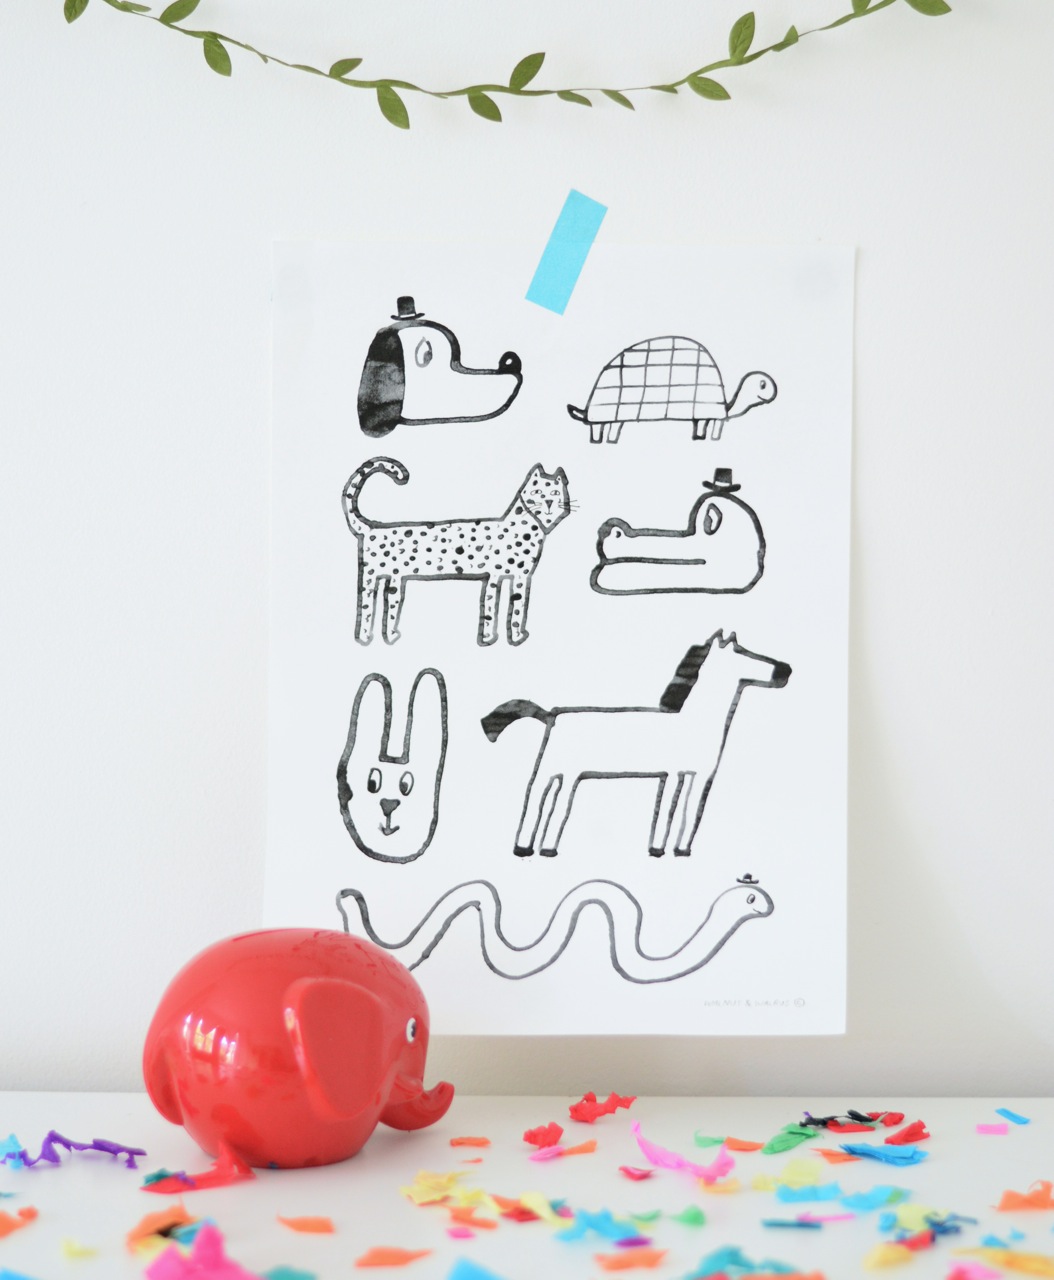
I was excited with all the bits that will work so well in Anya’s new room but my favourites are the animal poster and the wall sticker. The black and white animal poster has been created specially for this box so it’s not available elsewhere. And then you have a wall sticker – either ‘You are loved’ or ‘Grow Strong’. You don’t know which one you’ll get so it’s a nice little surprise. Lastly you have the cute sleepy hedgehog cushion.
I’m always looking for exciting and unusual gift ideas and this box would make a beautiful gift for any child. It’s a box of things that will grow with your child and they can keep for ages. And the best part is that you pay much less for all the things in the gift box than if you had bought them separately. This box is limited edition with only 50 boxes but I hope Peggy and Almondella will make more such boxes in the future because I so love the unisex, ageless aspect of it and of course the stylish Scandinavian delights inside it.
Ebabee Likes is a style guide for babies, kids, teens and their mamas. It’s all about inspiration, ideas and indulging yourself and your brood. It’s written by me ~ Nomita ~ a style loving girl from Mumbai who now live’s in London. Read More...