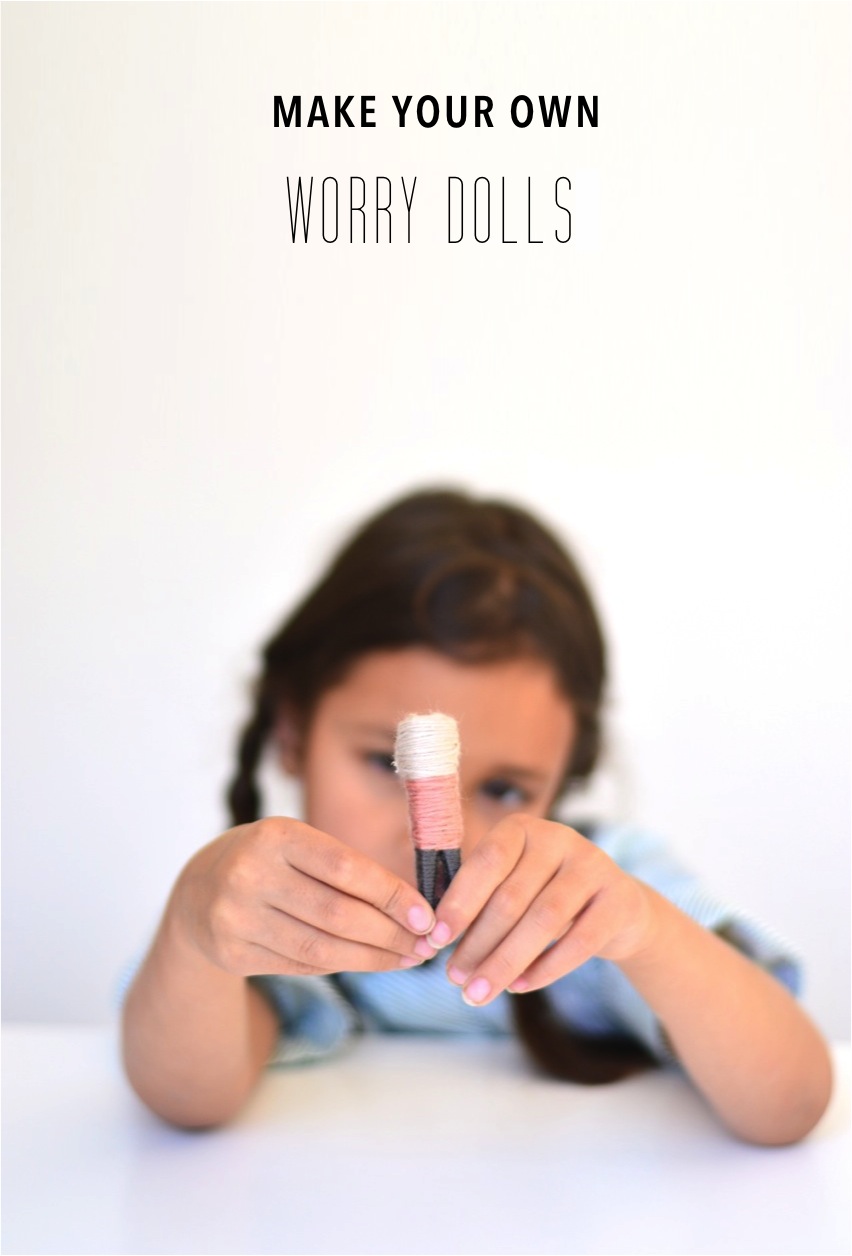
Do you know what worry dolls are? I hadn’t heard of them until a few weeks ago when Anya came home from school insisting that she needed a worry doll. I googled it and found out that worry dolls come from Guatemala and that they are tiny dolls that fit comfortably in the palm of a child’s hand. These tiny dolls are made to take away a child’s worries. Whenever your child has a worry, they can take the worry doll to bed with them, tell the doll their worry and place the doll under their pillow. The next morning the worries are gone because they have been taken away by the doll. Worry dolls are especially for kids but adults can use them too. I loved the idea so much – what a sweet and simple way to help your child with their worries.
Easter is almost here. What are your plans for the long weekend? We are planning a trip to the Natural History Museum, lots of down time, some delicious food and of course a few crafts. I love Easter crafts, especially Easter bunny crafts that can be so, so cute! So I’ve been collecting some ideas to try out over the weekend and in the holidays. I’ve rounded up 9 of my absolute favourite ones that include some edible ones too. Most of these Easter bunny crafts are easy to make and perfect to keep little people busy over the holidays:
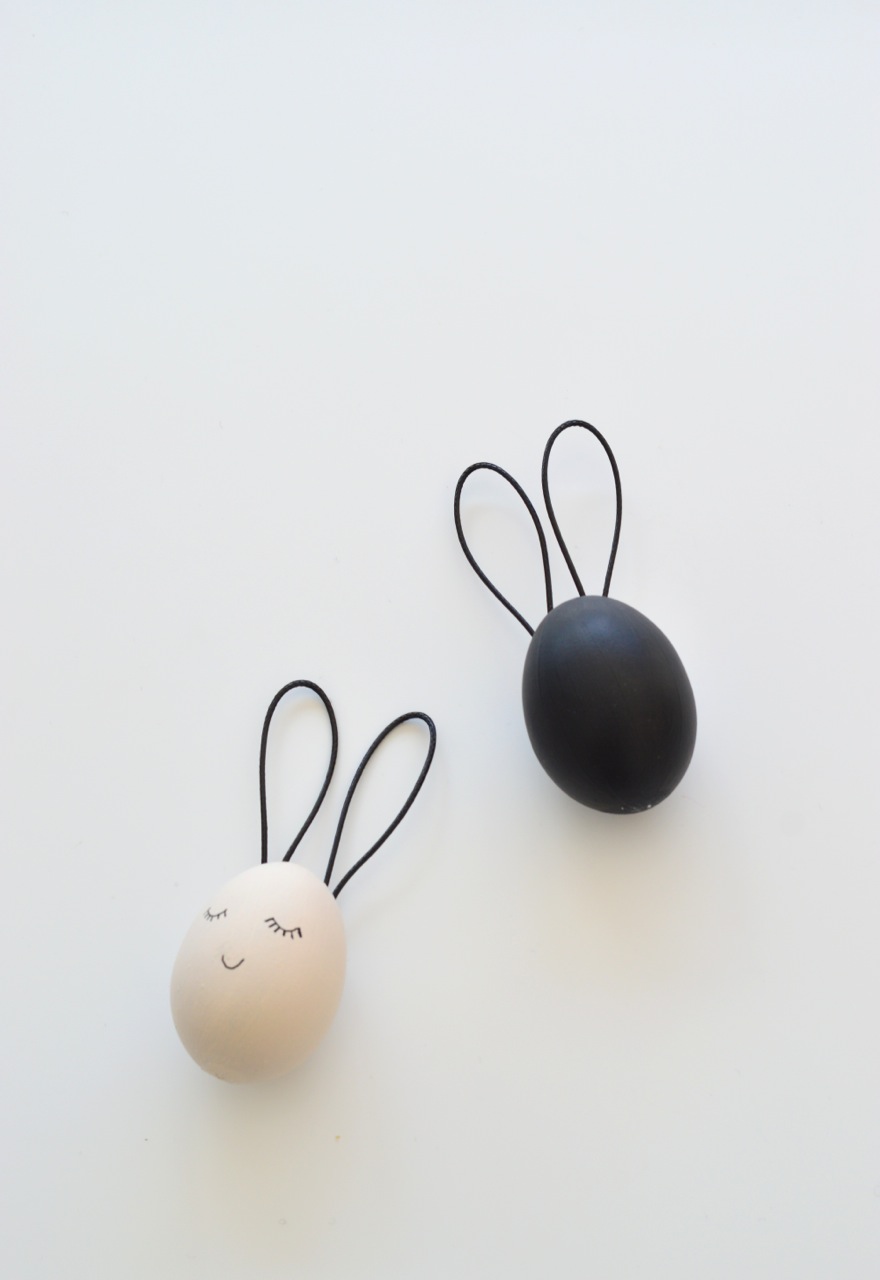
I can’t remember doing many crafts as a kid but the one craft I remember doing each year was painting and decorating Easter eggs. After we made our eggs, no matter how hideous they were, my mother would treasure them and almost treat them like they were priceless faberge eggs. Only a mother could do that! I haven’t painted an egg in years so this year I remembered in time and decided to make these cute black and white Easter egg bunnies.
I love Easter. Not just because of all the divine chocolate you’re allowed to eat but also because of the four day weekend which is a rarity in the UK. It’s a great time to switch off, spend time with family and of course eat more than your own weight in chocolate. What’s not to love?
Last year I shared these free printable Easter treat boxes and this year I decided to make little DIY Easter treat bags that Anya can give to her friends. One of my favourite bunnies out there is Miffy so he was the inspiration behind these cute little treat bags. And the best part is that you don’t need to sew to make these bags, just use a glue gun instead. Here’s what I did:
I never considered myself a DIY’er or a crafter but since I started some crafts for this blog a while ago, I can’t seem to stop. It’s so addictive. My latest crafting obsession is making stuff with home bake clay. Oh the possibilities! My first DIY clay project was making clay necklace pendants for kids. We chose moon and star shaped pendants but you could go any any shape you like. Here’s what we did:
I was recently gifted a pom pom maker and I can’t even begin to tell you how many pom poms I’ve made. I thought it was about time I did something with them and so here is my first pom pom DIY that I want to share with you. These DIY pom pom hair clips are so easy to make and so pretty! I’ve made so many that I’ve started gifting them too and they’ve been really fun little handmade presents to give to Anya’s friends. I’m also loving the idea of using these as pretty little party bag treats.
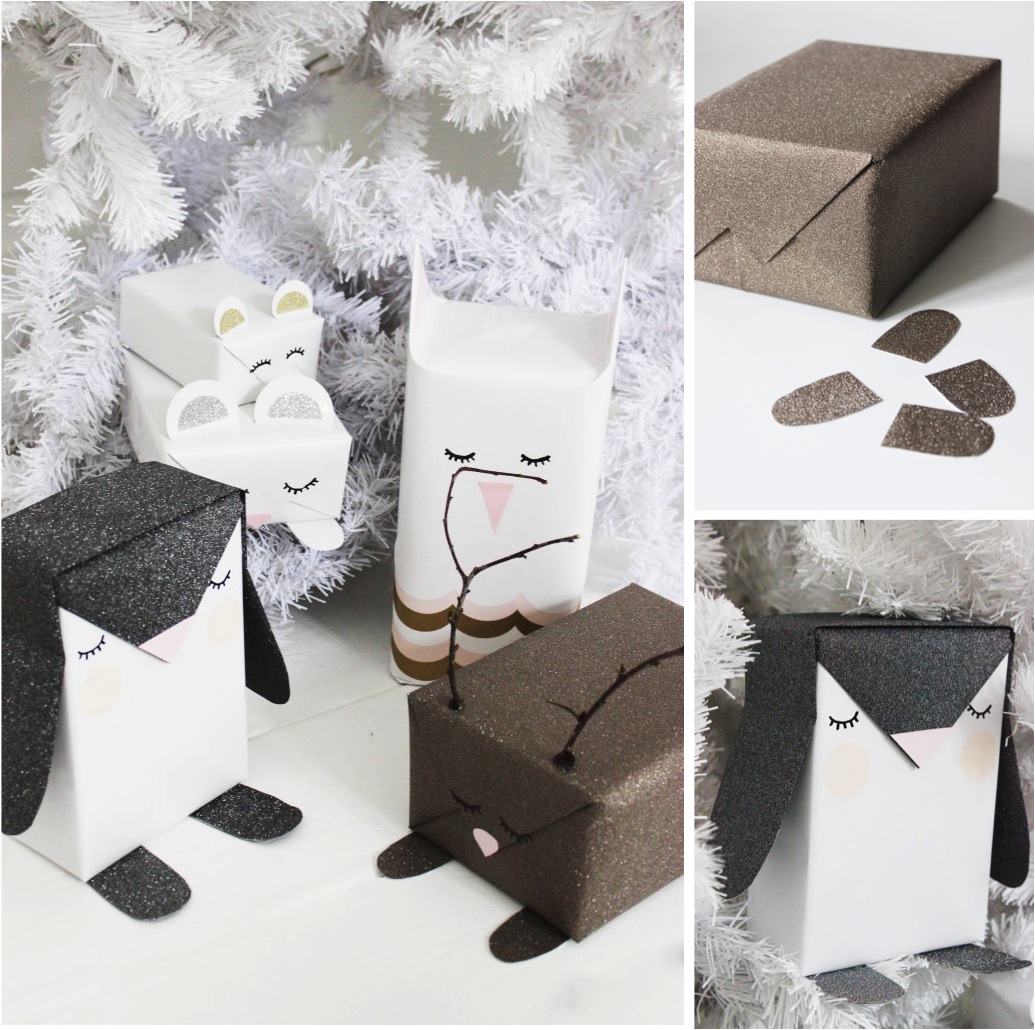
December is a month of giving gifts in our house. Not just with Christmas but also Anya is a December baby so we have birthday gifts to give too. For me, the gift wrap is just as important as the gift. After all it’s the first thing the person sees. So I love the idea of making my own DIY gift wrap as it makes it so personal. Recently I’ve been finding loads of gift wrap inspiration so here are 5 of the best DIY Christmas gift wrap ideas to inspire you too:
I mean how cute are these sparkly animal gift wraps? I’ve seen animal gift wraps before but I especially liked the sparkly touch on these.
These are two fun ways to get creative with ordinary wrapping paper. With the first, just stick some pompoms on and use a bit of bakers twine or ribbon to finish and you have a unique gift wrap. The second is so pretty too – you can find the tutorial here. You can take this idea and make cut out trees, snowmen or whatever you like.
Another option is to go minimal and stylish with your DIY Christmas gift wrap. While you can buy beautiful cloth gift wraps like the one above, you can just as easily use something you have at home – think tea towels or scarves. I love the idea of giving a gift where the wrap is part of the gift too. And the second gift is just so stylish, no? I love the marble paper and the idea of using mini honeycomb balls as decorations.
I’ve saved the cutest till last! For all those little gifts, I can’t think of a cuter way to present them. Not just for kids, but if you’re giving a piece of jewellery, what an adorable way to gift it to her or him.
So, have these DIY Christmas gift wrap ideas inspired you to get creative with your wrapping? Which one do you like best?
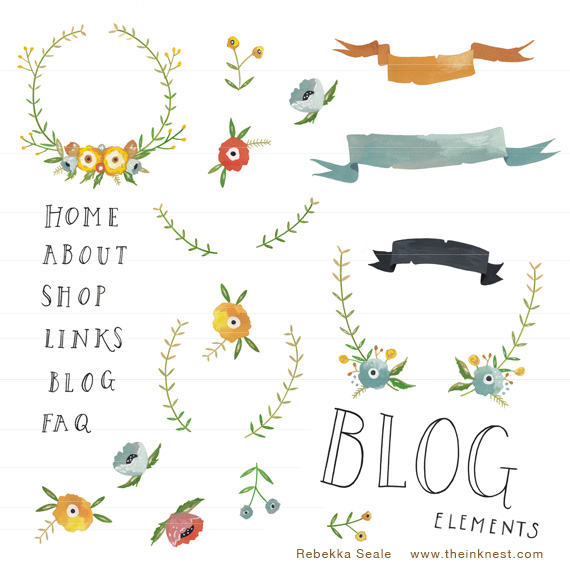
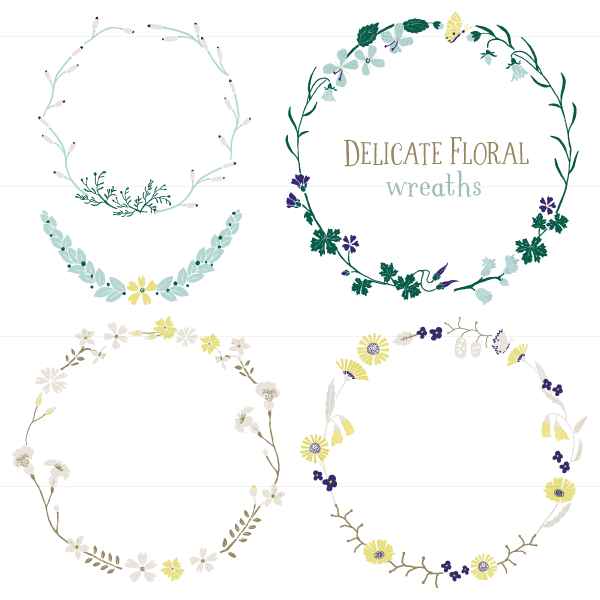
Today I’m going to let you in on a little secret. I discovered this great site that I think you will love whether you are a blogger, a creative or someone who likes to craft. It’s not always possible to design and create all your own images so this is where ink nest comes in. For a small fee, you can buy loads of beautiful hand drawn illustrations that you can print out and use as you wish – from making Christmas decorations to designing your own blog layout to anything at all. The possibilities of using these beautiful royalty free illustrations are endless.
I’m thinking these beautiful illustrations on ink nest can be used to make Christmas stuff, kids party decorations, house warning cards, thank you notes and so much more. And besides parties, you could create posters for your kids rooms, your own personal note cards, garlands for your home – really the possibilities are endless.
But the best part of all is that if you’re a blogger, you can even use these hand drawn royalty free illustrations on your blog to design your blog or to create free printables. How great is that? Each set of printables, which usually includes around 15-30 images, costs $10 and you are free to use pretty much as you wish – but do check the terms & conditions for full details. Also if you sign up to the newsletter you get a cool 20% off your first purchase.
I’m in the process of decorating Anya’s room and I’m loving the possibility of using some of the cute and quirky illustrations as posters for her room. But most of all I’m thinking about how I can use them on my blog to create stuff for you guys – some free printable gift tags maybe? Or a free downloadable calendar for 2016? So many possibilities… how will you use these? You’re welcome 🙂
It’s that time of year – time for my annual DIY advent calendar. Since I shared my mini forest DIY advent calendar last year, I have had so much love for it. It even got featured in Marie Claire Maison. Wow! So this year the stakes were high – I’ve also had readers asking me months ago what I was going to make this Christmas!
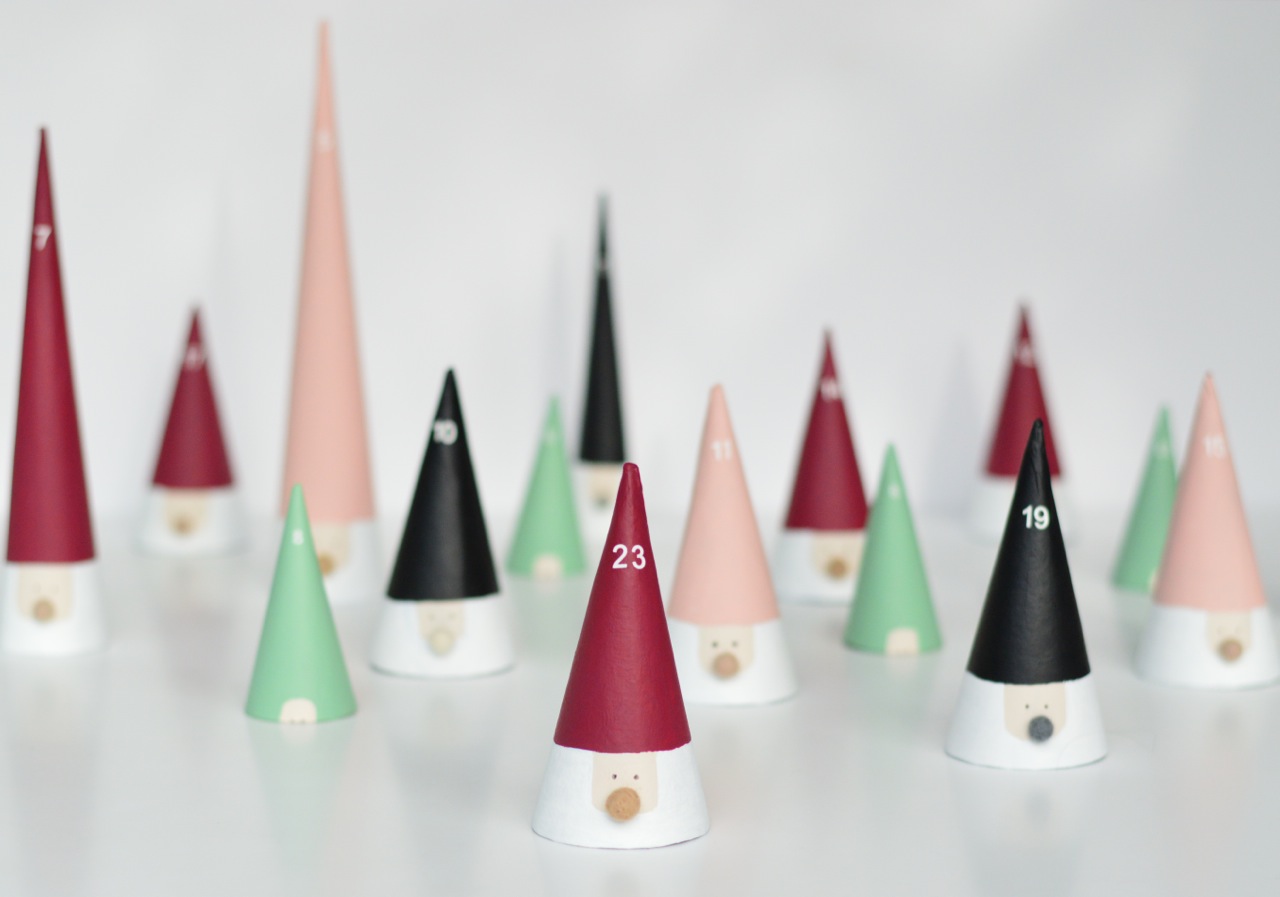
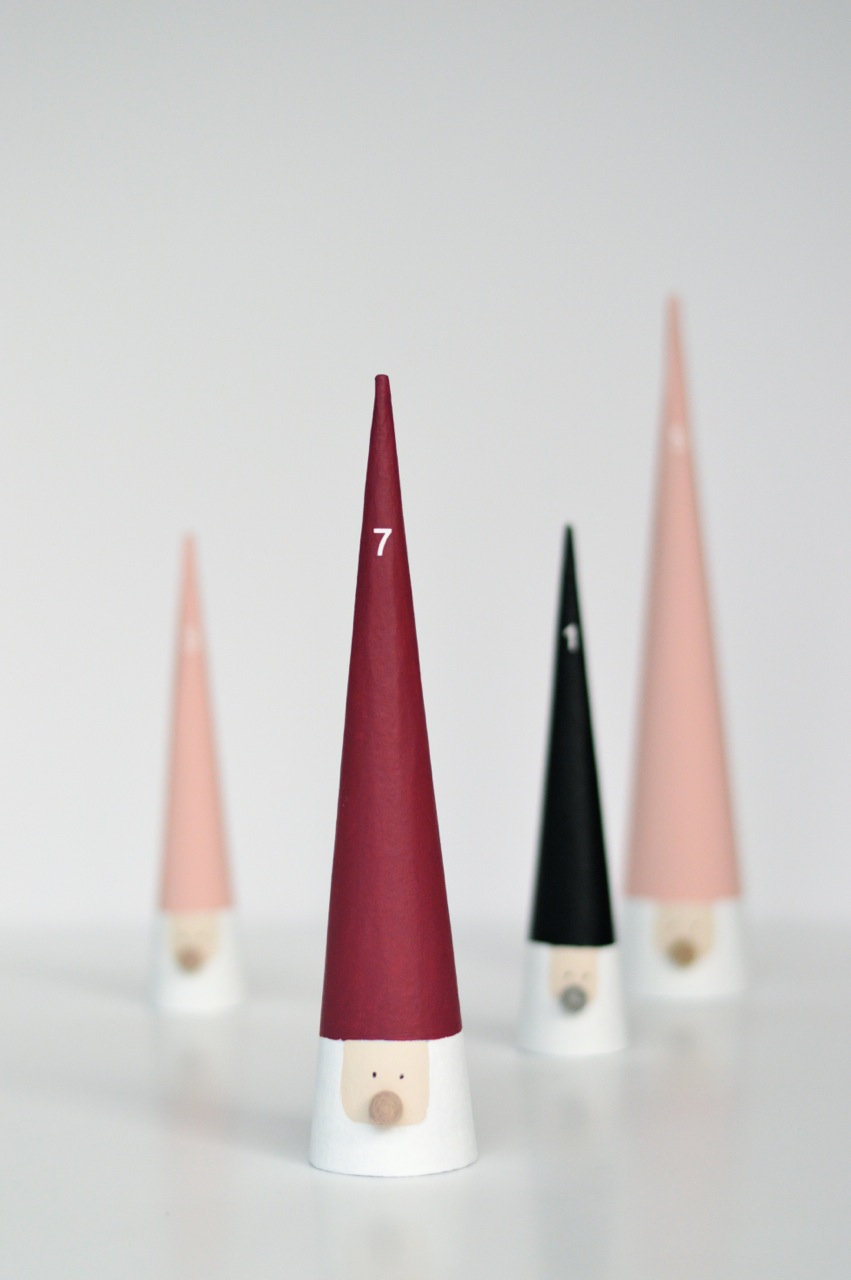
I went through a few DIY advent calendar ideas but in the end I loved the idea of making santas and their little elves. Aren’t they so Christmassy and cute? I chose different sizes as they not only look great but also allow me to put different size gifts under each one. I love making my annual advent calendar to share here and inspire others but also it’s Anya’s favourite part of Christmas by far. She adores the little surprise that each day brings and that makes making my own advent even more special for me.
To make this DIY advent calendar you will need: 24 craft cones in different widths and sizes acrylic paints (in your chosen colours) a fine black pen mini felt balls number stickers glue
First of all get your cardboard cones and using a pencil mark out the outline of the hat area and face for the santa cones. Also mark out the little face area for the elves.
Next paint the santa hats in your chosen colours, paint the beard bit white and the face bit in a skin tone colour – I used an acrylic paint colour called antique white. Similarly paint the elf cones and their faces. Some colours will require two coats for a better finish otherwise the cardboard will show through.
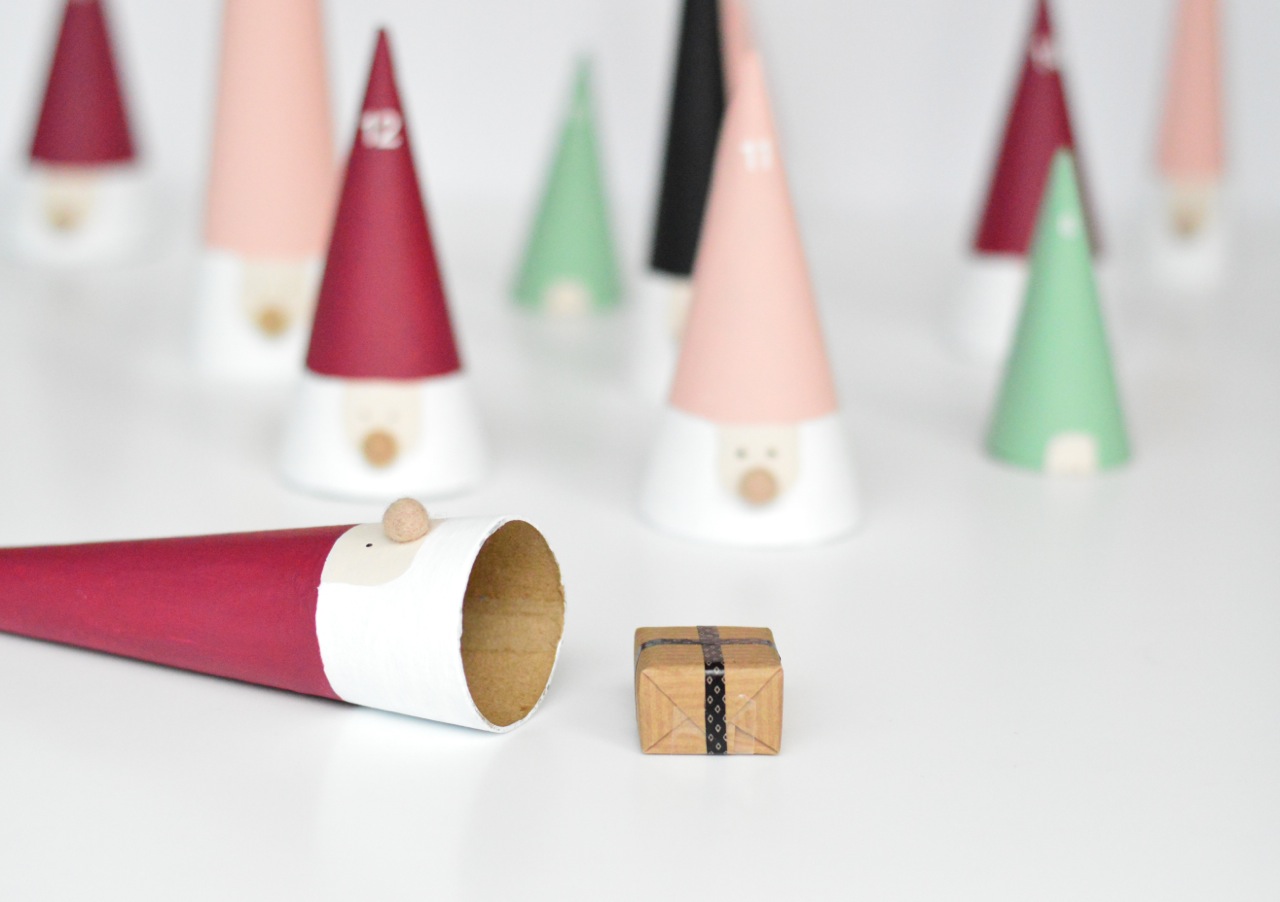
Using a fine black pen draw on little eyes for both the santas and the elves. Glue the felt balls on to make santa’s noses and thats the cones done. Either use number stickers to number the cones or you can even paint or write them on. Finally, add little gifts, notes or whatever you like under the cones and you have a super cute advent calendar.
What I especially love about this DIY advent calendar is that it’s simple enough for kids to make. Just get them the cones and they can create and decorate the santas as they wish. Also once the advent calendar has been used, you can easily turn these santas and elves into hanging Christmas tree decorations. Do you make your own advent calendar? I’d love to hear about what you make.
{I bought the cones on ebay but they are easily available from craft shops as are the felt balls.}
I’m so glad that Halloween is becoming more and more of a thing here in the UK and especially London. If you have kids, what’s not to love about Halloween? Anya loves the whole dressing up and trick or treating thing as so do all her little friends. Sometimes the child in me feels so tempted to wear a costume and do the whole trick or treating with them – should I? The other thing to love about Halloween is all the treats and candy. Last year Anya came back with a haul so big, she couldn’t quite believe her eyes – I don’t think she had ever seen so much candy in her life!
Each year we are invited to a Halloween party so this year instead of taking just a bag of sweets or chocolates, I thought I would make some fun Halloween treat bags for all the kids. While I don’t like the really scary Halloween stuff, I love a more playful take on the whole ghosts, ghouls and spookiness. So with that in mind I thought about making mini witches hats that would hold a few small treats. Here it is – my mini witches hats DIY Halloween treat bags:
What you’ll need: black origami paper (One sheet per hat) – try and get double sided although I couldn’t find these orange coloured card paper glue mini treats to fill the hats
I made these witches hats using an origami tutorial which you can find here. At first it seemed a bit challenging but after making 2 or 3 , it became really easy so stick with it. Make as many hats as you want and then take your orange card and cut out circles of 6.5cms diameter.
Now fill your hats with mini treats – I used little round chocolates which proved a bit tricky as they were rolling all over the place. It would be easier to fill them with a small bag of chocolates or sweets. This will also help to hold the shape of the hat. Finally glue the orange circles to the base of the hats and you’ve got your witches hat treat bags. Don’t they look fun?
Once you’ve made a load, you could also use the mini hats as decorations for a Halloween party – they’d look great dotted around a halloween party table table.
Ebabee Likes is a style guide for babies, kids, teens and their mamas. It’s all about inspiration, ideas and indulging yourself and your brood. It’s written by me ~ Nomita ~ a style loving girl from Mumbai who now live’s in London. Read More...


 I was recently gifted a pom pom maker and I can’t even begin to tell you how many pom poms I’ve made. I thought it was about time I did something with them and so here is my first pom pom DIY that I want to share with you. These DIY pom pom hair clips are so easy to make and so pretty! I’ve made so many that I’ve started gifting them too and they’ve been really fun little handmade presents to give to Anya’s friends. I’m also loving the idea of using these as pretty little party bag treats.