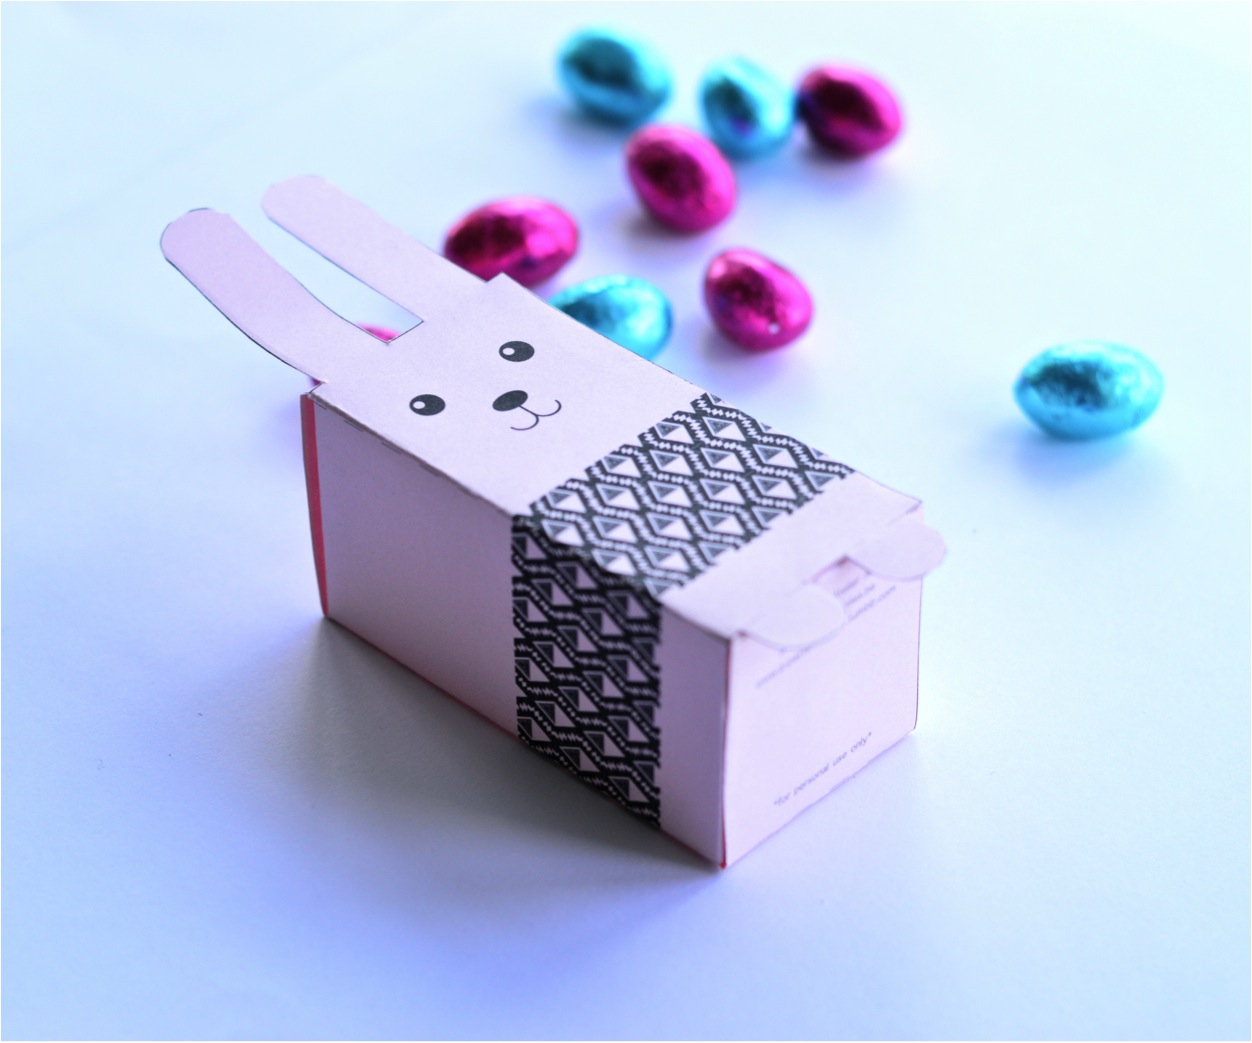
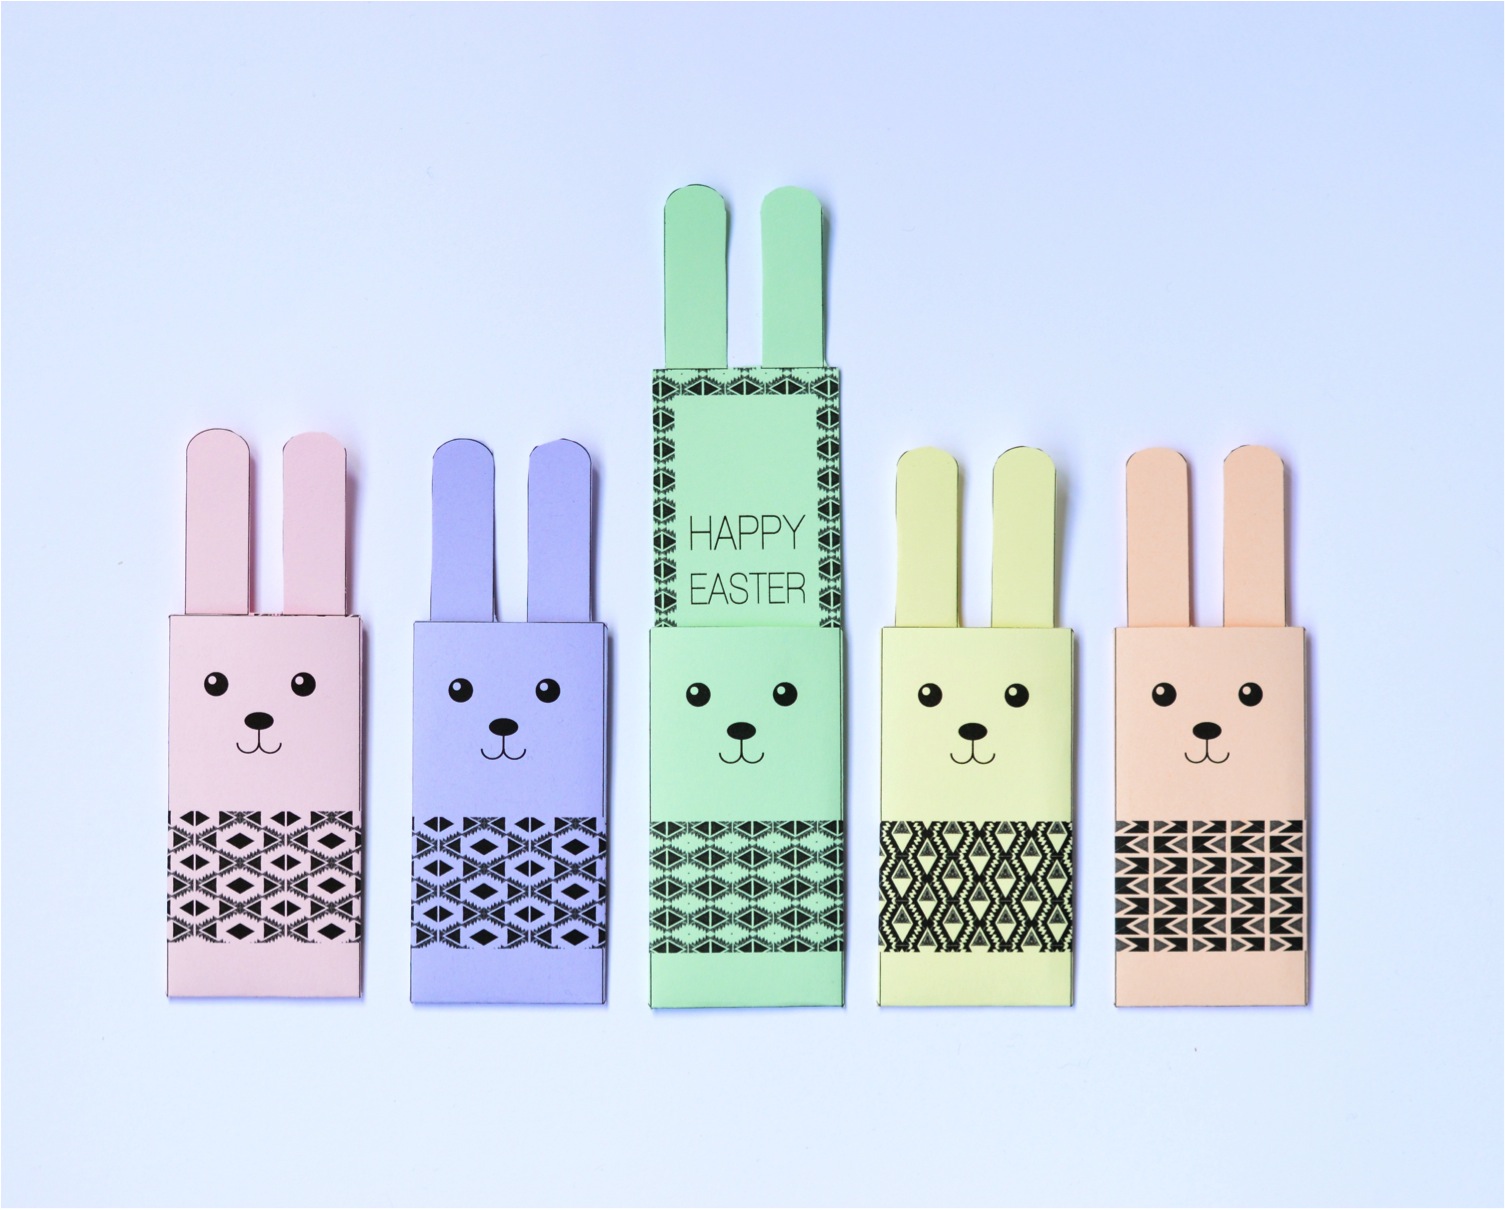
Today I have a little treat for you – these super cute free printable Easter boxes which you can fill with whatever you like. They perfectly compliment the Easter bunny cards I shared a little while ago.
These bunny boxes have been designed by a very talented design and architecture student called Annelies and they are exclusively for my readers. It was her blog – A pattern a day – that first caught my attention. The patterns she creates – wow! Just wow.
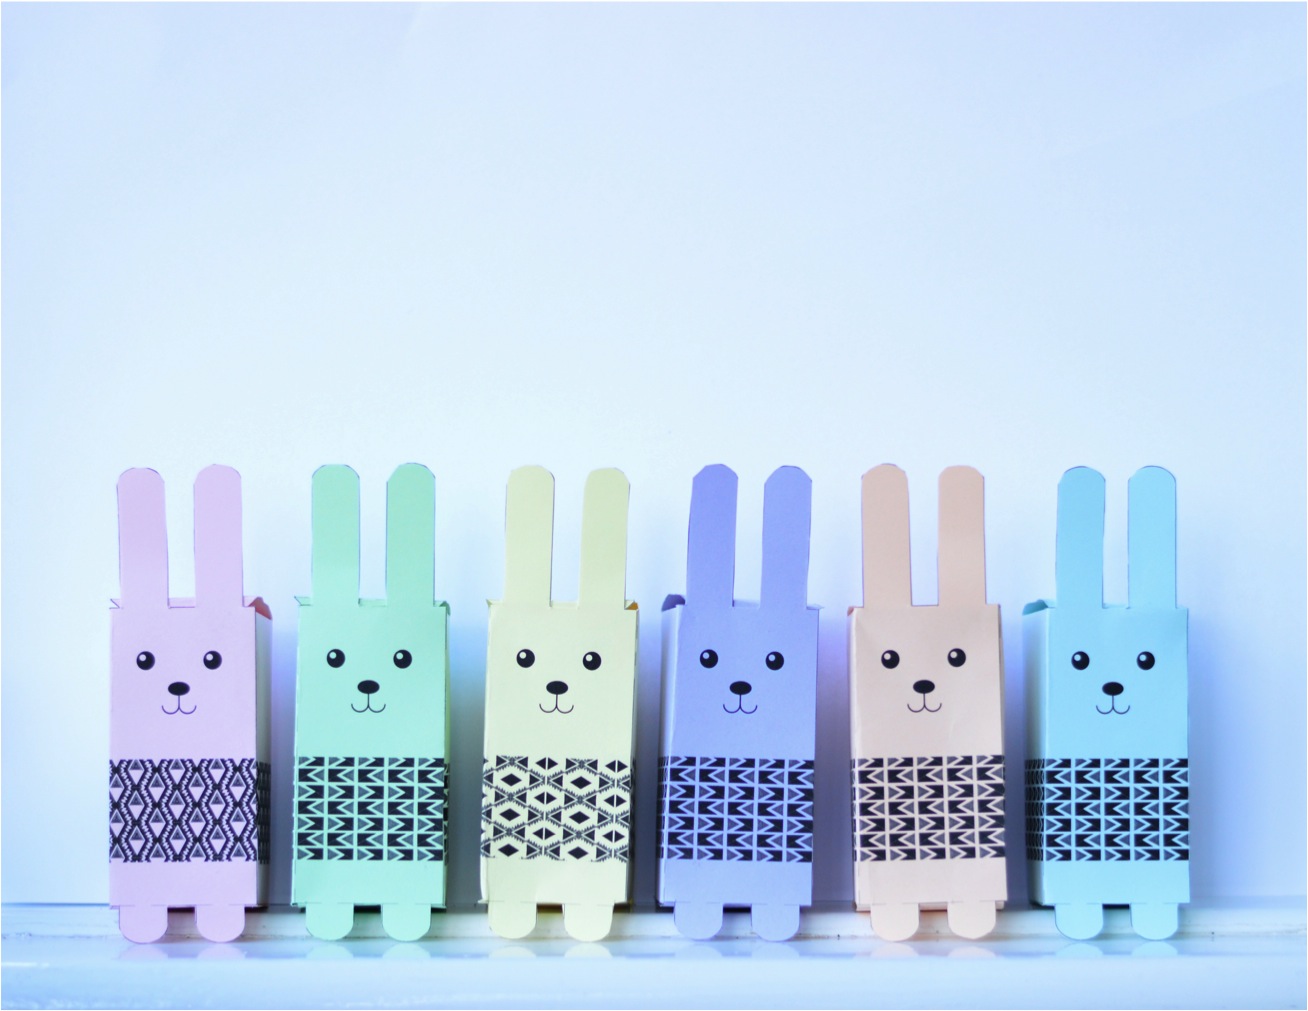
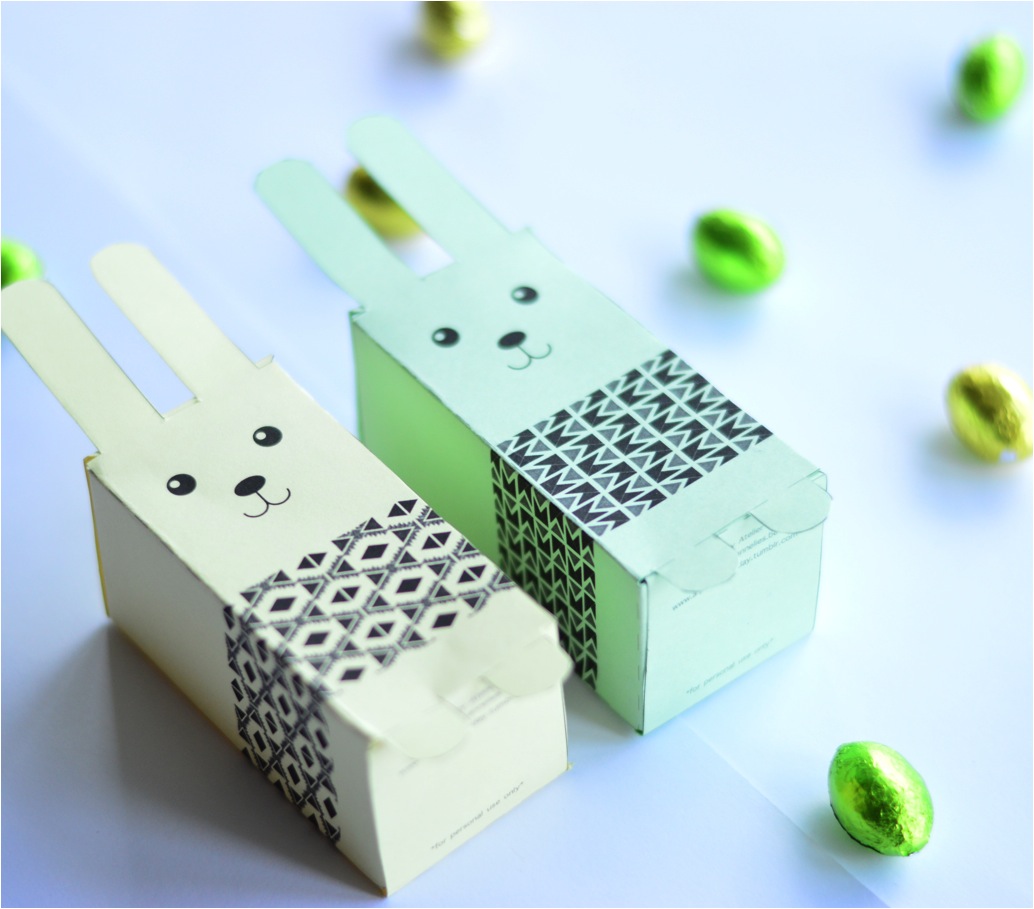
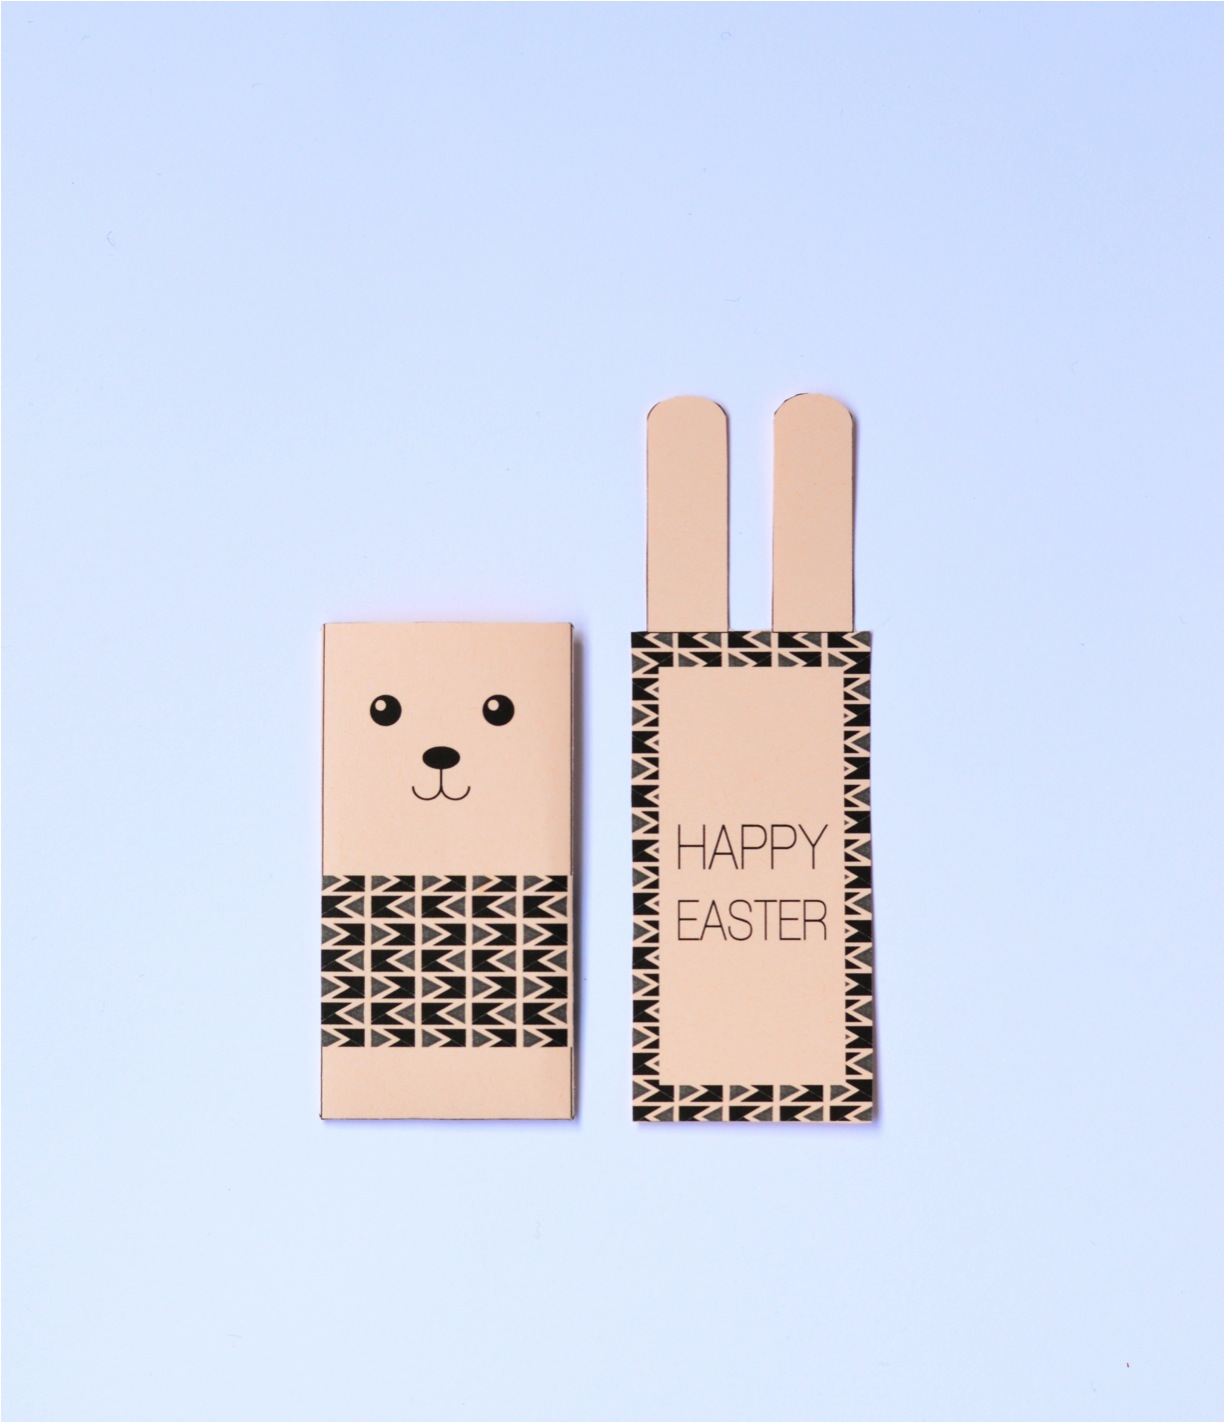
To make these boxes print out the templates provided. Annelies has designed three boxes – each with a slightly different pattern. Regular printer paper is too thin so you will need coloured card to ensure that the boxes hold together. Once printed, cut along the outline provided and then fold down the dotted lines. You will need to glue the the box together, leaving out the top flap so you can put things in the box. I love a bit of pastel for Easter but of course you can choose any coloured card you like.
Anya’s been taking these bunny boxes as little gifts for the play dates she’s been invited to over the holidays. We either fill them with little chocolate eggs or a small toy. We’ve given out a couple and they have been loved. Making the box yourself adds that personal touch which people so appreciate.
A big thank you to Annelies for creating these adorable free printable Easter boxes and for the cute bunny cards too. We have made great use of these and I hope you will too.
Here is the PDF. Print and enjoy for your personal use: bunnyboxes
I don’t really know why but I always get much more excited about Easter crafts than I do about Christmas or any other occasion. With this in mind, last week I shared some fabulous Easter egg decorating ideas and the week before I had some adorable Easter bunny card printables created especially for you. This week I have another fab free printable coming for you but today I wanted to share some fun and unusual Easter bunny crafts to try out over the holidays. I went looking and here are my favourites:
This is such a cute idea to make your own bunny t-shirts. You could actually make any item of clothing using the same idea.
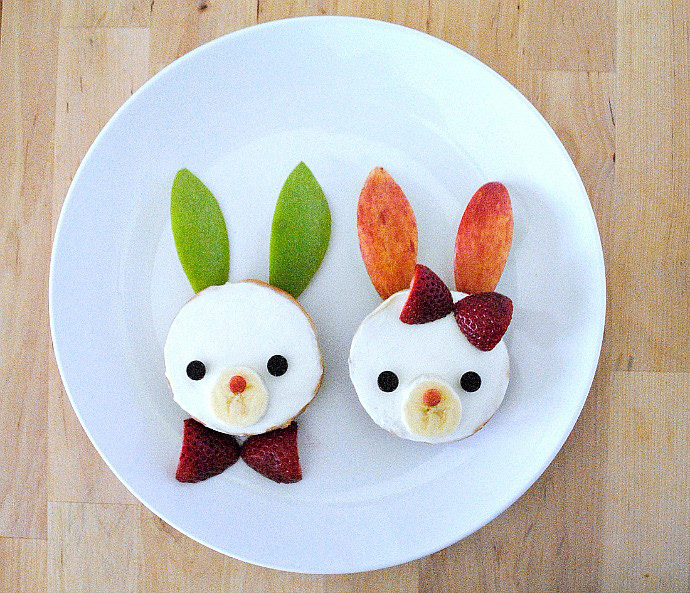
I know Easter is all about indulging in chocolate but you can also have fun with healthier treats like these bunny bagels. How cute are they? Made with cream cheese and fruit, they look so adorable – I don’t think any little kid would be able to resist.
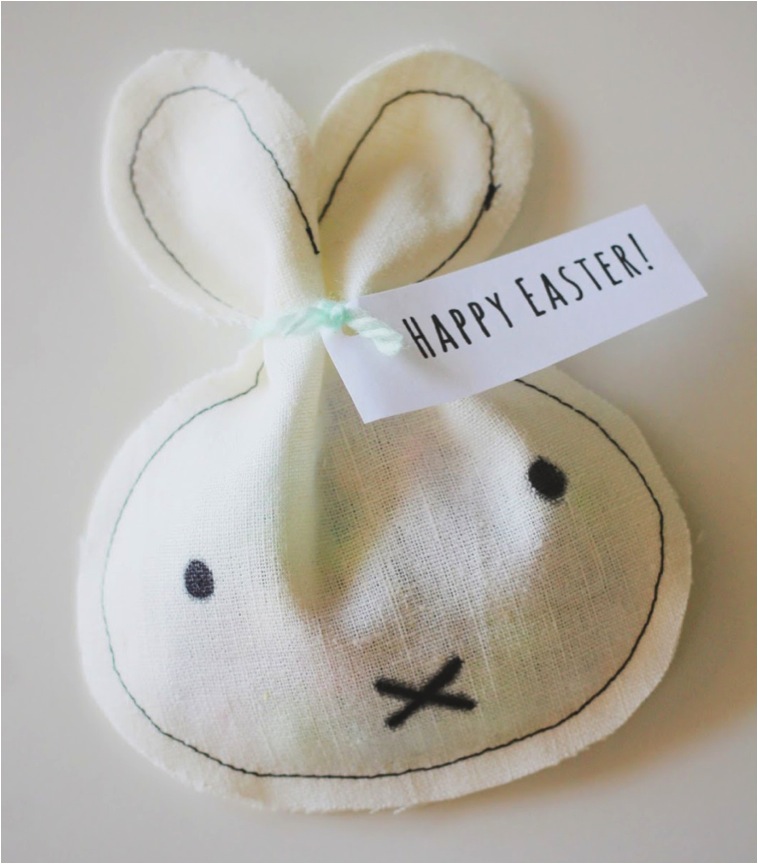
If like me you’re a Miffy fan, Easter is the perfect time to indulge in lots of Miffy shaped things like this cute DIY miffy bag perfect to fill with little chocolate eggs.
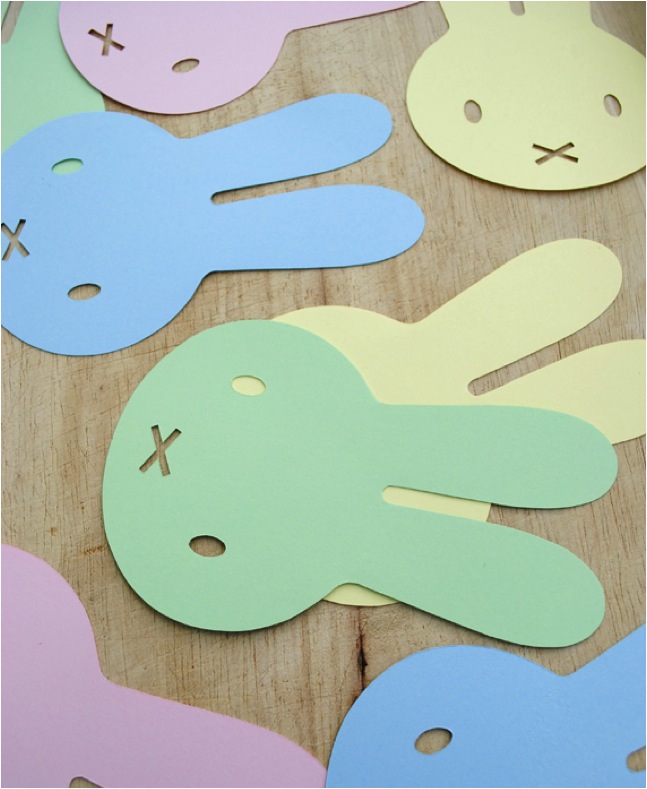
I did warn you that I was a bit Miffy obsessed so here is another Miffy craft. This pastel Miffy bunting would look great for an Easter party or even as a year round kids room decoration and it comes with a free printable template making it super easy to make.
These DIY Easter bunny envelopes not only look cute but will keep little hands busy for a while. This is one craft kids can make on their own and then fill with little toys or treats for themselves or for a friend.
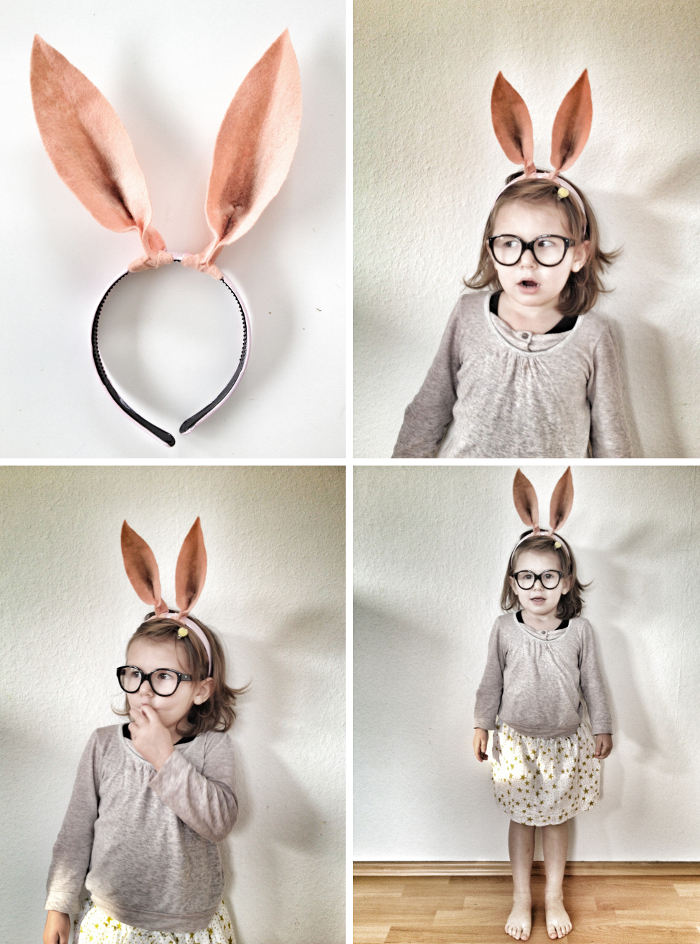
Easter can’t be complete without a set of bunny ears for each of the kids and maybe even for the adults! I’m loving these DIY bunny ears that are easy to make too.
Last but not least are these fun bunny decorations to hang up over the Easter weekend. Or instead you could just decorate paper plates in a similar way – add ears and a little face to the middle.
These are some of my favourite Easter bunny crafts – I really want to have a go at making those ears and that Miffy garland. Do you enjoy Easter crafts? What crafts will you be doing this Easter?
Kids really do say the funniest and sweetest things ever. Lately I’ve been making a great effort to write down some of the stuff that Anya has been saying because I really want to remember it. These little conversation gems won’t be around forever and will get less and less frequent as she gets older. I was looking through my book of these notes and I thought I would share a few here for a light-hearted end to the week:
I was reading the Observer food monthly (kids special) which had an interview with Nathan Outlaw talking about his kids and how adventurous they are with food including all kinds of vegetables. I showed Anya this interview as she is a fussy eater and especially dislikes all manner of vegetables. After explaining how they eat and try everything I asked her to fill in the blank:
Me: The children eat everything like meat, fish, chicken, fruits and they even eat….? (I’m thinking veg of course) Anya: … their dad?
Latest excuses not to sleep: After trying a few usual ones and realising they’re not going to work, Anya pipes up: ‘I can’t sleep because my underwear is too small!’ (Whatever will she think of next?)
Anya asks to borrow my ipad and this is how the conversation goes: Me: Why do you want it? Anya: I want to sing along to ‘Beat It’ Me: OK give me five minutes Anya: No, that’s too long (I tell her again that she has to wait but I can see she’s getting very frustrated and impatient and I just can’t understand why the urgency) Me: Why can’t you wait five minutes? Anya: Because the concert has started and the pretend audience are getting very bored!
Anya: I’m really rich. Me: Please could you give me £50,000? Anya: I only have £2 but you can have £1 (bless her sweet little heart!)
What are some funny things your kids have come out with? Or maybe they’ve said some stuff to melt your heart? I’d love to hear in the comments.
P.S. Anya wears the gorgeous Oslo dress which is now available in the Ebabee shop. Unfortunately stock is very limited due to off-line sales and this dress being so popular.And the cute brown brogue shoes were a gift from Pisamonas – where you can get £10 off your first purchase.
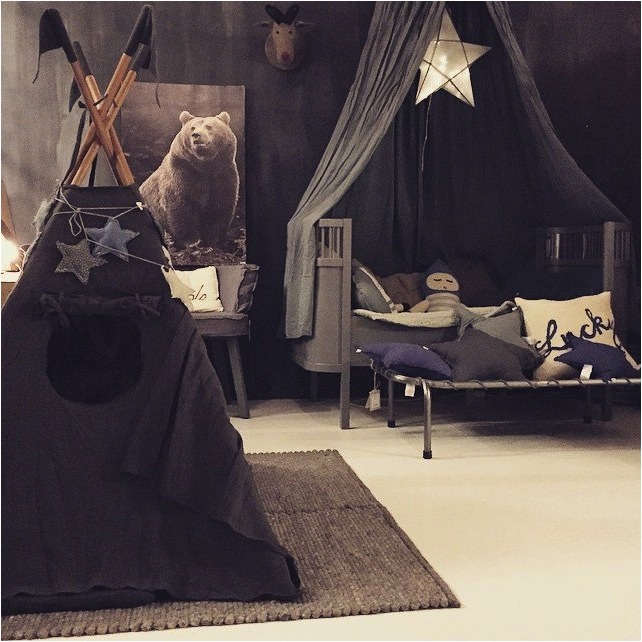
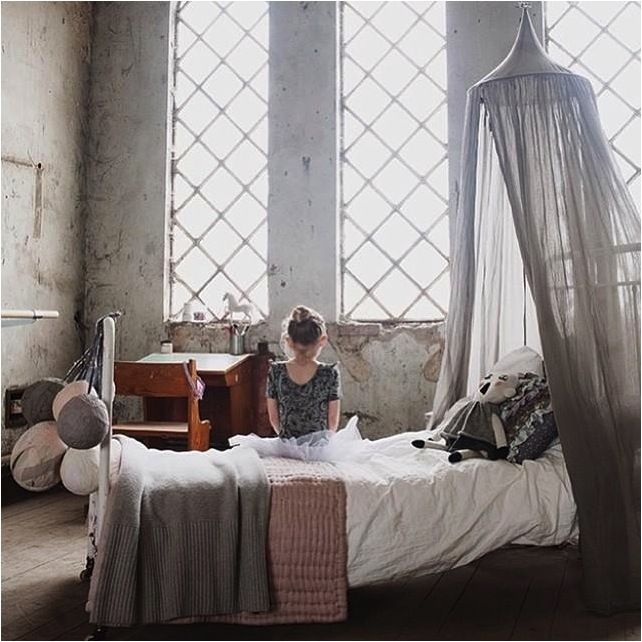
When you think of decorating a kids room, I think your mind instinctively goes to white and bright colours. I’ve been thinking a lot about colours for Anya’s new room which I will be decorating as soon as the builders are out of our new home. My initial instinct was to go with lots of white and add touches of pink and grey, maybe black too. But recently I have been coming across darker and dreamy kids rooms and I am loving them more than I thought possible. There is something so magical about these rooms that bright colours just don’t bring. Each of these rooms are different but the one thing they have in common is that dreamy canopy which I want for Anya’s room. So now I am re-thinking the whole thing. Here are some magical kids rooms all with that dreamy must-have canopy that are really inspiring me at the moment:
This was the room that first inspired me. This room is a styled room as are many below but the overall look can be recreated in a kids room and how magical would it be. Right from the choice of the bear poster to the dark wall. I absolutely love it – of course you could choose any dark tones, not stick with blues and greys. I’m thinking dark greys and deep, dark and dusky pinks for Anya. This room has been created by a Norwegian Interiors shop called Olen Mobel.
What a dreamy room! Not as dark as the first one but this room has bags of magic and personality. This is certainly not your typical decor for a girls room but I love it so much with the choice of wallpaper, the ornate gold frame and the rug. It’s also a room that your little girl won’t outgrow in a hurry. This beautiful girls room is totally inspiring me right now!
Another inspiring and magical kids rooms. There’s something about all these rooms that transports you to an imaginary world where anything feels possible and what could be better for a kids space? The concrete floor may be a step too far but I love the rustic clothes hanger, the vintage metal bed the colour tones in this room.
Soft greys perfectly compliment the dusky pinks and whites in this magical girls room. Of course the massive windows complete the look but sadly we can’t all have those. I love the addition of the vintage desk and the decor balls casually hung at the end of the bed. And of course that beautiful canopy just completes the look.
All of these rooms feel like you’ve stepped in to a fairytale but not in the traditional way. They feel like a magical world where anything is possible and I can’t think of anything more appropriate for a kids room. A lot of the decor in these rooms is by Numero74 and they are the best kids decor brand that I have come across to add that magic touch to a kids room. What do you think? Would you consider a room like this or do you prefer bright colours for a kids room?
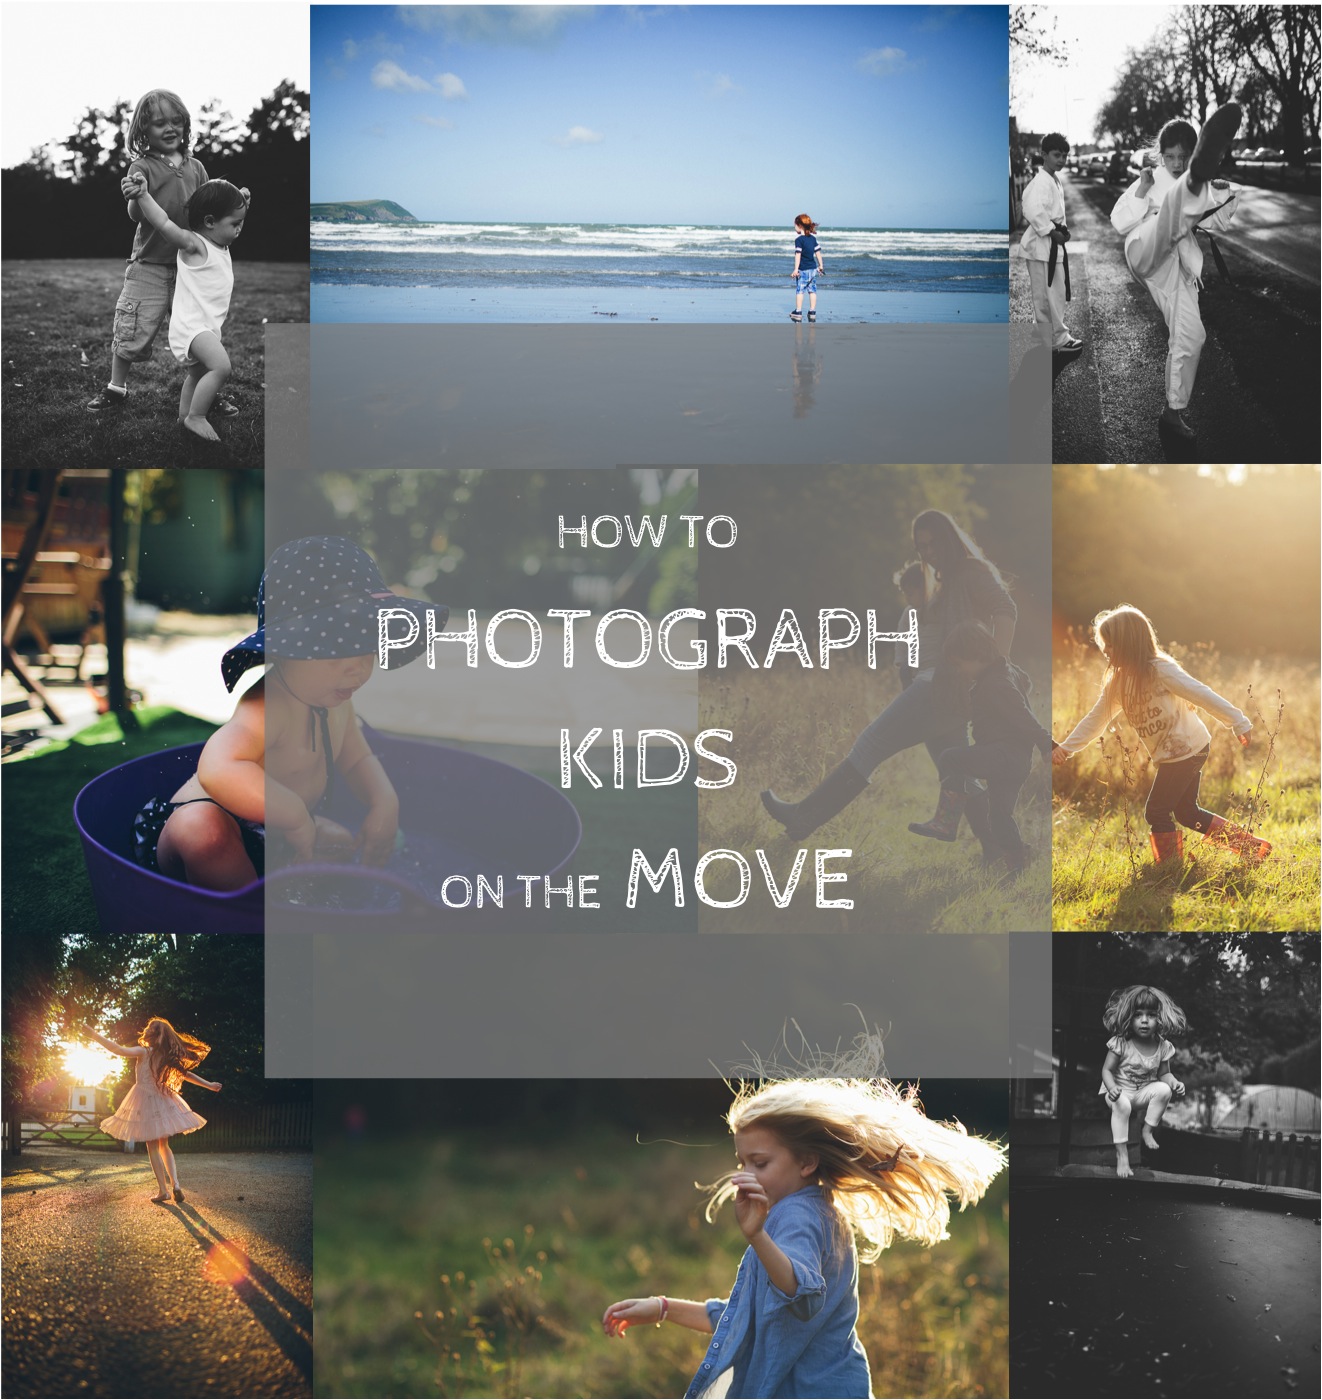
It’s Wednesday and that means it’s time for another photography tips post. Last Wednesday I shared the best photo filter apps and before that it was tips on taking better iphone photos of your kids. This week it’s about taking photo’s of your kids who cannot sit still! I know from my own experience that Anya is constantly moving and the more I ask her to stay still, the more she jumps around while I’m trying to snap pictures. I also know I’m not alone because since starting my photography series, many of you have said the same and quite a few have asked for tips on how to take photos of moving kids. So today I share top 10 tips on photographing those fidgety kids by super talented photographer and mum of four – Abigail Fahey.
I’ve had the pleasure of knowing Abigail for a while – both on and offline. I was first drawn to her through her absolutely amazing family photography. Abigail’s style is distinctive and beautiful. All her pictures tell a story and really draw you in. I know my words are not doing justice to her photography but from the pictures below you’ll see exactly what I mean. I am so excited to have her here today sharing her photography secrets and handy tips to capture those kids that never sit still! Abigail’s tips are geared towards DSLR users however there are lots of tips in here which can be applied to any kind of camera you use including phone cameras. Now over to Abigail!
It wasn’t until my babies became toddlers that I truly realised how much ground they covered each day. My two sons in particular rarely sit still and are generally on the go from morning until night and sometimes even throughout the night! I tried hard at first to get them to pose and found it so frustrating when they would not sit still whilst I tried in vain to recreate some gorgeous shots I had seen online. I quickly realised that posing and fidgety children are not a happy match, so I decided that if I was to get any decent shots of my children I needed to embrace the action and just learn how to photograph them on the move. So here are my 10 tips for photographing fast moving children!
1. Don’t be a poser. Kids don’t always cooperate so it’s best not to try too hard. Instead go for natural shots of them moving or interacting. If you want them to slow down, a great way of doing this is to give them an activity that focuses their attention in one place. Something like a board game, a toy, sitting them on a swing or simply asking them to find worms outside will do the trick.
2. Lets go outside. The best way to maximise the amount of available light is to shoot outdoors. More light means faster shutter speed which means less blur.
3. Change your camera mode. If you shoot in Auto then turn your settings to Sports mode and your camera will automatically increase it’s shutter speed in anticipation of an action shot. If you shoot in Semi Auto then turn the dial to Tv (shutter priority mode also marked as S on some cameras) and set your shutter speed at 1/500 or above. You may need to compensate by raising your ISO to get the correct exposure.
4. Be ready. Keep your finger on the button and if possible use a continuous shooting mode. If you want an action shot then short bursts of the shutter will increase the chances of getting the shot you are after.
5. Anticipate the moment. Look at the scene before you and get yourself into a position where you can concentrate on getting one good shot rather than chasing children around taking hundreds of pot luck ones.
6. Steady yourself. Use a wall or something to lean on to steady your hands whilst holding your camera. The more you can reduce camera shake, the less blur you will create.
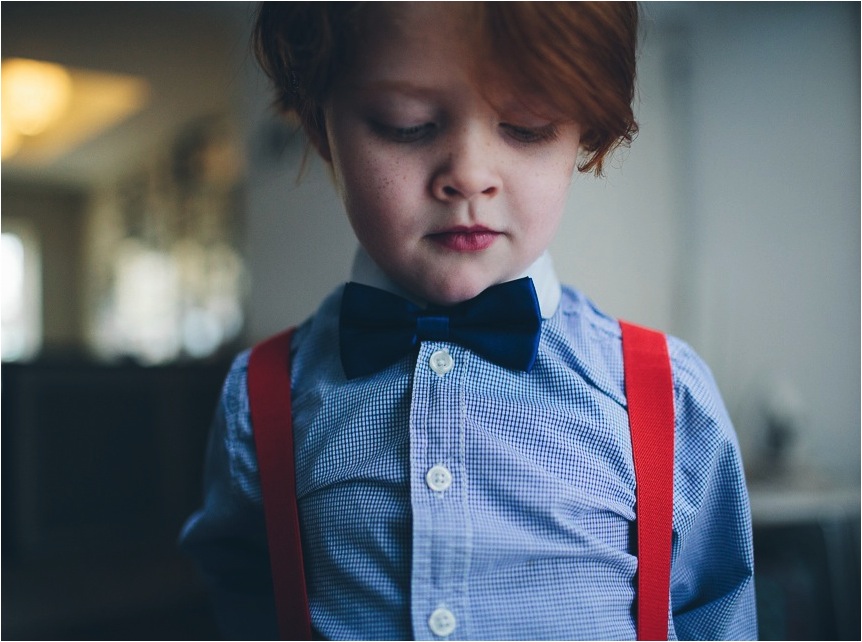
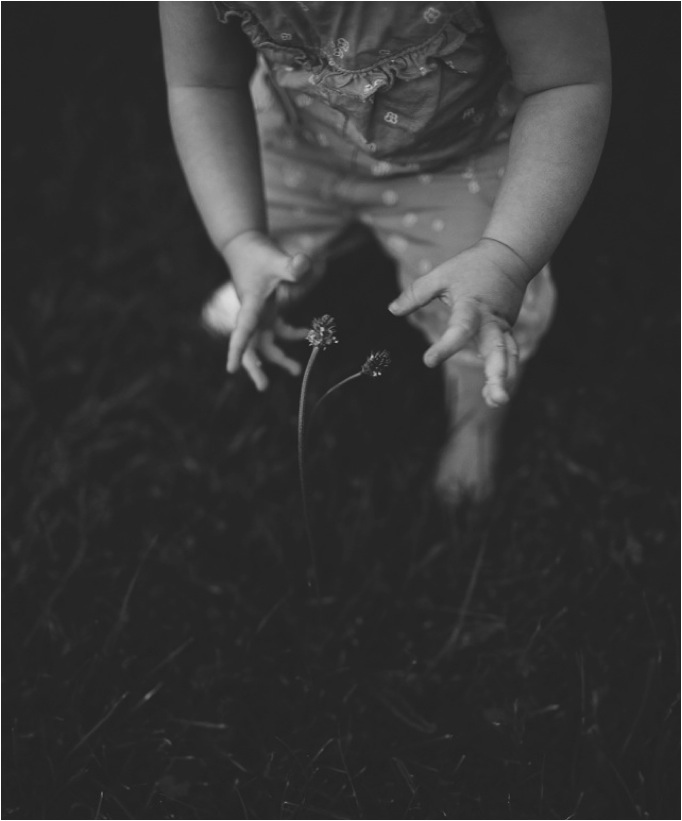
7. Talk to the hand! Not all photographs have to show a childs face. Often I will take shots of busy little hands or quick little feet. Or even photos showing the back of the child. These can be equally cute and take the pressure off having to get a shot with the right facial expression.
8. Use a zoom. This will allow you to sit further away and take shots without interrupting their games or encroaching on their space. Children will quickly get fed up of a constant camera in their face and will start to react. If you can sit quietly some distance away and snap without them being too aware, you will achieve far more natural results.
9. Get creative. Don’t panic if you get some blur. Occasionally blur in the photos emphasises the movement and makes for a more interesting shot. If you get some unwanted blur turn your photos to black and white; it’s amazing how much better they look.
10. Don’t miss out. Remember to put the camera down occasionally and get involved. So often I have waited for the perfect shot only to miss the moment. Pick your time to take a worthwhile shot. For e.g. when you go to sports day as great as it is taking shots of your children running, the best ones are of their faces when they have completed their race and are full of pride. And better yet you were there cheering them on from the sidelines not squinting through the viewfinder.
Thank you Abigail for these great tips on how to take photos of moving kids. I look forward to experimenting with these tips and hopefully capturing some great motion shots. I especially found the tips of using a zoom and turning blurry photos to black and white very useful. Abigail has recently started photography workshops in Surrey for beginners, bloggers and intermediate photographers so if you’re interested in learning more check them out at A Happy Capture.
I’ve been thinking about doing some interviews for a while. But I didn’t want to just chat about products or brands, I wanted it to be something more than that. I wanted get to know the person behind any venture and to talk to people who were truly inspiring and could teach us all something. Then it came to me – I would interview people who have overcome something to get to where they are. Simple as this may sound – it’s not. Once you read the the interview below you will know what I mean.
If you have ever found yourself wallowing in self pity over the smallest or even big things (I know I do) then this interview will really inspire you. If you find yourself making excuses not to do something because of your circumstances, then just keep reading because anything can be overcome – it’s all about the attitude. It’s about accepting the situation and making the best of it no matter how bad. And in this instance, out of sheer determination despite such a massive struggle, was born a gorgeous baby clothing brand. More about that below.
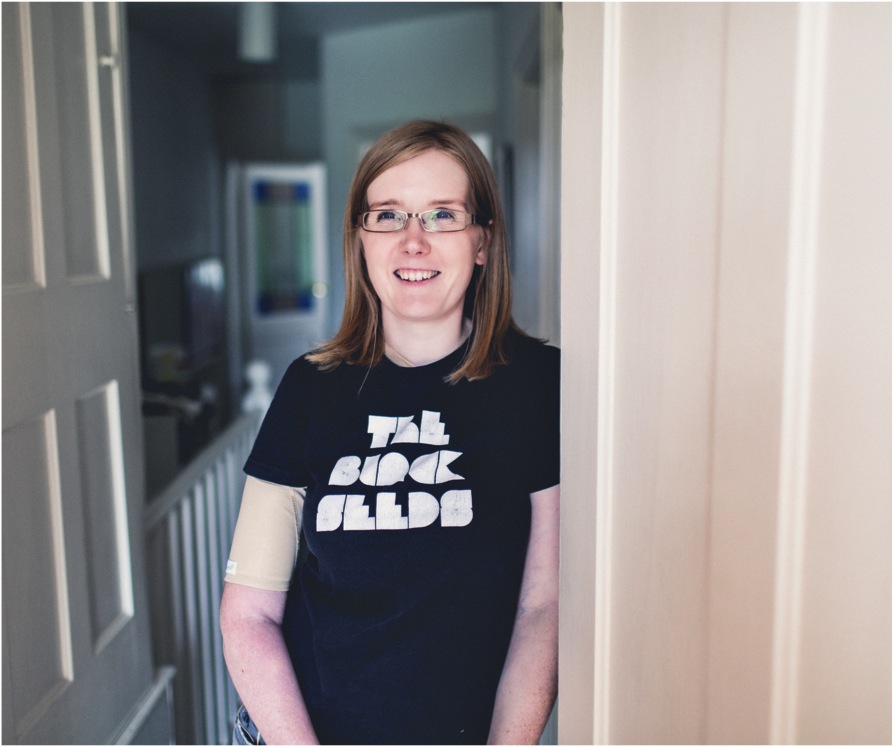
Meet Allison Tovey who is the founder and designer at Asolon – a beautiful baby clothing and baby gift brand.
Tell us a few words about you? I’m Allison, a one-handed New Zealand designer whose mind never sleeps!
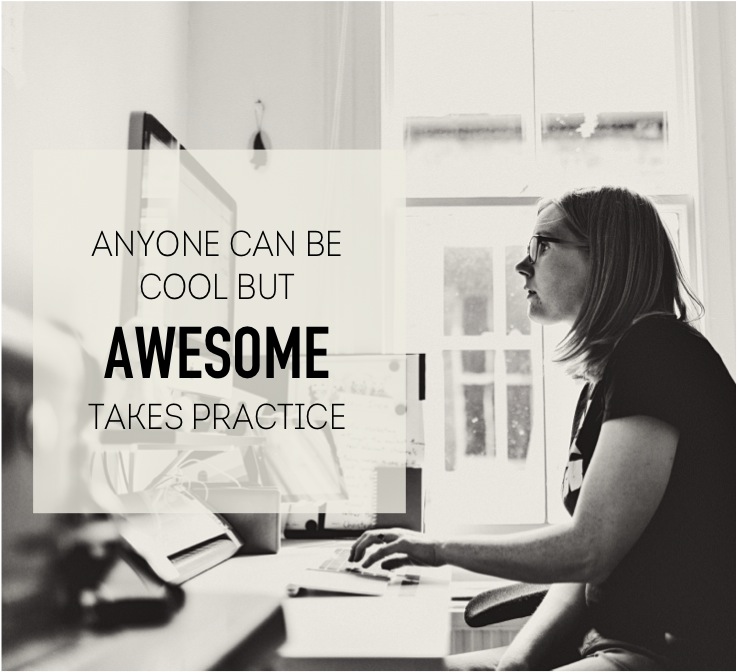
What has been your biggest struggle so far? When I was 25, thinking about quitting my full time job and working full time on my own womenswear brand, I had a major stroke. After surgery and four weeks in a coma I woke up to find my speech missing and my right side paralyzed. I spent another six months in hospital learning to speak, learning to walk and learning to function without the use of my dominant arm. After five years of countless physio, OT and speech sessions and all the rehab tools in the world – I’m back running my own business, doing what I love but in a different way to what I expected six years ago. Now I still walk with a stick, my right arm and hand are not functional but I’m still working on my rehab. I have a quote on my desk to keep me on track – ‘anyone can be cool, but awesome takes practice’.
Where and how did you find the strength and determination to carry on? People ask me this all the time and I have yet to come up with a strong answer! Before my stroke I was a very independent, determined person. Then when I had my stroke and came out of my coma I wanted to know how I could get back to my old self. I couldn’t hold on to the ‘what if’s’ and ‘poor me’ – I just had to get on with life and deal with whatever came my way. I was determined not to let my stroke define me and I just accepted it as part of my journey.
A lot of people in your situation would have given up. Did you ever feel like giving up? And how did you pull yourself out of those dark moments? As most people do, in the beginning I had my pity parties especially when I wasn’t able to do the normal things that other people don’t realise they do all the time (e.g. communicate) – it was a real emotional roller coaster. I would cry with frustration but luckily I had my extremely understanding father and boyfriend (now husband) at my side to bring me back to reality and help guide me back on my path.
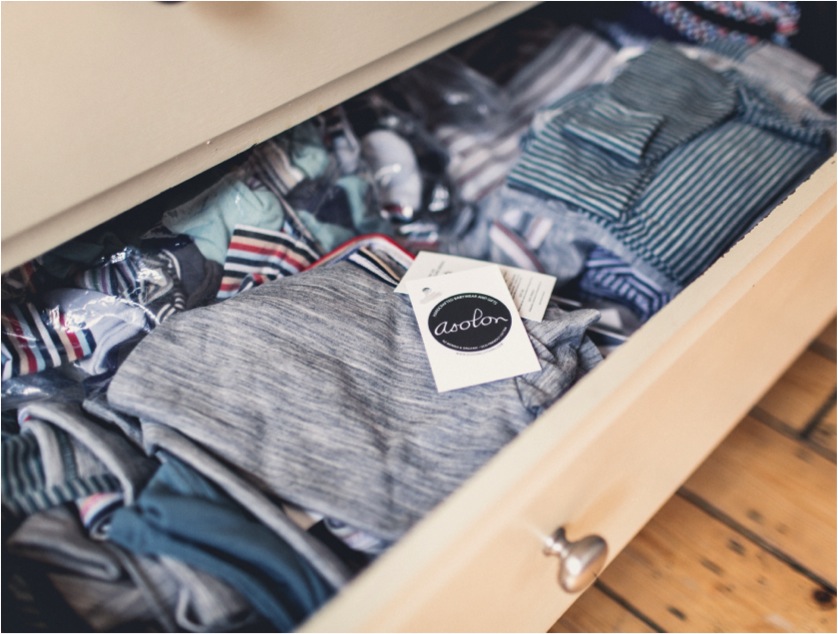
Tell us about Asolon, your baby and kids clothing label?
Asolon is a baby clothing and baby gift brand selling mainly baby bodysuits, sleepwear, tops and baby gift sets. I design and create the entire range which is all about classic styling with a strong focus on quality. Every piece is individually hand-crafted using natural fabrics – NZ Merino wool, organic cotton and cotton. Perhaps most importantly, a great deal of love and care has gone in to making my garments so I hope that you will enjoy them as much as I enjoyed making them.
So many kids clothes designers say their inspiration came from their kids. I know you don’t have any kids (yet) so how come you chose to design a baby and kids clothing range? My stroke affected every part of my physical body but my creative brain was still intact. I’m not good at having nothing to do, so when I finally got home from hospital my dad got me a shiny new Mac with all the design software and I spent all my time learning to draw and design again without using my right arm. This became my rehab tool!
Soon after I was invited to a baby shower. I was still very much a shell of my old self and finding it extremely hard to communicate but I wanted to show my friends that deep down I was still the same creative person I had always been. This led to me creating my first handmade gift set ‘The Hare and The Tortoise’ and with that Asolon was re-born. As my recovery has progressed and my skills have developed my range has expanded more and more in to what you see today.
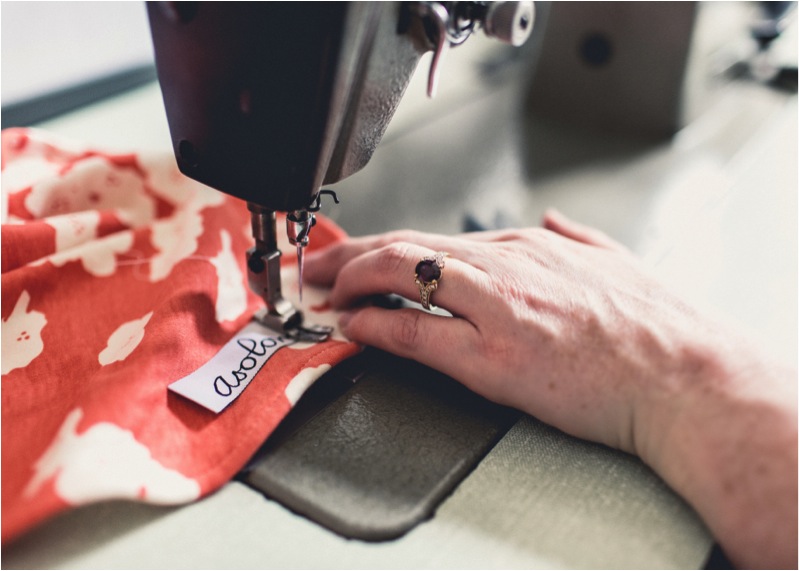
As creatives we are always looking for new ideas and ways to make them a reality. Tell us us how you look for inspiration and how do you turn that in to a piece of clothing? So many inspirations, but I guess my main inspiration for Asolon is fabric. The feel, handling it, colour and the limitless items these fabric could become! My mum was a seamstress and ever since I can remember we were always found in material shops dreaming of what we could make that weekend. As you have probably guessed now I’m a fabric hoarder! Merino is my favourite fabric to work with – simple and natural but it’s a super fabric. I can’t understand why everybody doesn’t dress their baby in merino!
What’s the best part of running a small business? In my case, the best part of running a small business is that I can have a life of flexibility. My business can fit around my life, especially my rehab.
The world of kids clothing is incredible. There is so much beautiful choice out there for any budget and taste. Apart from your own, who are your favourite kids clothing designers? High-end and high-street? There’s so many great brands that I love – Gray Label, Moi, Mini Rodini, Oeuf… the list goes on!
What’s your best piece of advice to anyone who has suffered a really big setback in life? A cliché I know but ‘your past cannot be changed, forgotten, edited or erased; it can only be accepted’ – you have to move on and make the best of what you have today!
Would you change your past if you could? Normally people would say ‘I would change nothing’ but I would say if I was to go back in time I would STRESS LESS!
What’s next for you – both professionally and personally? All though my recovery I had to learn to do everything in a different way than I had always known so I have started a blog of my creative adventures from a one handed person’s point of view. It’s called one handed crafter. Hopefully I can inspire other young people who may be in the same or similar position and show them that you can have a creative life even if you are one handed (or indeed have any other struggles). And as for Asolon the opportunities are endless, watch this space!
Thank you Allison for sharing your incredible and truly inspiring story with us. It really puts things in perspective, at least for me. They often say ‘where there is a will, there is a way’ and Allison has shown us just how true that is. What I loved most about getting to know Allison was the incredible lack of self pity – there was not a hint of it. As she explains, you have to get that out of the way quickly and look forward to making the most of what you do have. So she has completely accepted her fate and despite her big setbacks has achieved her goals. Do take a look at the gorgeous baby clothes that Allison makes – very classic, very practical and very stylish. There are lots of stripes in the collection but also some brighter pieces that perfectly compliment the stripes. Some of my favourites include the deer print leggings and the orange poppy print ones.
P.S. If you have a story of overcoming a set-back (of any kind) and would like to share it, please get in touch – I’d love to hear from you (only requirements are that you are a parent with or without a business but if not you have a baby/kids related business). You can get in touch privately through the contact page or send me a private facebook message and we can chat more to see if it’s something you would like to share.
*I’ve linked up to Honest Mum’s brilliant blog posts.
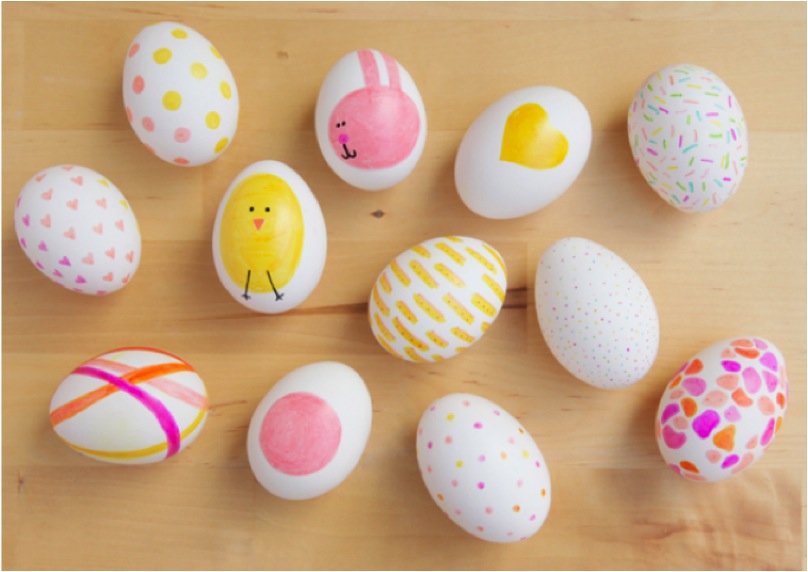
I can’t believe that we are just two weeks away from Easter. I feel like the year has just begun but it’s already nearly April! Easter is probably my favourite holiday not just because I love bunnies, eggs and chocolates but also because Easter takes me back to when I was a kid. We always, always did some egg decorating and I loved it – right from learning how to empty eggs to painting them and of course breaking many along the way. I’d like to do some egg decorating with Anya soon so I went looking for Easter egg decorating ideas and I found so much inspiration. From simple coloured eggs to really fun faces painted on, there is so much you can do with the humble little egg. Here are 10 of my favourite finds:
How gorgeous are these Easter eggs? I love the simple colour scheme of just two colours and the faces are just so sweet.
These Easter eggs have been dyed in various pastel shades and look so pretty. You can of course choose any colours you like but I love the soft tones of these.
For something a bit quirkier try making these colourful easter egg sculptures. They’d make such a fun and unusual table decoration for an Easter meal.
These Easter eggs have been decorated with felt tip pens and they look so great. I especially love the chick and bunny ones and the polka dotted ones. So easy to do with any pattern you like.
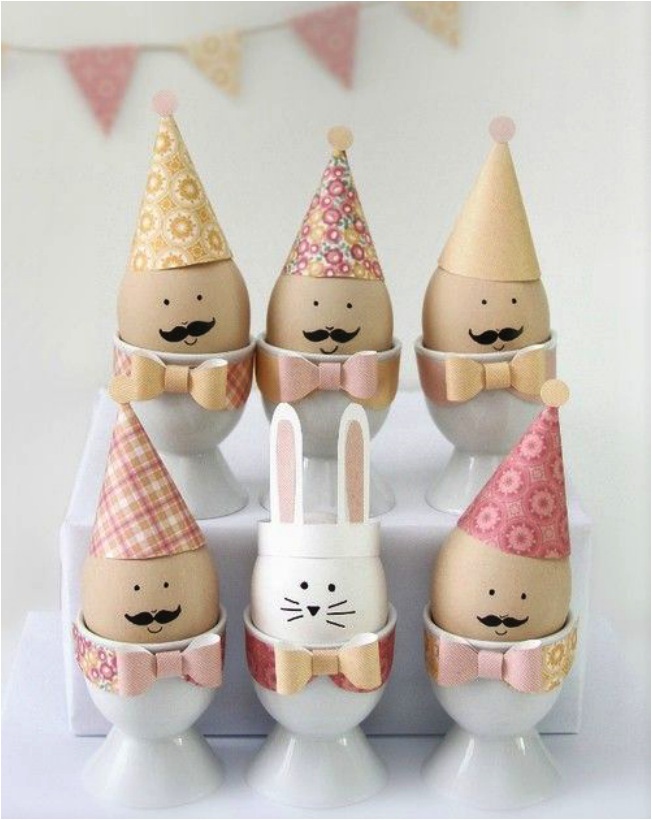
I wish I had thought of putting mini party hats on to Easter eggs – the eggs look so darn cute! To make these easier I wouldn’t bother with the bows as the hats are more than cute enough.
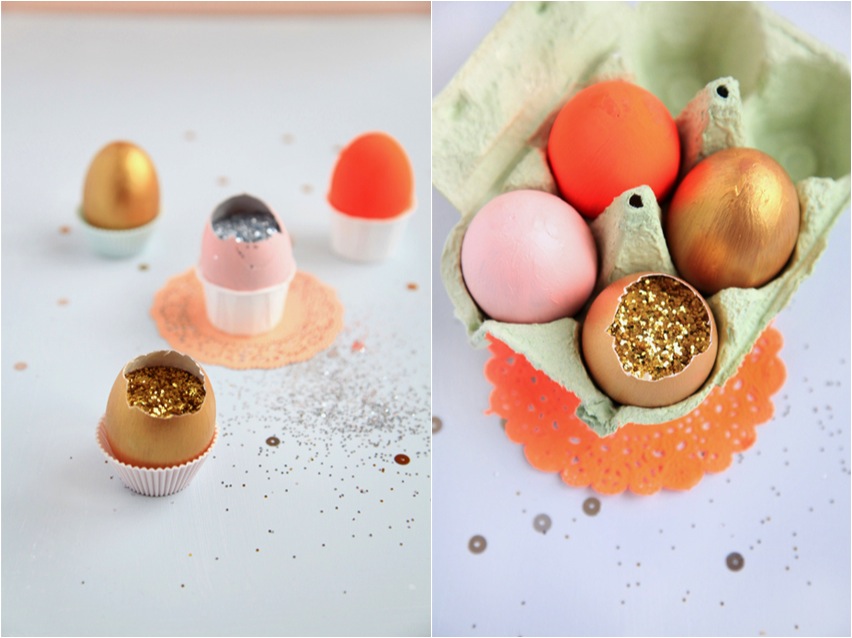
I love a bit of glitter and sparkle for any occasion so I’m loving these glitter filled eggs. The metallic colours look great with the other colours but of course the egg colours are entirely up to you. I ‘m thinking lots of different metallic shades like copper, bronze, gunmetal and pewter.
Instead of an elf on the shelf, make an egg on a shelf! I love how this egg is given so much personality just by adding legs and a body. Any kid would love making this Easter egg craft.
These bouffant hairstyle Easter eggs are just fab. When I saw them, they instantly brought a smile to my lips. For eggs that are a bit different from bunnies and chicks, these are my top pick!
Love these Easter eggs! I’m not sure I have a steady enough hand to paint something as neat and perfect as this but a messier version will be just as fun to make. In addition to the versions above, I think a Queens guard version would look so cool too.
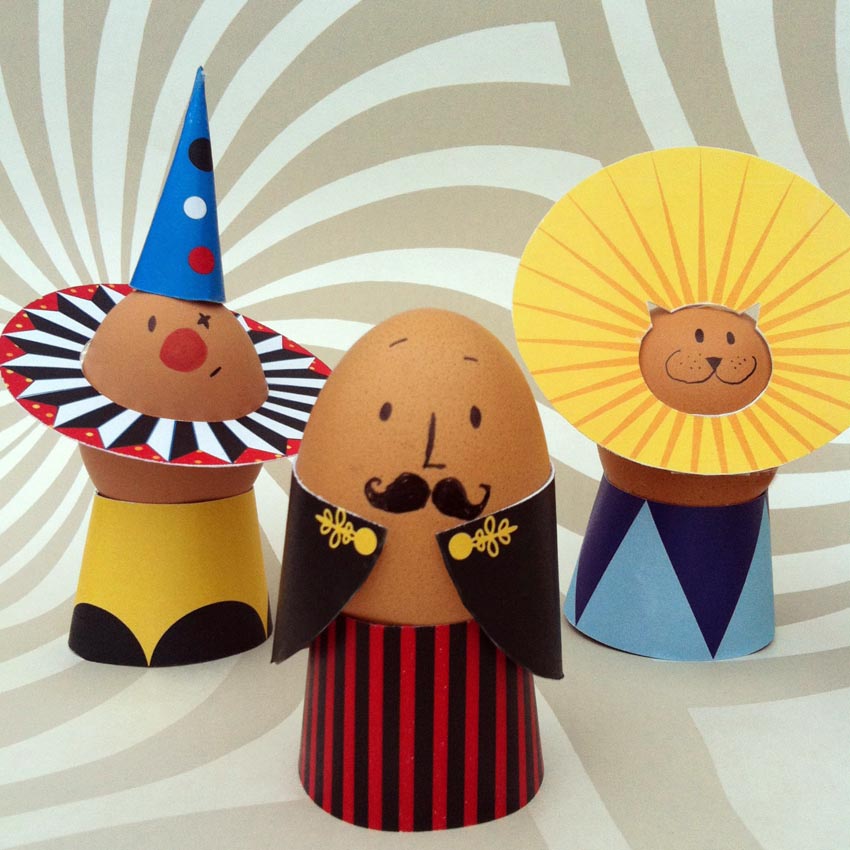
Last but not least are these fun circus eggs. They come with free printables for all the circus bits so you just have to paint the faces and then dress the eggs.
These are my favourite Easter egg decorating ideas – some are more involved than others but they all look really fun to do. Will you be decorating eggs with your kids this year? Which one do you think you’ll make? And don’t forget to check out my super cute free Easter bunny card printable.
With my current house renovation project I seem to be spending half my life on interiors sites, pinterest and browsing through interiors magazines. I’m definitely not complaining! Recently I’ve noticed a bit of a trend for using deep, dark blues in interiors like indigo and petrol blue. These deep blues are not colours you find everywhere so they are still quite unusual and really stand out. While they look great in dining rooms and living rooms, I think these blues would look equally fabulous in a nursery or kids room – for boy or girl. So I felt inspired to put together a mood board for a kids room using various shades of deep blue with touches of lighter blue.
One of my first ports of call for finding cute things for kids rooms in the UK is Petit Home one of my sponsors. It’s run by a French lady who has a real mix of styles in her shop so there is something for every taste. From quirky pieces like that rabbit light to more understated things like the bed linen she has. I picked a few of my favourite pieces and mixed them up with with some others to create this blue kids room moodboard. Here’s where you’ll find everything:
Last Wednesday I started a new photography series on my blog and today it’s time for the next feature. Last week I shared lots of great tips on how to take better iphone photos of your kids. This week it’s all about the best apps for adding filters and effects to your photos. With so many photo filter and editing apps out there it can be really confusing to know which ones to use. So here I’ve picked the ones that I would say are easiest to use and are great to tweak and enhance your everyday photos. I have focused more on getting quick effects with a range of filters than on editing functions as I’m not a pro photographer and this series really is about enhancing our everyday photos, not about turning pro! With the right app and the right filter an ordinary photo can look extraordinary and a good photo can look awesome. Here are my recommendations for the best photo filter apps around:
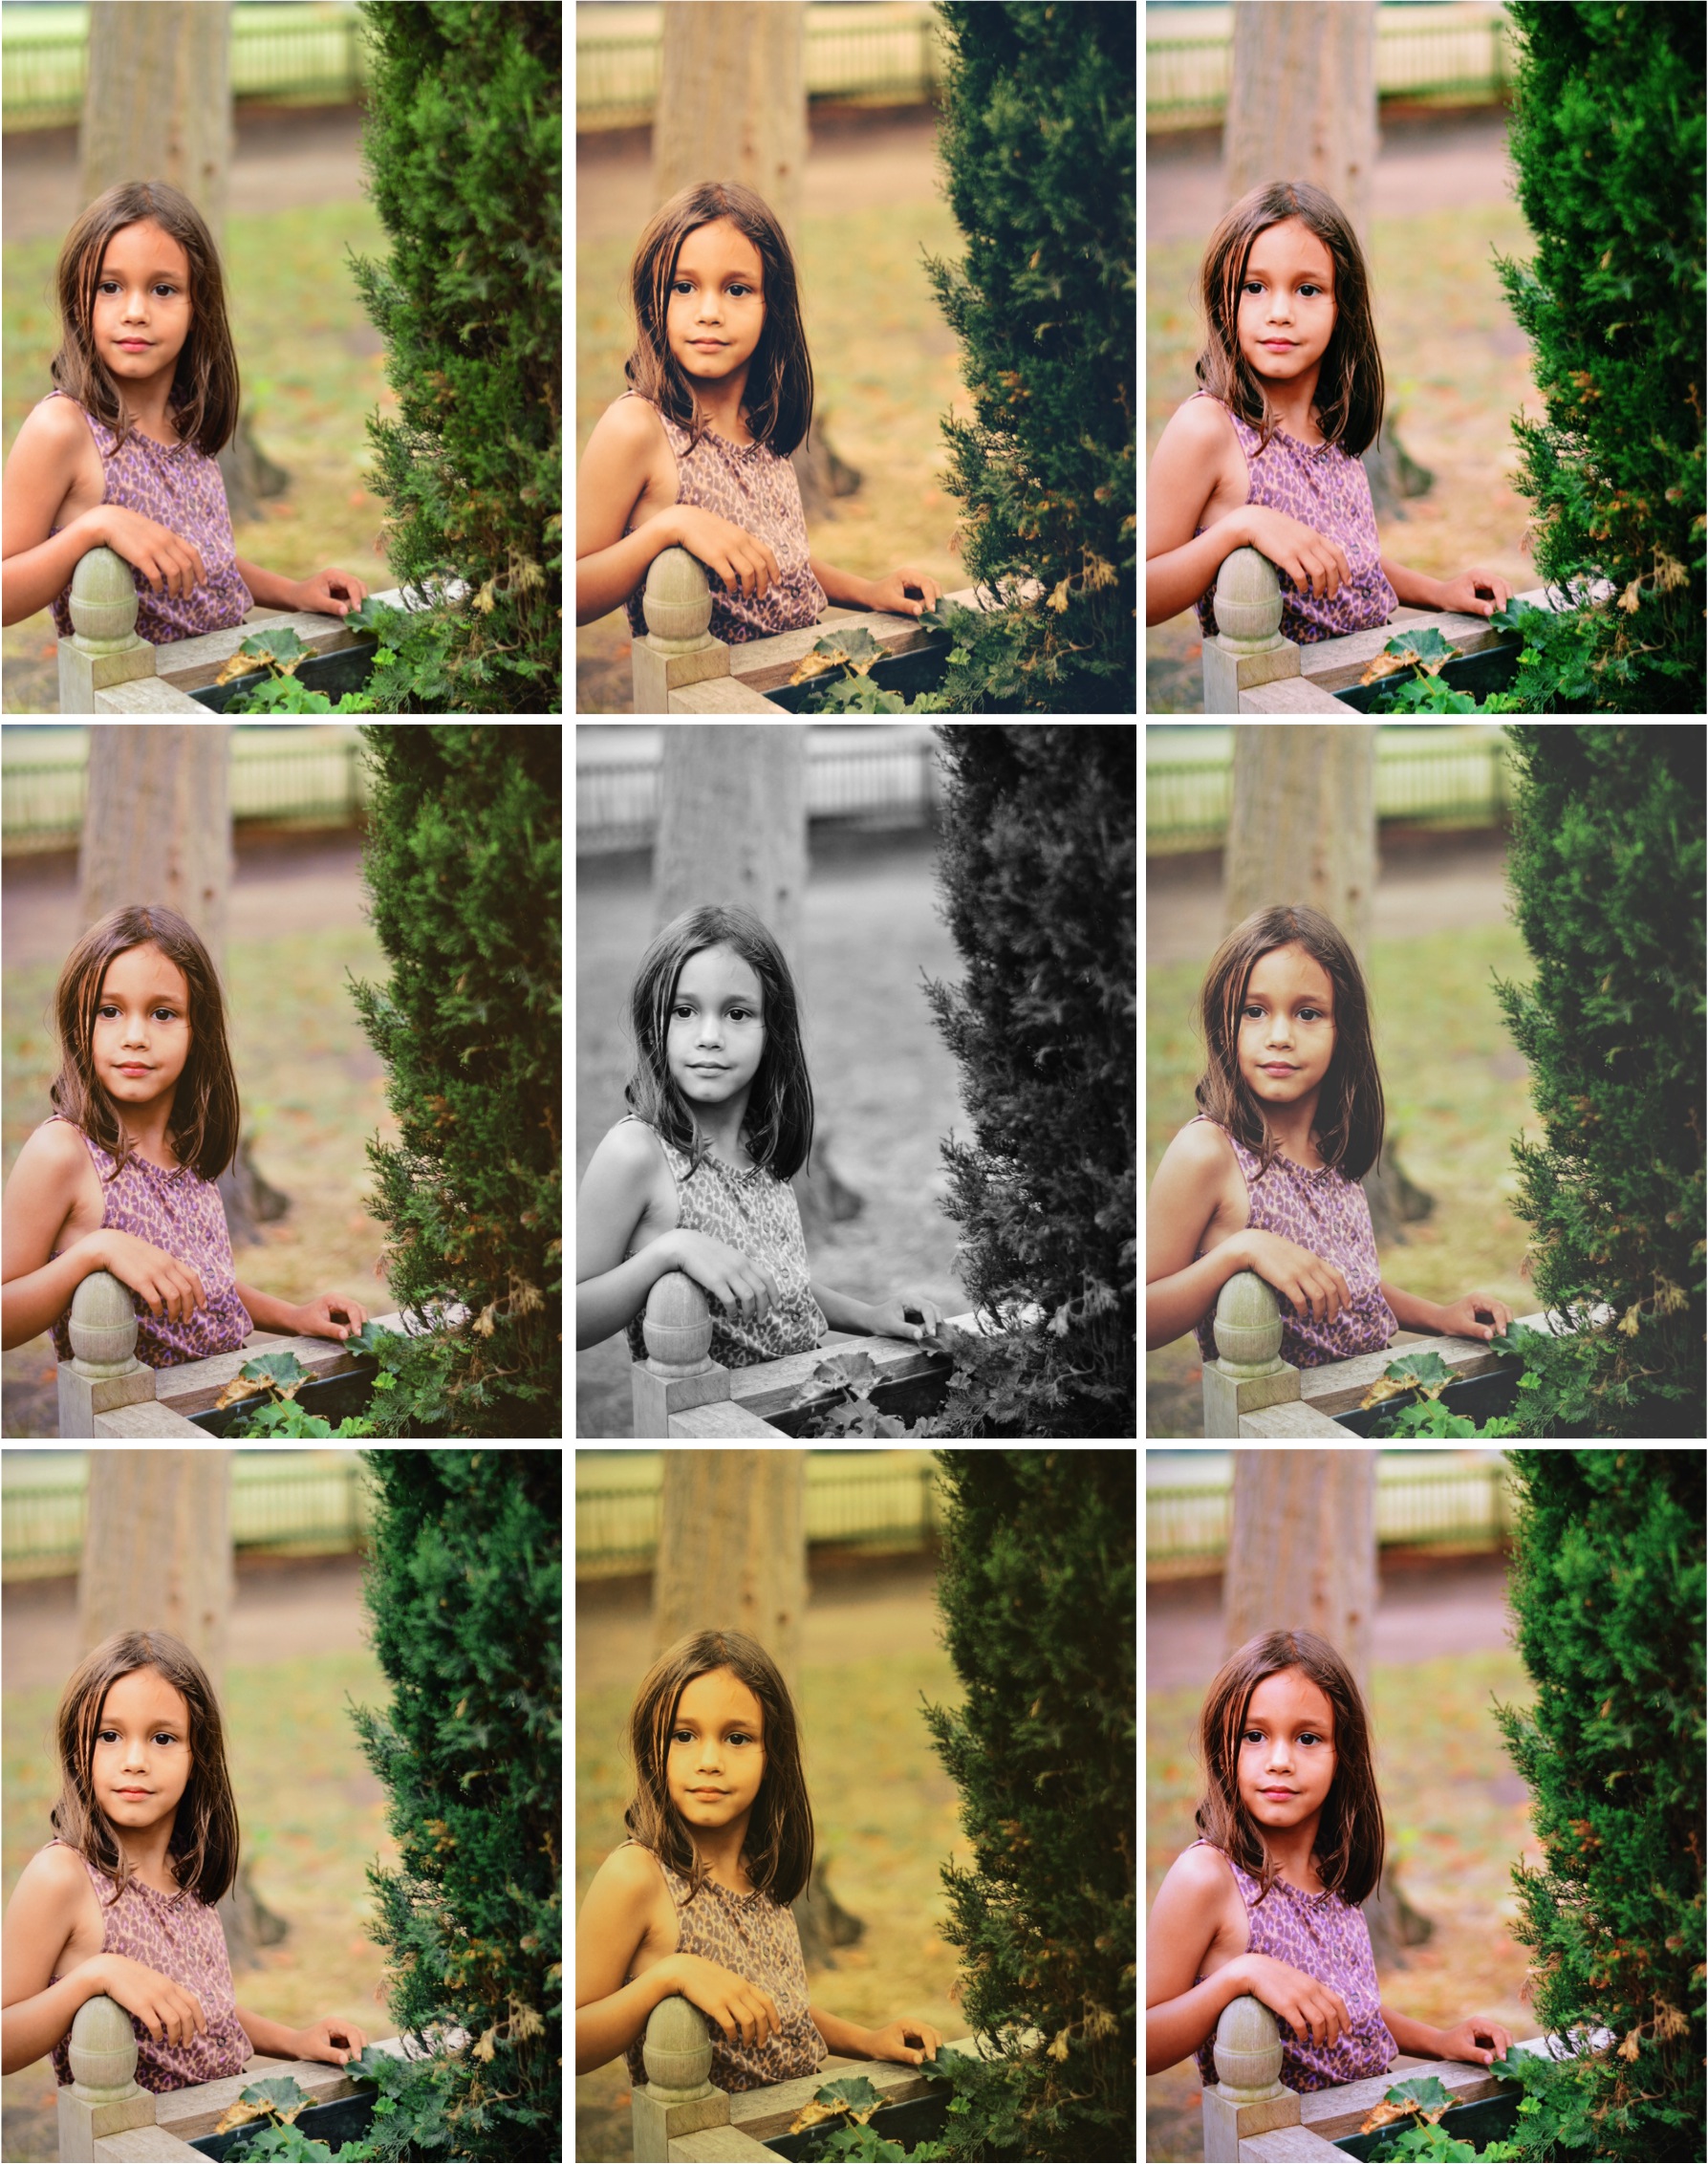
1. VSCOcam This is my favourite app for adding filters to photos. VSCO has the largest range of filters that I have come across and they are fantastic. The filters are the most natural looking of any app and are all quite beautiful as you can see from the range above. With VSCO you can also take photos within the app and then experiment with the filters. It also has loads of other editing functions like adjusting brightness, adding a grainy effect, sharpening or fading and lots more. This is definitely the photo editing app I use the most but one word of caution – it’s addictive! I can spend ages playing around and trying out different filters as there are so many. The basic filters are free but to get all of them it’s paid but most definitely worth it.
2. Retrica
If you are into your selfies, you’ll love Retrica. It’s a simple app that allows you to choose from a range of filters and effects to keep your selfies interesting and different. What I especially like about Retrica is that any filters and effects are done before taking the selfie. So you get a live preview of exactly what your photo will look like before you click. Once you click you can instantly share or send wherever you want including Instagram of course. The free version is more than good enough unless you hate seeing ads on your apps, then you’ll have to go premium.
3. Dash of Colour This simple app does what it says on the tin and it’s free. Strictly speaking this isn’t an app for adding filters – there are some basic editing functions and filters but the main purpose of this app is to add a colour effect. Or what I most love it for is that I never manage clean, crisp white backgrounds to my photo’s and this app helps me get much closer to that. You simply convert your picture to black and white and then add the colour bits back in by using your finger as a paintbrush. This allows you to make a certain part of the picture pop like the example with Anya wearing those blue glasses. And also as you can see from the leggings photo – my original picture was quite yellow so I turned the photo to black and white and added back in the bit of pink tape. So much better!
4. Simply B&W I’m a big fan of black and white photo’s and this is an easy to use app to apply black and white filters to your photos and again it’s free. While there are many apps that will convert photo’s to black and white, there are normally only one or two pre-sets to choose from. With this app, you can not only play around with a bigger range of black & white filters but also within each filter you can adjust the effects like the strength of the filter and more. So the same black and white photo can look completely different as you can see in the pictures above – from giving it a really old, dated feel to a much sharper looking photo.
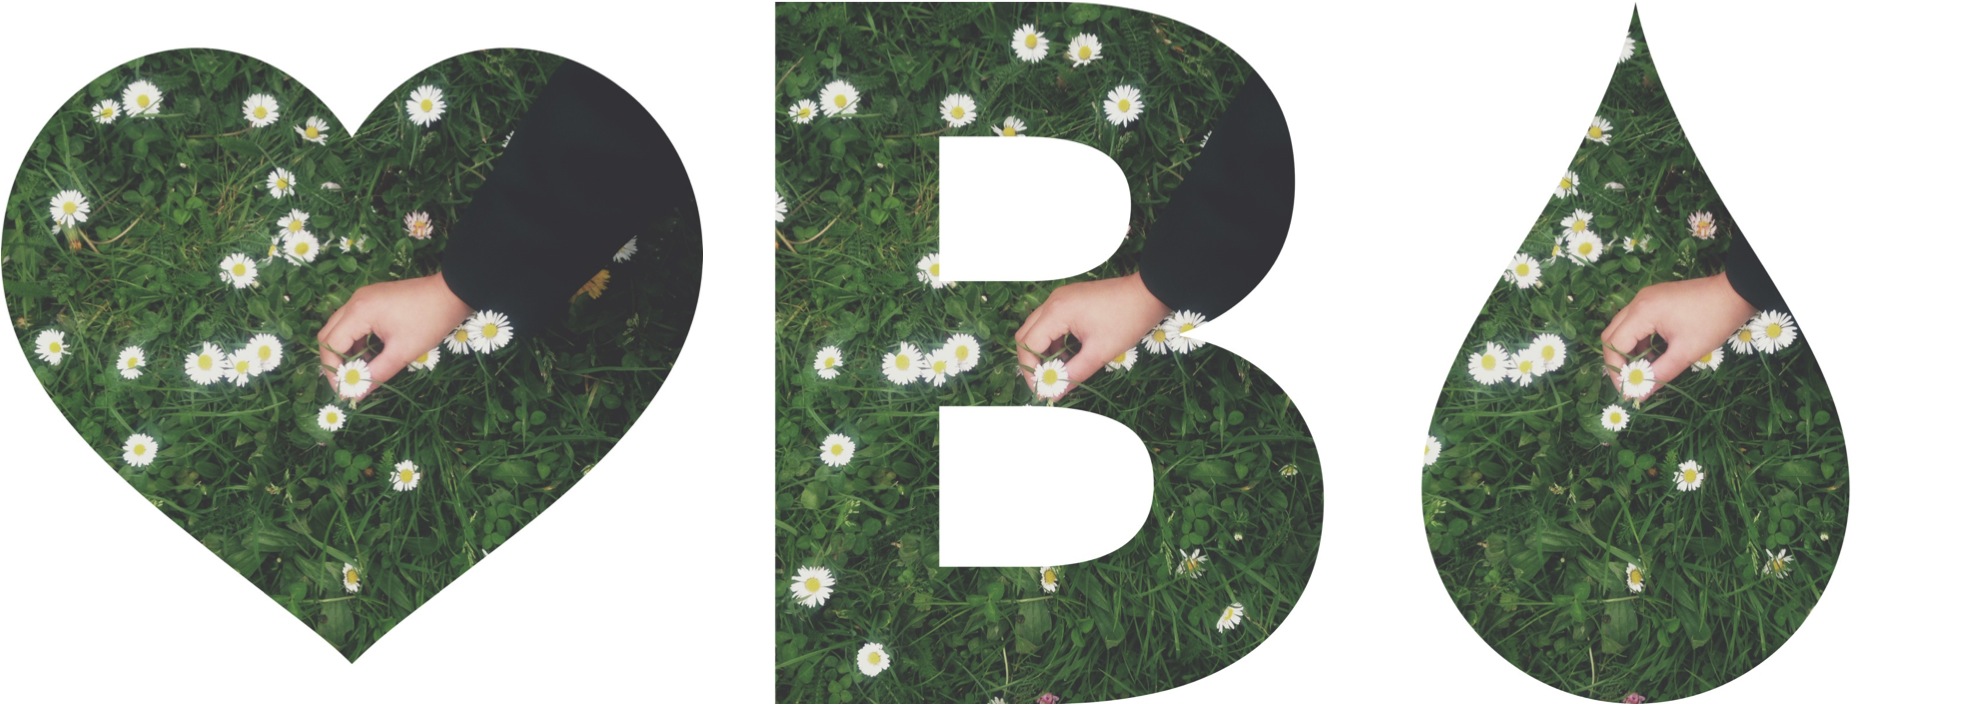
5. Afterlight Afterlight is a filter lovers dream. It offers an in app camera too but I don’t really use this – my iphone camera seems just as good. What I do like about Afterlight is the big range of filters and that they can be layered on top of each other to create even more effects. Too much of this and your photo will end up looking very unnatural but if you did want to create quite distinct effects you can. My favourite bit of this app is the fun shapes which can be filled with your photos like the examples above which I love. From bold capital letters to script letters to shapes like hearts, stars, sun and more. You can be so creative with these without needing to learn how to do it from scratch. Afterlight isn’t free but costs just £0.79 or $0.99 so it’s definitely worth it for what you’re getting.
These are my most useful phone photo apps for being easy to use, for creating a range of effects and adding lots of different filters. And the best part is that most of them are free. They help easily take an average photo to a fab one without getting in to the technical side. The best way to use these apps is to experiment with them and try out different filters and effects – you’ll soon learn which are your favourites and you’ll also discover all sorts of tricks to make your photo’s really stand out.
Do you have a photo filter app you love ? Do share in the comments so we can all try it out.
With Easter fast approaching (how did we get to March already?!) it’s time to think Easter crafts. Anya loves all kinds of crafts but I know that Easter crafts are her absolute favourite – eggs, bunnies, chocolate – what’s not love? So today I have these adorable free printable Easter bunny cards for you. Anya’s already made loads to give to her friends – they’re super easy to make and look so cute!
These free printable Easter cards have been created exclusively for my readers by a super talented graphic designer and architecture student called Annelies. I stumbled across her site and I fell in love with her work so we collaborated and here are these cute little cards. This is the first part of the collaboration – there’s another part coming soon.
To make these cards simply print out the templates provided and cut them out. Stick the envelope part with glue or invisible tape, pop the card in and you’re done! I have chosen to use pastel coloured card as these colours remind me of Spring but of course you can choose whatever colours you like. I would suggest using something heavier than regular printer paper like thin card for best results. Once printed, write your message on the back and give them to your friends or you could even make an Easter bunting by hanging these bunnies on to string. They’d also make great gift tags and so much more.
I am so glad I discovered Annelies’ work and we managed to collaborate. If you like pattern and design then don’t miss her blog A pattern a day where she creates beautiful new patterns every day. Annelies is only 22 so I can’t even begin to image what great things she will get up to in the coming years! And don’t forget, this is part one – part two of the free Easter printable is coming soon.
Here is the PDF – Annelies has created a few versions of the bunny cards each with slightly different patterns. Print and enjoy for your own personal use:
Ebabee Likes is a style guide for babies, kids, teens and their mamas. It’s all about inspiration, ideas and indulging yourself and your brood. It’s written by me ~ Nomita ~ a style loving girl from Mumbai who now live’s in London. Read More...