Do you make your own kids party invites or do you buy them? I always plan to make them myself and sometimes do but sometimes life gets in the way and I end up buying them. Most of the kids party invitation cards you find in the shops tend to be a bit samey and are often themed with TV or cartoon characters which isn’t really my thing. Recently I went looking for something a bit different for a friend and I came across these really fun and colourful party invite kits.
These invite kits aren’t just for kids parties but they have baby shower ones, general ones which can be used for a range of occasions and of course kids party invites too. They come as a complete kit with the invites, envelopes, envelope seals and party favour bags included. All the designs just scream fun and cheer, exactly what a party should be! For our next kiddy party I’m loving the colourful heart ones or maybe even for my next grown-up party!
Probably the most memorable day of my life was the day I gave birth to Anya. How could it not be? And afterwards Richard and I got to take this tiny bundle home and stare at it wondering what to do next?! But as the days passed, we slowly learned to become parents as do most first time parents. The one thing we didn’t do properly though and I sincerely regret to this day is take any great newborn photo’s. In that crazy haze that is the newborn days (especially with the first baby) photo’s didn’t seem like the priority or even much of a thought for me. Thankfully Richard took some but I wish someone had told us, warned us, advised us that don’t miss capturing those precious first few days. So today, that’s what I’m doing for you – telling you that no matter how you feel, don’t forget to capture those incredible first few days of a new life. And to help you today’s photography post is on the best newborn baby photography tips for parents by Suzi Bowles – an incredibly talented photographer.
I have yet to meet Suzi in person but I already feel like I know her through our many online interactions. Suzi specialises in contemporary family photography including newborns, maternity and children. Her style is distinctive, bright and very fresh. The expressions and little details that Suzi manages to captures in newborns is second to none. She snaps those exact newborn moments that you want to remember forever and so I am very excited to have her here today telling us exactly how she does it. Now over to Suzi.
I love photographing newborns. Those euphoric first few days of a child’s life are so very unique and special. Capturing these moments to immortalise those special memories is one of my absolute favourite parts of my photography life. There are so many magical new moments to capture with the arrival of a baby but there’s nothing more frustrating than snapping away only to find that your picture is missing the very detail that you were hoping to capture. These ten tips should help you immortalize those memories of the days when your precious bundle was still tiny, fresh and very new.
1. The ‘best’ time to photograph The best time to photograph is between 6 and 10 days. In photography terms your newborn is only considered to be a newborn for the first two weeks – sounds crazy doesn’t it! But some of the reflexes that they are born with, which make them all curly and new looking, disappear after that time. Many babies develop baby acne for a while around the two week mark and they become more alert and aware of the world around them each day so achieving those classic newborn images are much more difficult after the first two weeks of life. Having said that, there’s something delightful about a curious newborn stare and capturing those little eyes looking back at you so there are still plenty of other special shots that you can get after this time.
2. Keep your camera close Keep the camera close to hand so that you don’t miss an opportunity while you’re fumbling around around trying to remember where you last left it!
3. Find the light Pay attention to the light in your home. Think about which rooms are the brightest and and which times of day they have the most light. Daylight will generally produce a much prettier image than artificial light so daytime is your friend. Turn your baby towards the light source to photograph her. Diffused, indirect light consistently produces good results so having your baby facing towards a window but not in the direct sunlight is a great option. Have her head nearer to the light than her feet as this will produce shadows that fall in a natural looking direction.
4. Keep it warm and toasty Babies inbuilt thermostats don’t work very well and they can get cold really quickly. Also they love being bundled up all warm and cosy. If you’re planning to photograph your baby au naturel, crank up the heating – a lovely toasty 28 or 29 degrees is what I recommend for my newborn sessions to keep them content while I’m shooting. The parents and I are usually peeling off our layers but baby is cozy and content.
5. Capture the details As well as photographing the big picture, don’t miss those tiny details as babies change so very quickly! Make sure you capture tiny hands, feet, eyes, nose, rose bud lips and the top of their head so that you can always remember it exactly as it was. These kind of shots of my kids still transport me right back when I look at them today; I can almost smell that newborn freshness!
6. Think about family and friends Who is visiting to meet the new arrival? Document those precious first cuddles with grandma, those story times with siblings and those evenings when your baby barely moved from your other half’s chest. And whether it’s mum or dad who is taking the lions share of the photographs, don’t forget to hand the camera over sometimes so that you exist in some of the pictures too. You will really cherish these in years to come.
7. Keep it simple and let your baby be the focus If you trawl through pinterest you’ll find a plethora of ideas for posing a newborn – dressing them up as Oscar the Grouch, covering them in lipstick kisses or putting them in a tutu. Personally I’ve found that no matter which props parents bring to their session, the most treasured images and the ones that my clients usually choose from their gallery are the simplest ones. Brand new babies are so very gorgeous as they are and props can often just distract from their fresh and captivating beauty.
8. Make your baby feel secure Sometimes a newborn’s startle reflexes can go in to overdrive as they may not be comfortable with their arms and legs being free. If your baby won’t settle while you put him down to photograph, try swaddling him as he is more likely to relax when he feels secure. A bit of white noise can also help him relax – it will drown out some of the background highs and lows and send him right back to the womb. There are a couple of great white noise apps that you can download on your phone – I like White Noise Lite on the iPhone.
9. Print your images Don’t leave those beautiful images of your newborn sitting on your phone or computer. Print them out and put them where you can enjoy them! Frame them, share them with family or have them made into a photo book like the quick and easy Pop Books that were mentioned in a previous photography article.
10. Keep that baby safe I’ve intentionally saved this point till the end because it is the most important point by far. It may seem obvious, but I’ve heard of several unfortunate incidents where proper safety precautions have not been taken. Always keep within reach of your baby. If you are taking the photograph, have someone else as a spotter to give their entire focus to your baby’s safety. Never place your baby near the edge of a surface which they could roll off or in a glass or ceramic bowl which could shatter. Always carefully check any baskets, crates or other props you use for sharp edges, snags or anything which might hurt your baby.
Some of the poses that newborn photographers create such as the baby leaning up on his elbows with his head in his hands, or hanging from a branch in a muslin hammock, aren’t what they first appear to be. Some are composites – that is, they are made by stitching together two or more images in Photoshop to create the final picture and others are shot from above with baby lying on their side to give the illusion that they are suspended in mid-air. This is absolutely vital for safety – babies necks aren’t strong enough to hold up their heads at this age, they shouldn’t be placed anywhere that there’s a possibility of them falling, and certain positions will require a hand to hold them at all times.
Thank you Suzi for these very helpful newborn baby photography tips for parents – I just wish I had these when Anya was a newborn. But you have them now so once again I say don’t miss capturing those precious first days of your babies life with these helpful tips. Suzi has also recently started photography workshops in Surrey for beginners, bloggers and intermediate photographers so if you’re interested in learning more check them out at A Happy Capture.
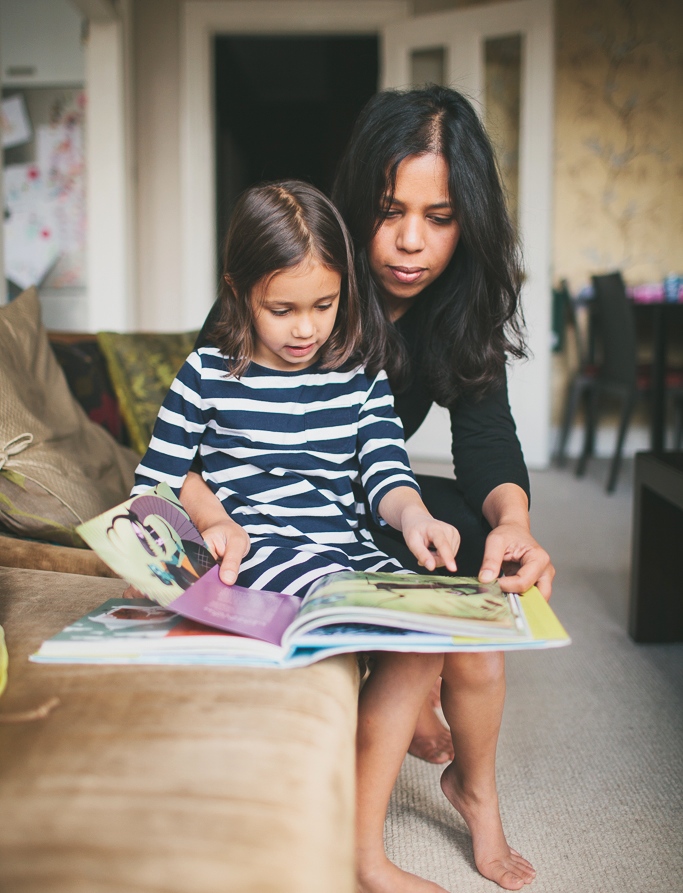
I absolutely love kids books and can spend hours upon hours choosing books for Anya and then enjoying them with her. We all know that it’s important to encourage our kids to read but to develop their interest and keep it going it’s so important to pick the right books for them. Apart from searching online, I tend to ask friends and colleagues for recommendations, browse real bookshops in London and on holiday (where I have found some gems) and I even ask on my facebook page which gets me some fabulous suggestions. Over the years we have discovered many fab kids books in this way but there have been some disappointments too. While I love searching for kids books, sometimes I wish there was a less time consuming way. And that got me wondering about a kids book subscription box as there seem to be monthly subscription boxes for everything else these days!
I went searching and I found some – yay! In the UK there is The Willoughby Book Club where you can subscribe for 3, 6 or 12 months and it’s aimed at children from 5-12 years of age but they also offer toddler and baby book subscriptions. You just answer a few questions about your child and the books are tailored to their age and interests. In the US you have Giftlit which works in pretty much the same way but has a few advantages. I especially liked that with Giftlit you get to see the books you are getting before you order and having briefly browsed their selection I have to add that it looks really good. So if you don’t like the sound of one, you can substitute it with another and you can also return books. This ensures you only get and keep books you and your kids love. Lastly again in the UK is Prudence and the Crow who specialise in vintage books for kids and adults. You don’t get to see the books which is a shame but I still like the idea behind the service.
I haven’t tried any of these book subscriptions yet but I am very tempted. I love the idea of a kids book subscription box because of the element of surprise and also any kid would love to receive a monthly package in their name. The anticipation would just add to their excitement of reading and enjoying the book. And especially for those months when you don’t have time to search and find books you know you’ll at least receive one in the post. Apart from your own child, these book subscription boxes would make great gifts too. Have you tried one? Where do you look for inspiration for your kids books? Do you know of any other services? I’d love to hear your thoughts and ideas in the comments.
Who doesn’t love a bit of time wasting and surfing the net aimlessly? I know I do! That’s what my Friday finds are all about and I haven’t done one in a while so here’s the latest dose. To start with, here are 15 hilarious things nobody tells you about parenthood.
Fox prints are all the rage and they don’t get cuter than this foxy shirt.
Make these and you’ll probably be the most popular mum ever.
I’m a big fan of playful clothes for kids of any age. Who said rompers should only be for babies? Even though Anya is six, I still want her to have lots of fun clothes in her wardrobe – heck I even want some for myself! So I went looking for fabulously fun clothes and accessories in peach for the coming Summer months and here are my favourites. I cannot resist that Mr Shy romper and those ice-cream knee socks are just too cute too:
It’s Wednesday and that means the next dose of my photo series. We live in a time where taking photos could not be easier. We click away several times a day creating thousands of memories on our phones, cameras and other devices. On the one hand it’s quite amazing that we can photograph anything, anytime, all the time but on the other, what do you do with all those photo’s? Do you have thousands of memories sitting in one big horrible mess on your phone, on your laptop or even on your facebook? Do you spend hours trying to find photos? Do you wonder what to do with all those thousands of photo’s you’ve taken? If your answer is yes, then todays photography article on how to organise your digital photos will help you get on top of this mess. These tips are easy to follow and with a little effort you will have a very organised photo library. I’ve put these tips together based on what I do (when I’m organised!):
1. Download those photos This is the easy bit because if you’re anything like me, I can’t wait to see the photo’s I’ve taken after an event or holiday. So whenever I take photos I always download them usually on the same day or within a day or two. Never leave photo’s on your memory card as your card will eventually get full and you may not have room the next time you need to take photo’s. This could leave you furiously trying to scroll through your camera and deleting photo’s in a hurry to free up some space. And besides it’s also possible to accidently delete your entire memory card.
2. Delete, delete, delete! As soon as you download your photos, start deleting. And be ruthless. Blurry shots, duplicate shots, random photos – you know the ones I mean. And then delete some more. Only keep the shots you really love and often you’ll find that more than half can be deleted. This also helps keep more storage space free. My best advice (which I try to follow) is to delete photo’s as soon as you download them. This will make putting them in to folders a much easier job.
3. Create folders That brings me on to the next point – creating folders. It doesn’t matter what software you use or even if the photos are stored directly on your PC but creating a folder system is essential to getting your photos organised. The simplest way to do this is chronologically – by year, then month, then by the subject or occasion. The best way to stay on top of your system is to place photo’s in to folders as you download and after a while this will become a habit. But if this isn’t possible you can also set aside a little time the end of each month and spend an an hour or two dividing the photos for that month in to folders. If you do this regularly, imagine how organised your photos will be and how easy they will be to find!
None of us have photo’s just on our camera’s anymore. In fact many of us have more photo’s on our phones than anywhere else. We definitely don’t want to forget these so do the same with these – download to your computer (or wherever you store your photos) monthly or weekly (depending on how many you take), delete unwanted ones and put in to folders with the rest of that months photo’s.
4. Mark your favourites I’ve recently started flagging my favourite photos in each set of photos that I download. This is easily doable in many photo management tools like apple iphoto or windows live photo gallery. This has helped me so much especially when I take photo’s for my blog. Before I’d trawl through 100 or more photo’s to choose the best two or three and then forget which ones I liked so I’d keep going back and forth and wasting far too much time. Now when I download them, I immediately delete the hopeless ones and flag the best. This will also help a lot if later you decide you want to print some or make a photobook – no more spending hours choosing.
5. Storage If you take a lot of photo’s then keeping these on your laptop can start eating away at your computers storage. So instead you could use an external photo storage site like flickr. There are many such sites that are free to use so it’s just a question of finding the right one for you – here’s a list that will help.
6. Print them! Seriously, how often do you print your photo’s? I am really bad at this but since starting this photography series I’ve realised that there is no point learning to take fab photos only to have them sitting on a hard drive somewhere. It’s so much nicer to hold a book or album and flick through the pages than it is to stare at a screen. With all the easy printing options available, there really is no excuse not to print photos. And once you’ve spent a bit of time organising your digital photos, choosing ones to print should be easy.
Some ideas on printing – You could print a yearly photobook. I did this when Anya turned one showing the first year of her life and it is such a wonderful memory. I did it again when she turned two but since have given up but plan to re-start. Another idea is to make mini little photobooks of instagram photos or phone photo’s that can literally be done in minutes. Yet another idea is to make real prints and create a gallery wall in your home. You could refresh these every couple of years and older ones can go in to an album. There are so many easy and quick ways to get real copies of your photo’s and once you start, you’ll love the physical memories you are creating and memories that can be handed down for generations to come.
7. Don’t feel overwhelmed If you have done nothing to organise your photo’s over the years and have thousands upon thousands stored on your laptop and phone, don’t panic! It’s so easy to feel overwhelmed and not know where to start. You can either start with your latest photos and work backwards or the other way around but most importantly, start with bite sized chunks. So consider tackling a months worth of photo’s each week and slowly you will start to see your digital photo library looking very organised.
8. Back it up You knew this was coming, you know you should do it but are you doing it? Even if you end up doing nothing else to organise your digital photos, at the very least you need to back them up. I use an external hard drive that I plug in to my laptop around once a month and job done! But there are so many ways to create back-ups, the important thing is to do it – not say you will do it, not plan to do it but do it today! Here is a simple article that lists some photo back-up options.
So that’s how I like to keep my photo’s organised. It’s a shame to have so many gorgeous memories lying in a huge mess somewhere. With my tips on how to organise your digital photos and a little consistent effort, you will have the most organised photo library ever. And once you get in the habit of doing this, you will save so much time because you won’t ever have to look through thousands of pics to find the one you want. And don’t forget to print and back-up those amazing memories.
Recently I’ve noticed more and more grey bedrooms for kids and I’m loving it. I’ve always been a fan of grey for both kids and baby rooms and when combined with lots of white and a pop of colour, it can look quite stunning for boy or girl or even unisex shared rooms. It’s a colour scheme you won’t tire of and you can always add in more of any colour to brighten or change the room if you want to. For Anya’s new room I had decided to go black and white with hints of pink but now after coming across so many beautiful grey kids rooms, I’m torn. These rooms have really inspired me and so I thought I would share a few favourites as they may just inspire you too:
This is one of the prettiest grey bedrooms I’ve come across recently. There are lots of different shades of grey in this room but using so much grey just makes the other colours and decorations really stand out. The little hints of pink, the white and the pastel touches all come to life against this sea of grey.
From a girly grey room to a more boyish grey room – grey works so well for both sexes and any age. Here the shades of grey used are much darker and are complimented with even more grey decorations. Paired with lots of white this room is very cool for a boy and makes such a nice change from blue!
This mostly white shared kids room uses grey in moderation. I like the soft, fresh vibe of this room and I love how you could practically add any colour in to this room to add a pop of brightness if you wanted. This is a unisex room that kids won’t outgrow quickly and will be very easy to update in years to come. Simple and sweet.
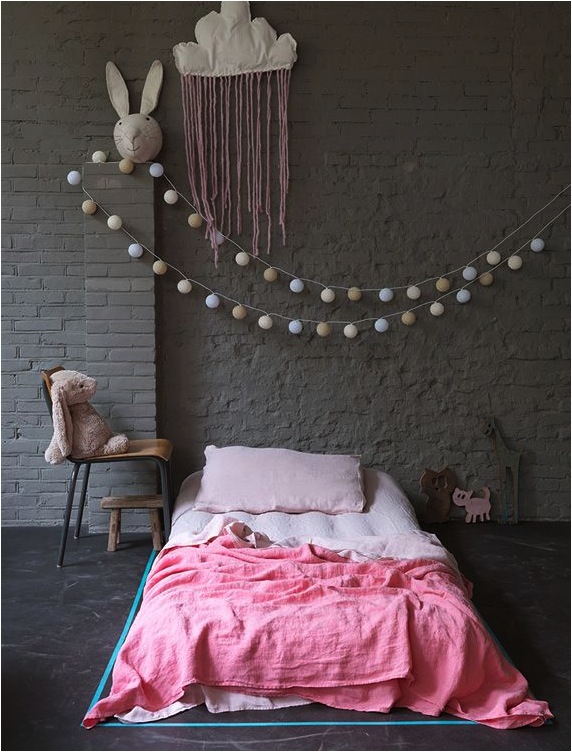
Grey works just as well in large doses as in small doses like this quirky girls room shows. There’s no hiding from the grey here with completely grey walls and floors. Some may find this a bit dark but I think its an enchanting and imaginative room. And the bright pink as well as the unexpected touch of turquoise balance the grey really well.
If I ever have to do up a nursery or advise anyone in future, grey would be my first choice. If you don’t know what you’re having, there is no better choice than gorgeous grey and you can always add colour accents once the baby arrives. Grey is a calming colour even when using lots of it as this grey baby nursery shows.
Most of the rooms above have used lots of grey with a hint of other colours but this room shows that you can easily add as much colour as you want in to a grey room. This girls room has all grey walls and some grey decor mixed with the brightest accessories and it looks so fun. Grey doesn’t mean no colour – it just means as much or as little as you want and any colour you want. Here we’ve got bright pink, yellow, turquoise and more and it all comes together so well.
If you ever thought grey was boring, I hope you’ve changed your mind. It’s a timeless, ageless shade that can be combined with as much or as little colour as you like. There are so many shades of grey to play with and so many ways to use grey in a kids rooms – from hints of grey to lots of grey. Now back to my dilema – go with grey for Anya’s new room or to stick to the original plan of black and white. What would you do?
With the recent sunny spell we’ve been enjoying, it’s time to think sun screens and sun creams. I recently came across Kiehl’s Ultra Light Daily UV Defense cream and I love it so much that I thought I would share it here. I’ve always said that while I’m no beauty product junkie, if I come across something fab, time saving or useful for us mums then I would let you know about it.
We all know that sunscreens shouldn’t only be used on sunny days but should be used everyday of the year, at least on our faces. They are the best thing you can do to protect your skin from the elements and protect against premature aging but I have to say that I have been guilty of using it only in the warmer months even though I know otherwise. The only reason was that all the face sunscreens I had previously used were heavy, greasy and so, so sticky. Also they always left white streaks and I ended up with sticky hands too after applying it. And with this heavy, sticky texture it wasn’t the ideal base for make-up. But now that I’ve discovered this Kiehl’s ultra light cream all those problems are no more. This cream is indeed very light but amazingly still has a very high SPF of 50, it is not even slightly sticky or greasy and there is not a white streak in sight. It literally glides on to your skin and it lightly moisturises while protecting from sun damage. And putting on make-up over it is no problem either. It’s not the cheapest cream around but a little goes a long way and I have not found anything else that comes close in texture with such a high SPF too. So I will happily say that this is the best sunscreen for the face that I have ever come across.
This Kiehl’s sunscreen is suitable for all skin types including sensitive skin so anybody can use it. Now that I’ve discovered it, I can’t do without it – a quick application of this cream followed by some light make-up and I’m ready to face the day. And I know with this cream I will use it to protect my face everyday – come rain or shine! Do you have a favourite face sunscreen? Do let me know in the comments.
In the UK, sending greeting cards is a big deal. People give a lot of cards for birthdays, new homes, thank you’s, new jobs, in sympathy, new baby – everything and anything. In fact you can get a card for practically any occasion. This whole card culture was new to me as in India we tend to use the phone much more than send cards. But having lived here for 15 years I’ve got used to it and I love finding fun and unusual cards. Often for family birthdays, I’ve been known to spend longer searching for the card than for the present. So now, when I come across a card I like, I buy it even if I don’t know who the recipient is yet. I always find a use for it and my latest finds are these absolutely adorable fruit and veg cards. How cute are they? I love them for both kids and adults and especially love the apple, carrot and cherry ones. I can’t wait to get some of these unusual and very fun cards and start sending them to friends and family.
It’s Wednesday and after a short break last week, I am back to my photography series. In the past few weeks I’ve shared some great tips and tricks on how to photograph your kids, which apps will make your photos shine and so much more. Today we are talking Instagram – the photo sharing app that seems to be all our addictions! When done right, Instagram is the online place to build a community by sharing snippets of your everyday life so we’ve got some great tips on exactly how to do this and how to do it better. Whether you’re a blogger, a small business owner or just someone who wants to share your photo’s for fun, these tips by super talented photographer and blogger Lucy of Capture by Lucy will be very helpful to you. Lucy’s tips will not only show you how to grow your Instagram following but also how exactly to use Instagram to get the most out of it for you and for your followers.
I’ve had the pleasure of meeting Lucy once but have also been a long time follower of her happy and incredibly engaging photography. Lucy has a way of putting the ‘extra’ in to ordinary every single time she takes a photo. By her own admission she loves her Instagram space and it shows. Her instagram feed is the story of her everyday life which is bursting with inspiration, colour, cheer and joy. You can’t help but want to be a part of it and I know I can’t wait to see more from her each day. I’m so delighted to have her here today to share exactly how she does this and how you can do it too so over to Lucy now!
Thank you so much for having me Nomita; it’s such a pleasure to share how I have grown my following on Instagram since I joined just over a year ago. I am a total Instagram addict! I love the community spirit, the inspiration and the fact that it’s so easy to join in. Everyday I can’t believe so many people follow my ‘mini blog’. It’s my fastest growing social media channel by a clear mile and I see my gallery as a way to share everyday moments that help my followers get to know me better, where I can let my creative side go wild and where I enjoy practicing my styling and composition. So I am really excited to be here today and to share my top 8 tips on how to grow your Instagram following:
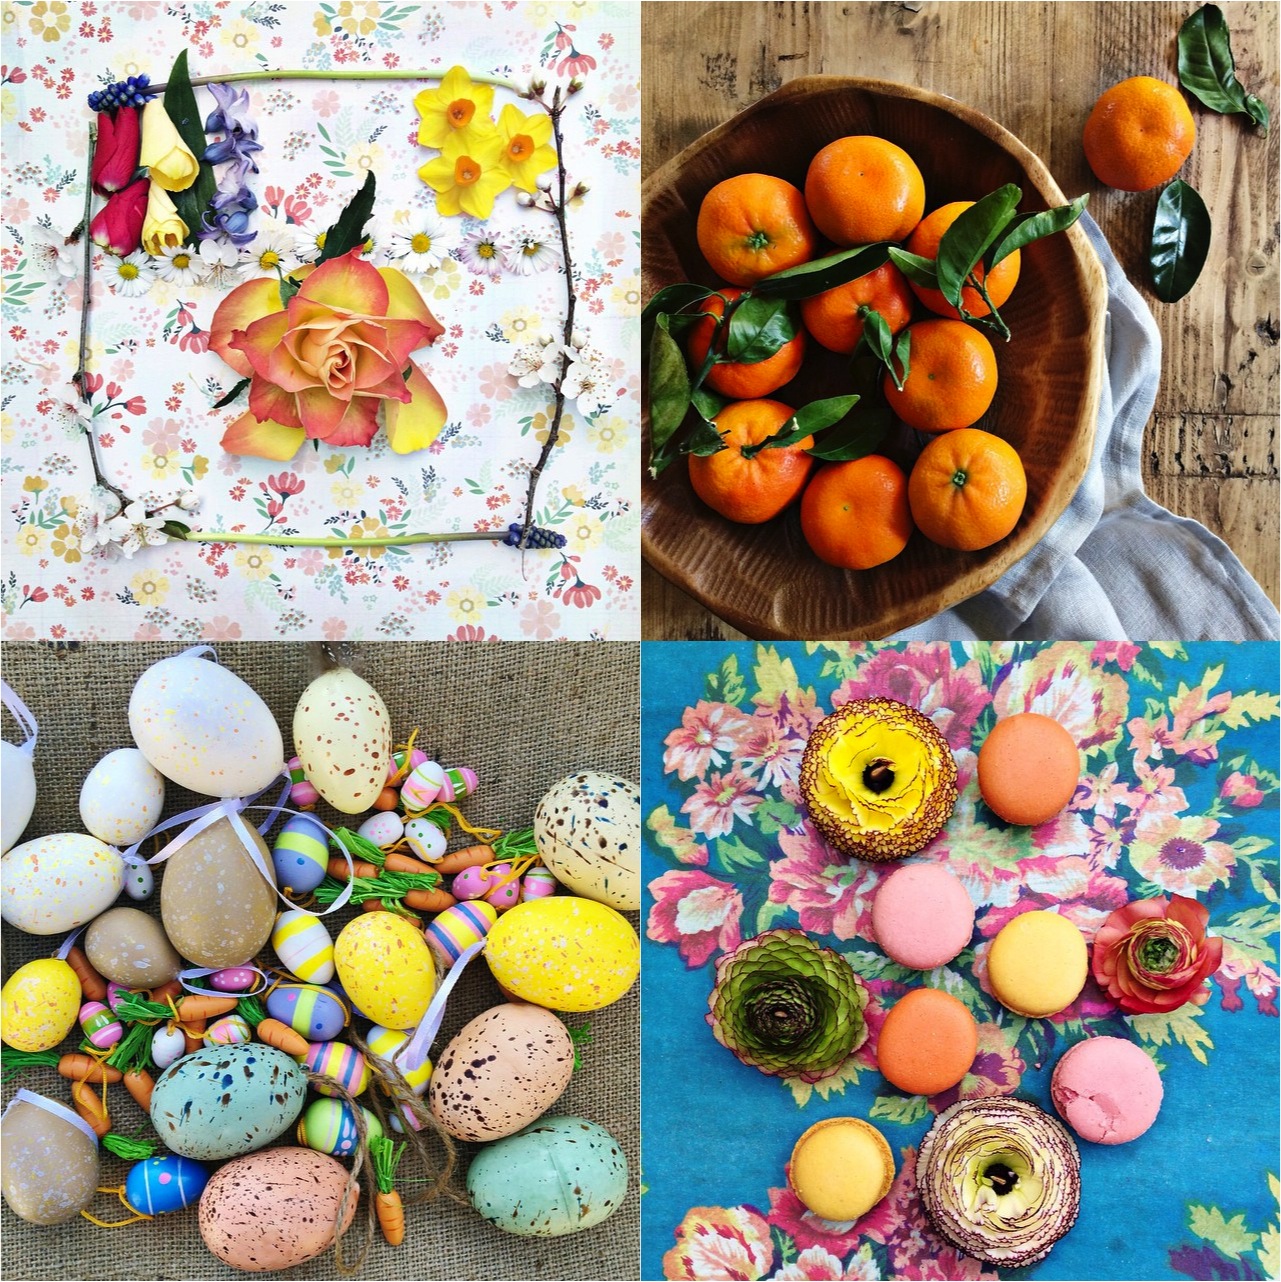
1. Be yourself Being authentic is key. If you aren’t a fan of staged or styled photography, no problem! Share the photo’s of what you love to photograph because it’s hard to keep up something you aren’t passionate about. I’m all about colour and although I sometimes try a more minimalist style, it’s really not me. I love sharing a mix of everyday life, our home and vignettes. A vignette is a styled photo so I am often found with a sheet of scrap paper or wallpaper, arranging a few flowers and props to create a still life image. I find it so therapeutic to share lovely photos and even if it’s pouring with rain and my boys are arguing, I can take two minutes out to create something beautiful.
2. Embrace the community Instagram is a wonderfully positive platform. I have experienced nothing but great community spirit and encouragement. I love the interaction, the way replying to comments is so easy and the engagement between my followers just amazes me. It’s a way to be part of a community and to create a community. Do join in with collaborative hashtags – it’s a great way to find other accounts with similar interests. I host the hashtag #capturingcolour where each Monday morning I announce a new theme for the week and then I share my favourite picks on my blog. I love to take part in various themes including “competition” themes just for the fun of it and also to be involved in the Instagram community.
My favourites are: Monday – #mymondaymoodboard Tuesday – #gatheredstyle Wednesday – #itsamoodywednesday Thursday – #byarrangement Friday – #floralfridaycompetition and #fridayfaffingcompetition Weekend – #frommykitchencompetition Weekly and monthly themes – #natureinthehome, #stylingtheseasons, #lovelysquares, #nothingisordinary, #at_diff, #its_my_week Family themes – #jj_its_kids, #mom_hub, #kids_of_our_world
3. Be consistent I like sharing lots of photos but I know it can easily overwhelm my followers and I begin to see people unfollow if I blast them with too many photos. You don’t have to share a photo everyday but being consistent and having a regular presence is key to growing any social media platform. Some people check their Instagram feed throughout the day while others may only check it once a day or less – so either way if you post a number of photos in quick succession, you are likely to take over someones news feed!
4. Be selective Instagram is all about sharing snippets. While on facebook you may well share 100 photo’s of your recent holiday, Instagram is more about moments that tell a story. Give people a reason to follow your account on Instagram – keep it interesting! I often follow the same bloggers on every platform, but find it frustrating when they share the same photo across all their accounts and then a few days later it appears on their blog too. By that point I might have seen the same photo 4 or 5 times, and I am less likely to engage with it.
This doesn’t mean putting pressure on yourself to think of different images for each social media platform, it’s more about what you choose to share. So for example – if we are at a play park I might share a photo of my boys to Facebook (where people are more interested and respond to family photos) and a picture of the trees or a close up shot of a little detail to my Instagram account. Twitter on the other hand is a very fast moving medium so I often share my Instagram photos on there too.
When you are being selective about the photos you share, you want to share your best. I recently wrote this post on Real life vs. Insta life to show that even in the midst of a normal chaotic family life you can still create beautiful photos.
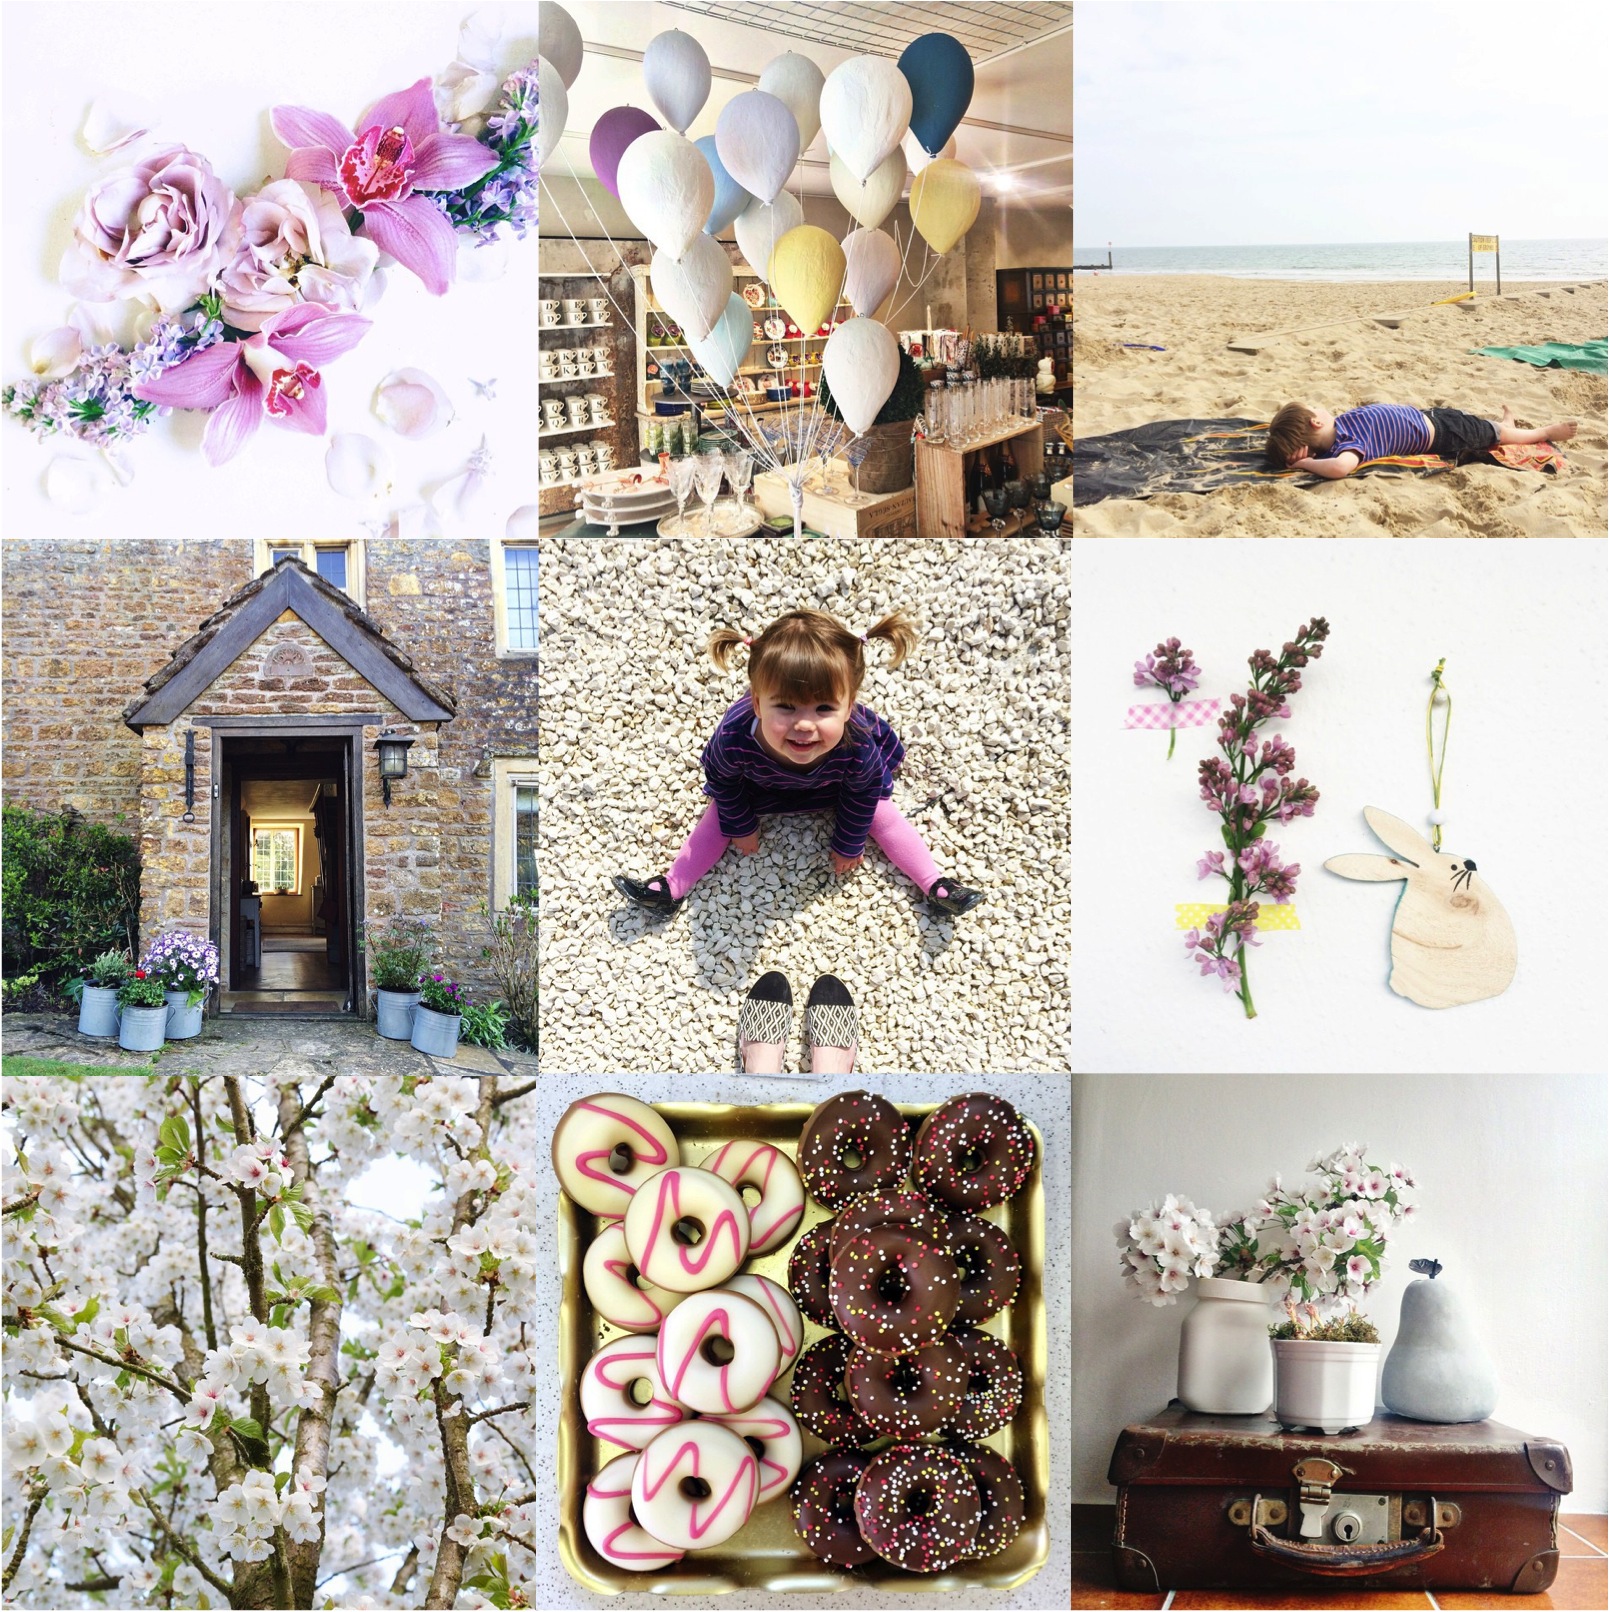
5. It is not cheating to edit your photos There is nothing wrong at all with editing your phone photos for your Instagram account. 99% of the photos I share are from my iPhone and occasionally I will share a photo from my Canon DSLR. But I always tweak my phone photos so they are the best quality they can be. People often comment on how bright and light our house is but in fact we live in a 300 year old cottage farmhouse with low ceilings and small windows! So in comes one of my absolute favourite apps – PicTapGo. I often use their ‘lights on’ filter to help brighten my images but I steer clear of the heavy traditional Instagram filters which distort the colours and saturate the image because it’s just not in keeping with my style. But Instagram does have a sharpening tool which can really improve those evening shots that look a little grainy and the tilt shift tool is wonderful for giving you a sharp focus point and a lovely blurry background emulating the Aperture settings on a DSLR. So do experiment with those editing tools to improve your photos and make them the best they can be.
Remember that Instagram is a square configuration so use the square setting on your phone camera to compose your images. I prefer to fill the whole frame instead of posting landscape or portrait images. Taking a little extra time to compose your images, thinking of things like what’s in the background that might distract from the subject can make a big difference.
6. Make it easy to find your account It’s no good sharing lots of lovely photos if people can’t find you. Make sure your account name or handle is consistent with your other account names on your site, blog or twitter for example. Do share a link to your Instagram account on your blog and consider displaying your latest IG posts in your blog sidebar. You can use a plug-in in your sidebar as I do, so it automatically displays your most recent IG posts. Let your followers know you are on Instagram too – why not create a collage of your most recent images and share to your Facebook page or write a blog post about the accounts you like to follow.
7. Connect and engage with like minded people Instagram is a place to connect with like minded people. You don’t have to follow everyone back and you can choose whether to make your account private or public. If you go for a private account followers have to request your permission to view your photos so you have complete control over who sees your content if you choose to. I have a public account because I want people to be able to quickly scroll through my gallery to see if it’s something they’d like to follow or not.
I follow a whole range of accounts that appeal to me for various reasons. Some for their lovely family snaps, some who I have followed since before they were pregnant through to their second and third children, some for styling inspiration, some for food photos, some for travel. They all engage me in different ways and no matter what the time of day is, whenever I check my newsfeed there are always lots of new photos to admire. And I tell them so. If you like something, if something makes you smile or if someone needs some words of support, don’t be shy – leave a comment and engage with people. It’s a wonderful community to be part of and I have actually made some real life friendships with people I have met through following each others accounts.
8. Have fun! Remember the most important thing is to have fun. If you don’t feel like posting, don’t post. The worst thing with any social media is when it feels like hard work. And also when it’s forced, it shows to your followers as well. Find what you love photographing and share that.
Thank you Lucy for these fabulous tips on how to grow your Instagram following and also for sharing in such detail exactly how you do it. I have recently gotten more in to Instagram but I definitely needed some help and these tips couldn’t be more useful. I love how Lucy depicts everyday life but in such an inspirational and uplifting way. Its inspired me to do better now that I know how and I am sure it has inspired you too. Do make sure you check out Lucy’s Instagram and also her beautiful blog. Also Lucy has kindly offered to help any of my readers with questions you may have – just find her here.
There is still more to come from my photo series but in the meantime why not check out the previous articles:
Ebabee Likes is a style guide for babies, kids, teens and their mamas. It’s all about inspiration, ideas and indulging yourself and your brood. It’s written by me ~ Nomita ~ a style loving girl from Mumbai who now live’s in London. Read More...