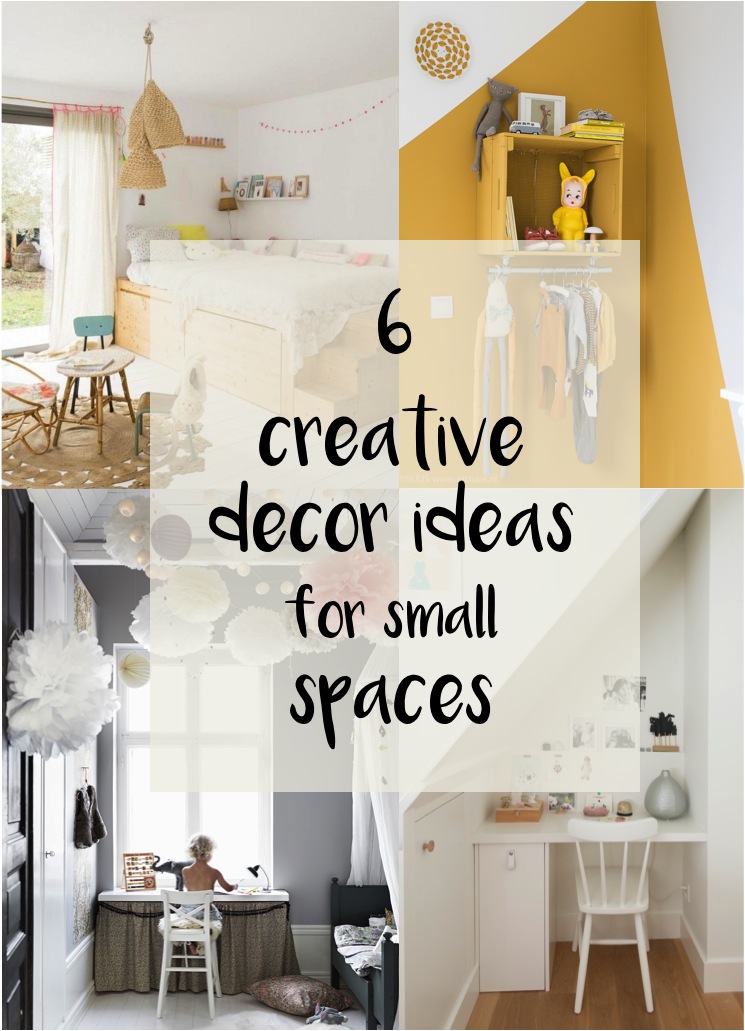
Doing up a kids room, especially one that is small can feel like a bit of a challenge. Kids have a lot of things – toys, books, games, dress-up gear – the list goes on and on! Trying to find space for all this stuff plus all the necessary furniture can be tricky in small spaces. So today I wanted to share some great space saving tips and ideas for small kids bedrooms. Having a small bedroom doesn’t have to mean untidiness or compromise. Instead there are lots of fun and stylish ways to maximise the space even in the smallest of rooms. Here are 6 clever and creative ideas for small kids bedrooms:
When it comes to kids shoes, I have a simple rule – no more than one type of shoe per season. Kids feet grow so quickly, there seems little point in splurging out on too many shoes. So in summer it’s a pair of sandals, a pair of closed shoes and that’s usually it. In winter it’s a pair of boots that will go with everything and a pair of converse trainers (love them!). But come the Christmas season we do like to add one little extra indulgence – a pair of sparkly festive shoes.
This year Pisamonas kindly sent Anya a pair of these sparkly mary janes and she is delighted. Ever since I discovered Pisamonas – an online children’s shoe shop – they have become my go to place for Anya’s shoes. Once you check it out you’ll know why – great styles and quality for incredible prices and free delivery and returns on every order. And not just for girls – they have some great boys shoes including stunning boots and much more for boys all at incredible prices. Some stylish occasion wear for now but also a great selection of everyday wear. So why spend more than you need to especially on kids shoes?
These beautiful sparkly mary janes are unbelievably under £20 with free delivery. I love the chic and subtle glitter paired with the bow – so pretty. They come in a few different colours including a gorgeous burgundy but Anya chose the black (she is my daughter after all!). Even Richard (who doesn’t ever pay attention to Anya’s shoes) commented when we opened these saying ‘wow, they’re nice.’
At the prices that Pisamonas offer, I’m thinking of buying at least one more pair for Anya for all the upcoming parties and outings. I’m really loving the soft pink croc print bluchers – so cool! If you toofollow a similar shoe rule to me, you will probably break it once you get to know Pisamonas. It’s hard not to!
I love serving finger foods at parties because they are so practical and easy for everyone to eat from the little people to the grown-ups. But they are labour intensive as you have to make at least 2-3 bites of everything per person. So I often mix up the menu with food that I can cook in large quantities in one pot and one of my favourite one pot party dishes is risotto. It’s easy to make and then you can serve mini portions in lots of ways – my favourite way is to dish the risotto in to mini espresso cups. Today I’m sharing a delicious corn risotto that I serve to big kids and little ones at parties.
The blackened corn in this risotto comes from my childhood. Some foods evoke such vivid childhood memories that they literally transport you back to that time and place. One of those foods for me is blackened corn. The only way we ever ate corn in India was to roast it on a gas hob flame, rub it with butter and spices and eat. The smoky, charred flavour is so delicious and goes so well in a risotto. I like to sprinkle a bit of pancetta on top but this is optional – you can easily keep the dish vegetarian by using veg stock and omitting the pancetta.
BLACKENED CORN RISOTTO IN A CUP Makes: 15 mini servings
1 tbs olive oil 2 generous knobs of butter 350g Arborio rice 1 onion chopped finely 2 cloves garlic chopped finely 150ml white wine 1.3l chicken or veg stock 2 corn on the cobs parmesan cheese small pancetta cubes cooked till crisp (optional) small handful roughly chopped parsley salt & pepper to taste
I start with blackening my corn on the cob. Turn on the gas hob to a medium flame and hold the corn over the flame using tongs or similar. Keep turning the corn around so it blackens evenly and of course be careful! The corn will make a few popping sounds but that’s fine. Cut the corn kernels off the cob and keep aside.
Next make your risotto. You can use your favourite basic risotto recipe or follow the recipe here. Heat the olive oil and a knob of butter, once melted add your onions and garlic. Cook on a low heat till the onions soften but don’t colour. Add the arborio rice and stir well so that all the rice is coated in the butter. Pour in the wine and continue stirring till the wine evaporates.
Now add your hot stock (keep it hot on a low heat) one ladle at a time. Keep stirring until the stock is absorbed by the rice and then add the next ladleful. Once your rice is nearly done and you have around 2-3 ladlefuls of stock left to add, throw in your corn and stir well. Continue cooking with the remaining stock till the rice is al dente (soft and creamy with a slight bite).
Finally add another knob of butter and a generous amount of grated parmesan, taste and season accordingly – you may or may not need salt depending on how salty your stock is.
Now the fun bit – dish out in to little cupcake holders, espresso cups, small glasses or anything similar you have. The corn risotto not only tastes delicious but also looks great in little mini cups. Sprinkle the tops with the crispy pancetta (if using) and a handful of parsley. Dunk a teaspoon in each and serve.
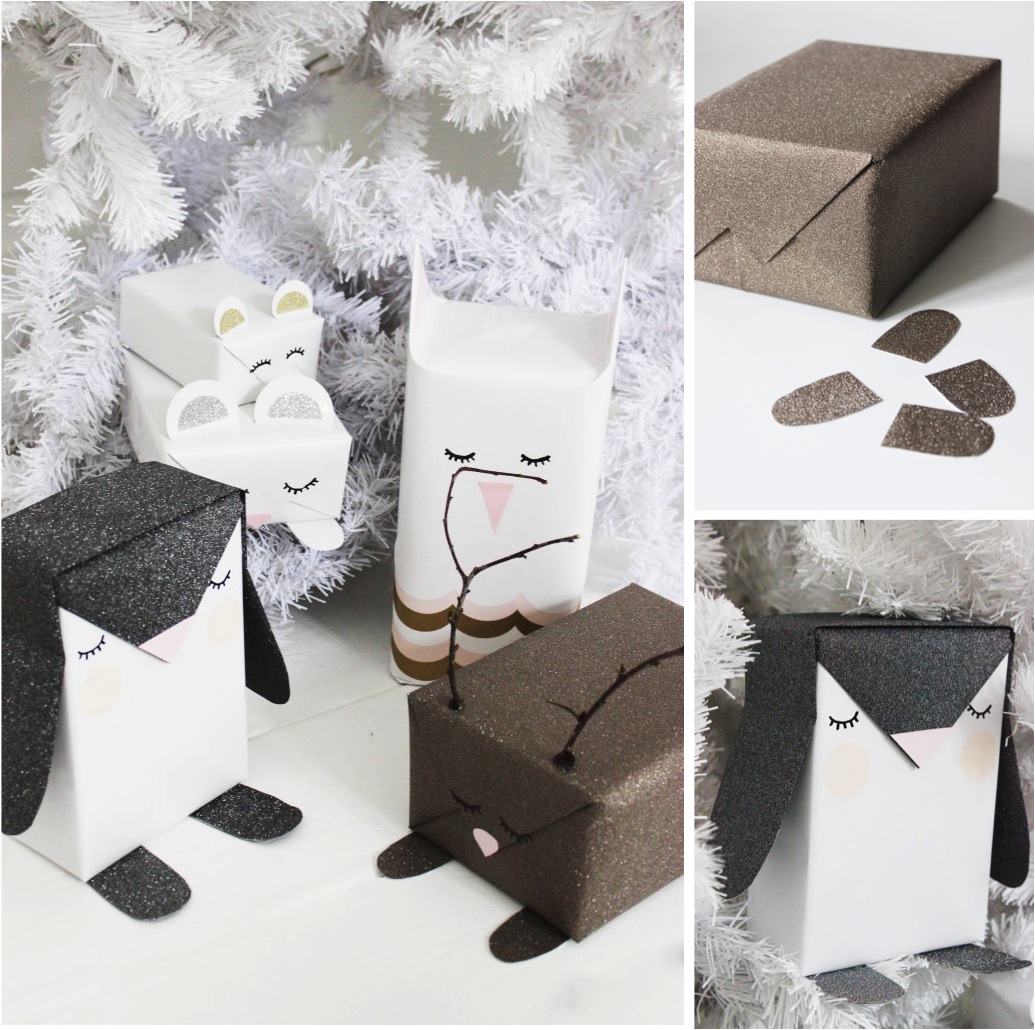
December is a month of giving gifts in our house. Not just with Christmas but also Anya is a December baby so we have birthday gifts to give too. For me, the gift wrap is just as important as the gift. After all it’s the first thing the person sees. So I love the idea of making my own DIY gift wrap as it makes it so personal. Recently I’ve been finding loads of gift wrap inspiration so here are 5 of the best DIY Christmas gift wrap ideas to inspire you too:
I mean how cute are these sparkly animal gift wraps? I’ve seen animal gift wraps before but I especially liked the sparkly touch on these.
These are two fun ways to get creative with ordinary wrapping paper. With the first, just stick some pompoms on and use a bit of bakers twine or ribbon to finish and you have a unique gift wrap. The second is so pretty too – you can find the tutorial here. You can take this idea and make cut out trees, snowmen or whatever you like.
Another option is to go minimal and stylish with your DIY Christmas gift wrap. While you can buy beautiful cloth gift wraps like the one above, you can just as easily use something you have at home – think tea towels or scarves. I love the idea of giving a gift where the wrap is part of the gift too. And the second gift is just so stylish, no? I love the marble paper and the idea of using mini honeycomb balls as decorations.
I’ve saved the cutest till last! For all those little gifts, I can’t think of a cuter way to present them. Not just for kids, but if you’re giving a piece of jewellery, what an adorable way to gift it to her or him.
So, have these DIY Christmas gift wrap ideas inspired you to get creative with your wrapping? Which one do you like best?
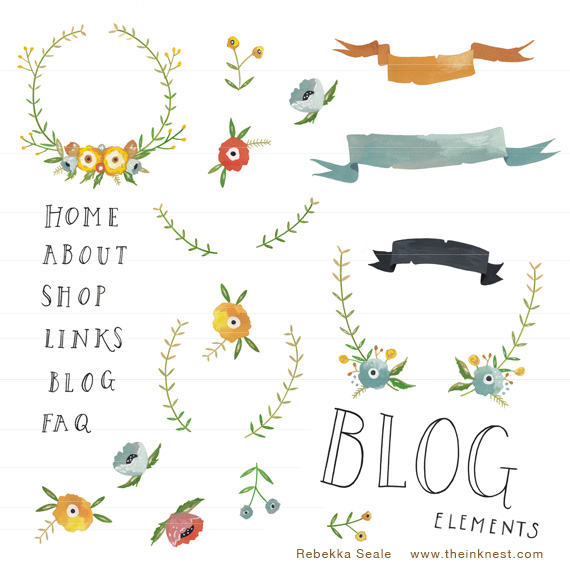
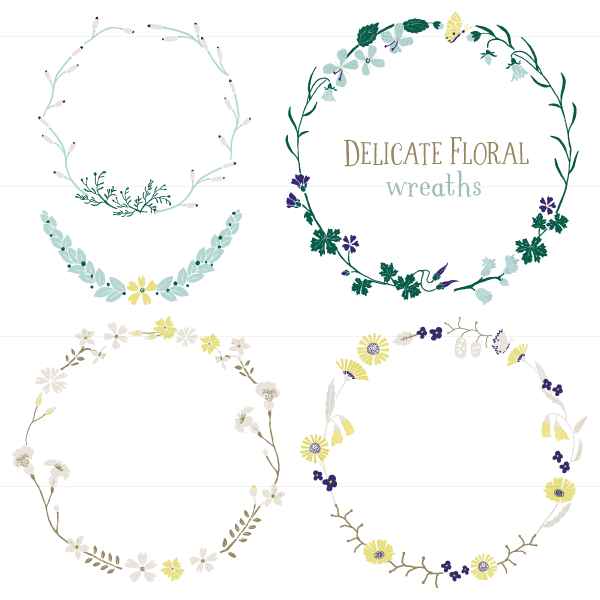
Today I’m going to let you in on a little secret. I discovered this great site that I think you will love whether you are a blogger, a creative or someone who likes to craft. It’s not always possible to design and create all your own images so this is where ink nest comes in. For a small fee, you can buy loads of beautiful hand drawn illustrations that you can print out and use as you wish – from making Christmas decorations to designing your own blog layout to anything at all. The possibilities of using these beautiful royalty free illustrations are endless.
I’m thinking these beautiful illustrations on ink nest can be used to make Christmas stuff, kids party decorations, house warning cards, thank you notes and so much more. And besides parties, you could create posters for your kids rooms, your own personal note cards, garlands for your home – really the possibilities are endless.
But the best part of all is that if you’re a blogger, you can even use these hand drawn royalty free illustrations on your blog to design your blog or to create free printables. How great is that? Each set of printables, which usually includes around 15-30 images, costs $10 and you are free to use pretty much as you wish – but do check the terms & conditions for full details. Also if you sign up to the newsletter you get a cool 20% off your first purchase.
I’m in the process of decorating Anya’s room and I’m loving the possibility of using some of the cute and quirky illustrations as posters for her room. But most of all I’m thinking about how I can use them on my blog to create stuff for you guys – some free printable gift tags maybe? Or a free downloadable calendar for 2016? So many possibilities… how will you use these? You’re welcome 🙂
While I love Christmas, it’s all about the festive season everywhere so today for a change, I wanted to share something not related to Christmas. As many of you know we’ve been through a house renovation project this year and now we’re decorating our home. I’ve learned a lot in the process and I often get asked for advice especially in choosing colour schemes and styles. The next room that I plan to focus on is Anya’s room and so I thought I would share some of my tips on decorating kids rooms especially tips that will help the room stand the test of time. After all you don’t want to have to redecorate after a year or even two. These are very much the things that I am planning to keep in mind when I decorate Anya’s room so I hope they will help you too:
1. Don’t go for a themed room With kids rooms, often the temptation is to go for a themed room especially if your child is really in to something at the time. But even if your child is really in to a particular character or is crazy about dinosaurs, that can all change in months or even weeks. So a themed room isn’t likely to grow with the child.
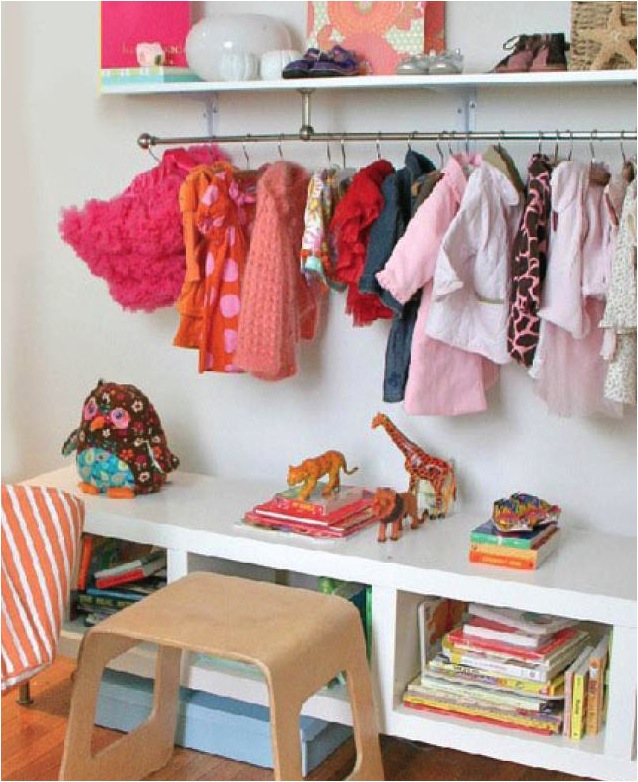
2. Buy practical big furniture pieces that will stand the test of time The two biggest pieces of furniture in a room are usually the bed and the wardrobe. You don’t want to be replacing these in a hurry so think your options through. If your child is going to need a big bed soon, get one now or at least one that can expand in to a big bed when the time comes. Also what kind of wardrobe do you need – do you really need a big closed closet that may dominate the room? Kids are constantly growing so they have a pretty high turnover of clothing and shoes for a long time. Unlike us, they don’t grow their clothing collection year on year and hoard things from 1997 (or is that just me?!). So really think through the closet options – will a chest of drawers and an open clothes rail work better than a big wardrobe and also end up saving space?
Sometimes when time is short and you’ve left stuff to the last minute, it’s handy to have one place to go to, to find all your gifts. That place for me is Little Flea – a one-stop place where you find all the best baby and kids brands from small, independent retailers. Rather than trawl the entire web looking for christmas gifts for kids, I find it a lot easier to go to Little Flea where I still get lots of choice but save a lot of time too.
In our home, Anya’s birthday is just a little before Christmas. That means December is full of presents for her – sometimes too many. So what we do is give her a big present for her birthday and small, inexpensive stuff for Christmas. I always get her birthday present organised in time but with everything going on the little Christmas gifts often get left till the last minute. So today I headed to Little Flea to make a list of possibles for Anya and while I was there I picked out some of the best little gifts that you too can get for under £20 with many that are under £10 too. Here are my picks for the best Christmas gifts for under 20:
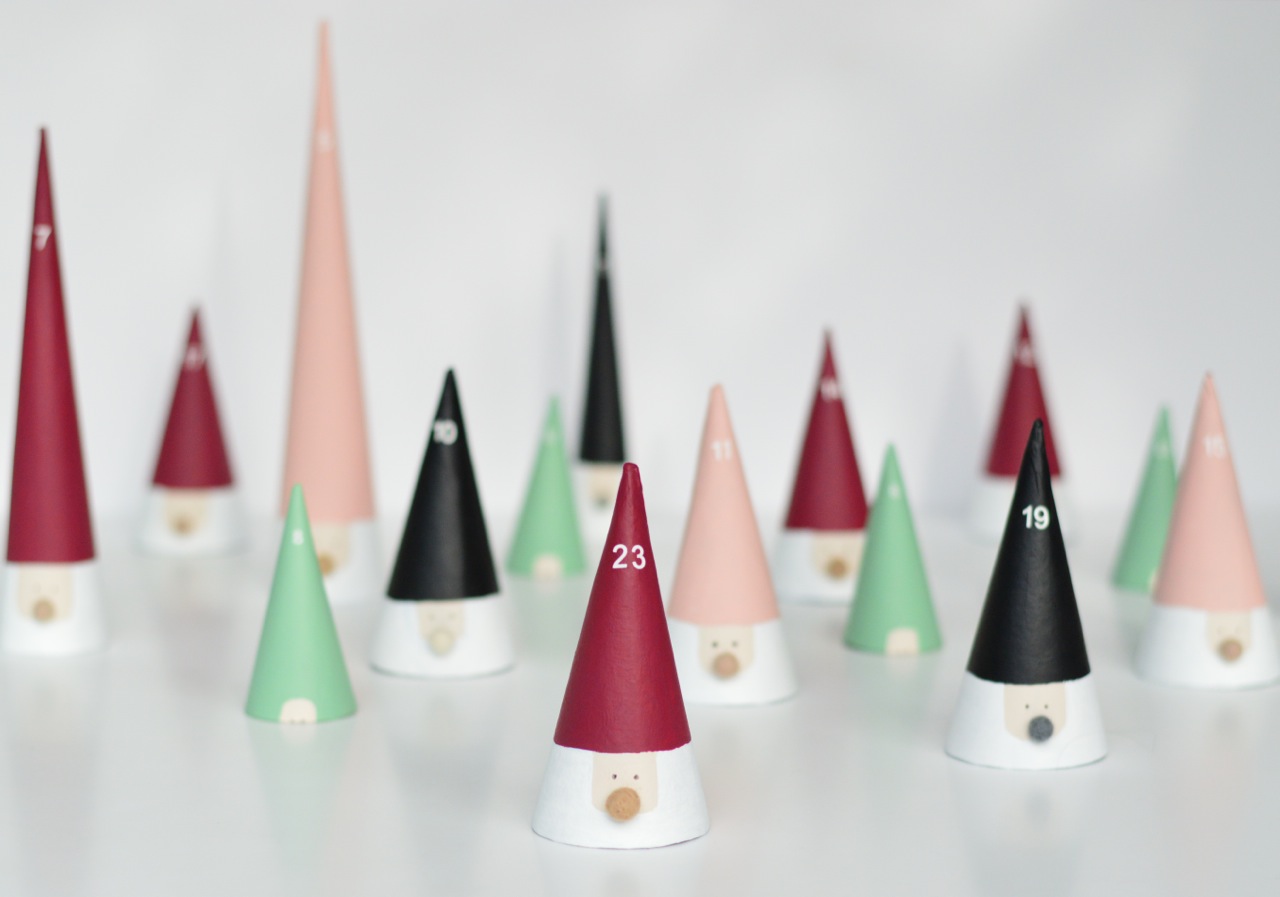
It’s that time of year – time for my annual DIY advent calendar. Since I shared my mini forest DIY advent calendar last year, I have had so much love for it. It even got featured in Marie Claire Maison. Wow! So this year the stakes were high – I’ve also had readers asking me months ago what I was going to make this Christmas!
I went through a few DIY advent calendar ideas but in the end I loved the idea of making santas and their little elves. Aren’t they so Christmassy and cute? I chose different sizes as they not only look great but also allow me to put different size gifts under each one. I love making my annual advent calendar to share here and inspire others but also it’s Anya’s favourite part of Christmas by far. She adores the little surprise that each day brings and that makes making my own advent even more special for me.
To make this DIY advent calendar you will need: 24 craft cones in different widths and sizes acrylic paints (in your chosen colours) a fine black pen mini felt balls number stickers glue
First of all get your cardboard cones and using a pencil mark out the outline of the hat area and face for the santa cones. Also mark out the little face area for the elves.
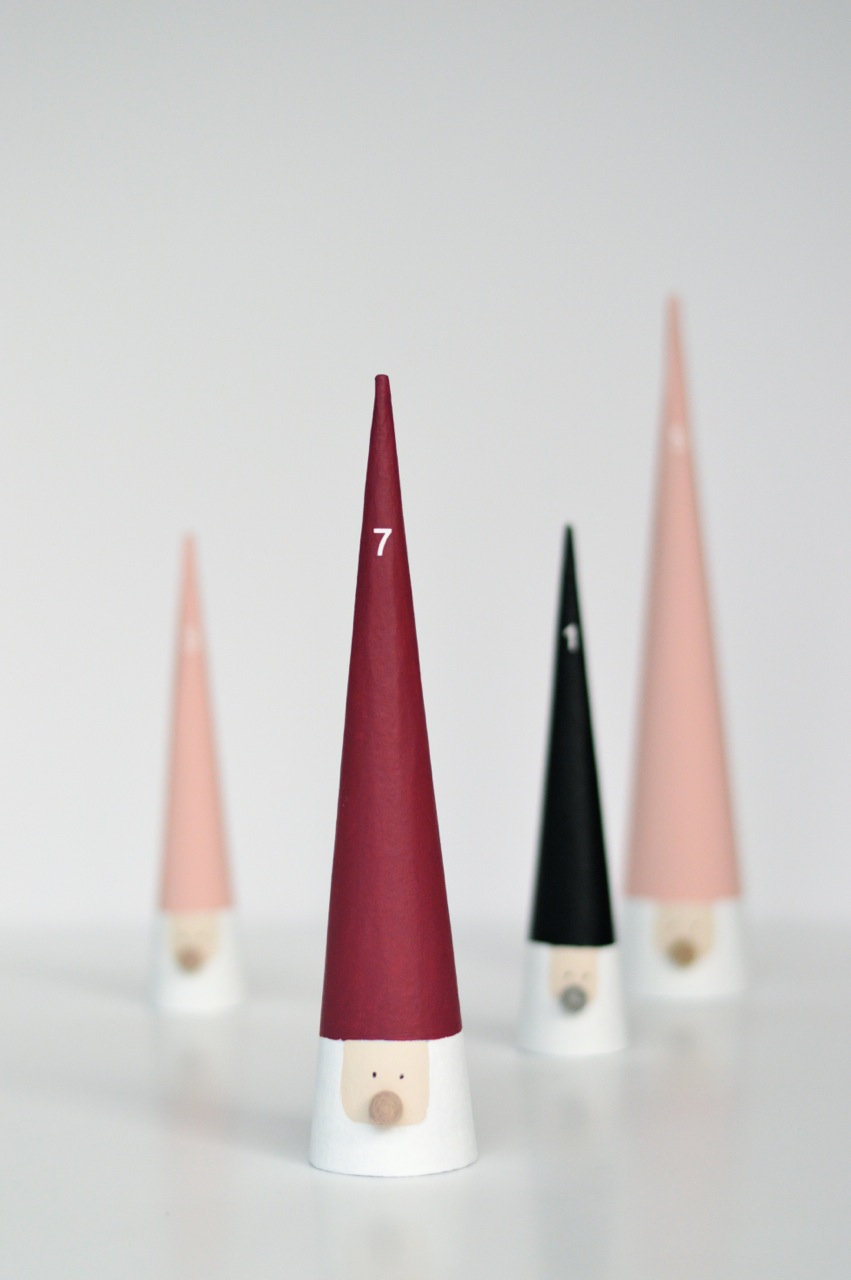
Next paint the santa hats in your chosen colours, paint the beard bit white and the face bit in a skin tone colour – I used an acrylic paint colour called antique white. Similarly paint the elf cones and their faces. Some colours will require two coats for a better finish otherwise the cardboard will show through.
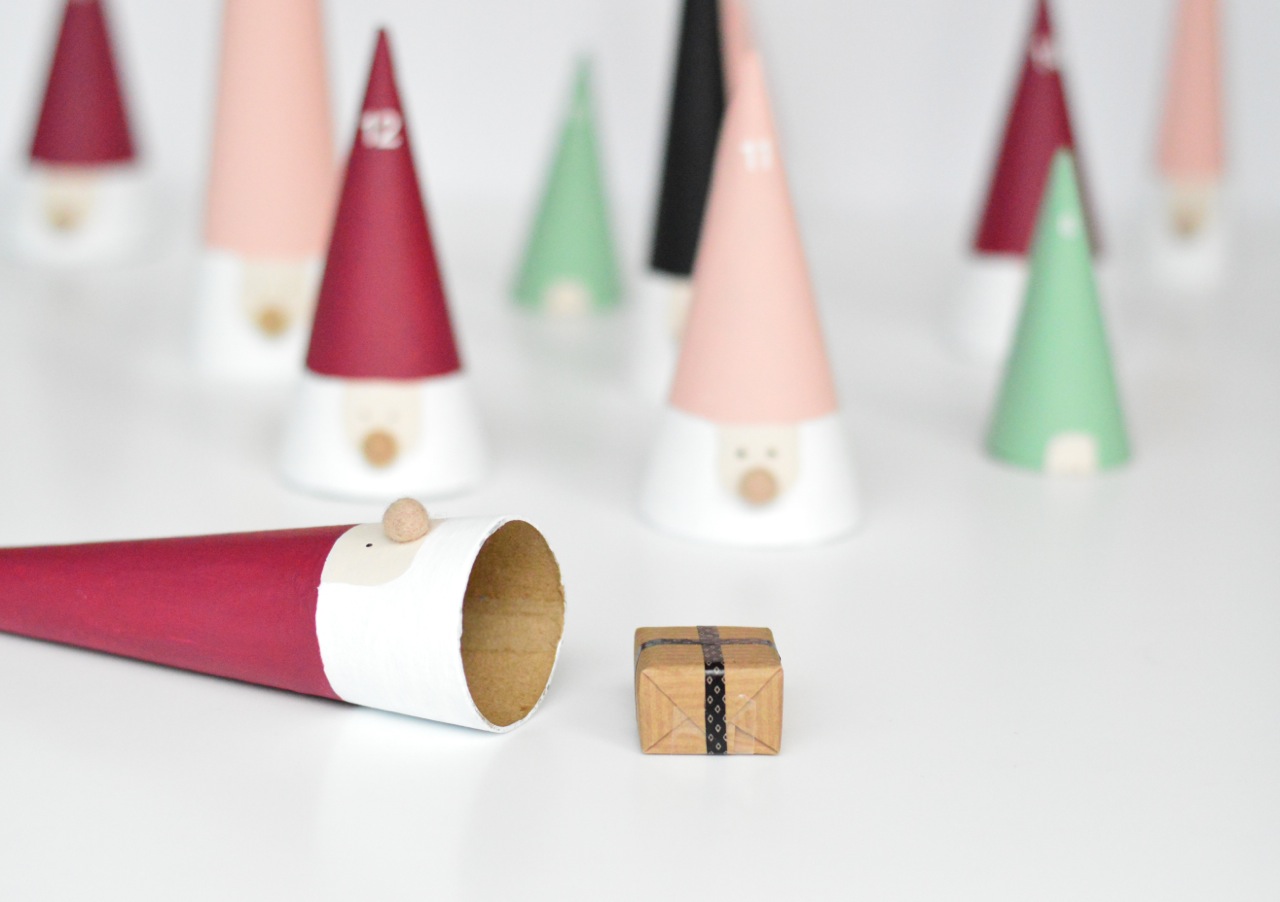
Using a fine black pen draw on little eyes for both the santas and the elves. Glue the felt balls on to make santa’s noses and thats the cones done. Either use number stickers to number the cones or you can even paint or write them on. Finally, add little gifts, notes or whatever you like under the cones and you have a super cute advent calendar.
What I especially love about this DIY advent calendar is that it’s simple enough for kids to make. Just get them the cones and they can create and decorate the santas as they wish. Also once the advent calendar has been used, you can easily turn these santas and elves into hanging Christmas tree decorations. Do you make your own advent calendar? I’d love to hear about what you make.
{I bought the cones on ebay but they are easily available from craft shops as are the felt balls.}
Books are my favourite gifts to give kids. For birthdays, for Christmas gifts, for any occasion at all. With so many fabulous kids books out there, it’s not hard to find the perfect book for any child. Here I’ve compiled a list of some of our favourite books – some of which we already have and others that are on our wish list. I’ve mixed up the selection to include picture books, art books, activity books, educational books and more.
Anya’s Christmas gifts always include books and usually a selection of different types like the ones I’ve suggested here. The one that I am looking most forward to buying her this Xmas is The School of Art which I have browsed through and it looks great not just for kids but for adults too. The books I’ve picked are for a range of ages from toddlers to 10 year olds so there’s something for everyone. The ages though are just rough guides, not set in stone.
Here are my best kids books gift suggestions for this year:
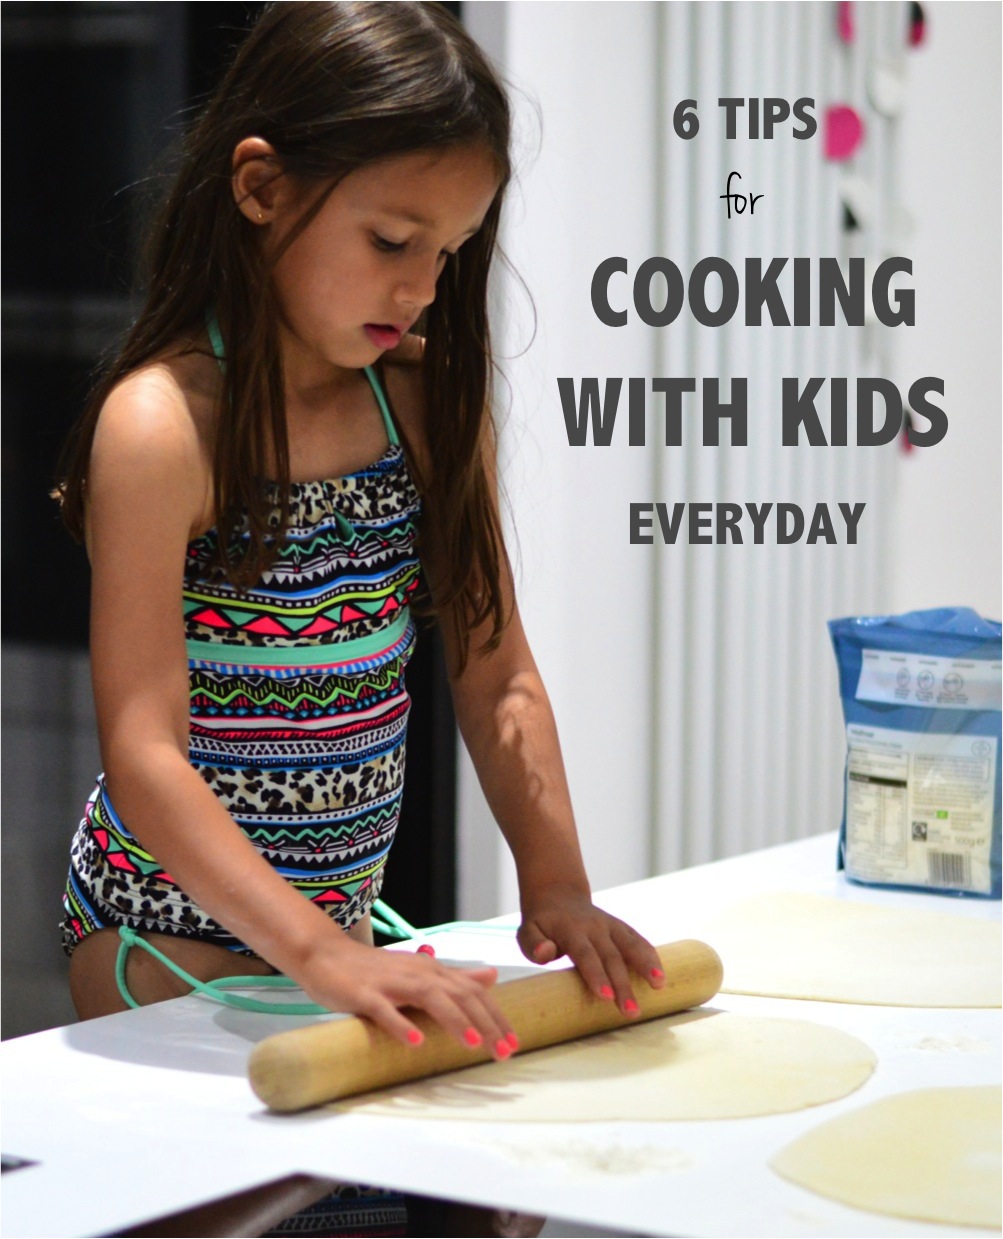
Do you cook with your kids? I don’t mean the odd cake or planned baking time but involving them in everyday cooking, everyday? I love cooking and cook most days but I just didn’t enjoy it as much with Anya because of the mess and slowness that it brought. I used to despair at the extra cleaning up, the extra time, the extra everything. A simple task that was supposed to take 10 minutes would take five times that!
Then I started thinking about it and realised that cooking with Anya could be a lot of fun if I changed the way I looked at things. She is interested in cooking (as most kids are) and it would be a real shame not to develop her interest especially when we all know that there are so many benefits of cooking with kids. So I thought about how I could make our cooking time in to something that we both looked forward to everyday. Here’s what I did and what anyone can do to make cooking with kids a daily thing that fun for everybody.
My tips for cooking with kids everyday (without killing them 😉 )
1. Make up your mind to remain patient no matter what. Before you start, make up your mind to stay patient. This has helped me no end. Taking a minute beforehand to decide that impatience isn’t an option has made for much happier cooking together times, for Anya and for me. And after a while, like me, you will naturally be more patient.
2. Only cook with kids when you have time. Cooking with kids is always going to take a lot longer than if you did it by yourself. There will be days when you need to be somewhere or you need to get dinner on the table in a hurry, so just do it yourself on those days. But when you know you have more time, that’s when you can take a slower pace, keep your patience in check and enjoy the process together.
3. Expect mess.
This used to drive me insane – poor Anya would barely spill a drop and I’d whip out the cloth and clean up after her every move. I put myself in her shoes and I couldn’t think of anything more irritating than someone cleaning up after you every five seconds! So now I accept there will be mess, sometimes a lot of mess and when I feel like reaching for that cloth, I just remind myself of the decision I made before I started cooking – see point 1.
4. Let them lead where possible. Give them a task that they can be in charge of, without any help from you. This makes kids feel happy and proud – the look of pride on Anya’s face when she has done something completely by herself and the concentration while she’s doing it is priceless. It can be as simple or as involved as your child can manage, depending on their age of course. Things like pouring all the ingredients in to a bowl and mixing or breading homemade fish fingers which is one of Anya’s favourite jobs.
5. Let them express themselves. If you’re a fan of cooking, you’ll know that it’s one of life’s great pleasures for so many reasons. For me cooking is fun, it’s relaxing and it’s so creative. This is exactly how kids should be allowed to feel about it too if they are going to enjoy it. The only way they will feel like this is if they are allowed to express themselves freely, without you giving instructions the whole way. Let them give ideas on what to cook, suggest extra ingredients that may not have been part of the plan or give ideas on presentation.
6. Think of it as bonding time. Cooking together with your kids is a great time for bonding but only if you view it as this. Once you view it as this, cooking becomes such a fun part of your time together and you will come to look forward to it everyday. Anya and I chat about her day, tell jokes and laugh at the mishaps and spills. And then when Richard comes home, she excitedly tells him about what she helped make.
These are a few things I’ve done but I’d love to hear from you too. Would you involve your kids in everyday cooking? Do you have any tips for cooking with kids everyday?
Ebabee Likes is a style guide for babies, kids, teens and their mamas. It’s all about inspiration, ideas and indulging yourself and your brood. It’s written by me ~ Nomita ~ a style loving girl from Mumbai who now live’s in London. Read More...
 Doing up a kids room, especially one that is small can feel like a bit of a challenge. Kids have a lot of things – toys, books, games, dress-up gear – the list goes on and on! Trying to find space for all this stuff plus all the necessary furniture can be tricky in small spaces. So today I wanted to share some great space saving tips and ideas for small kids bedrooms. Having a small bedroom doesn’t have to mean untidiness or compromise. Instead there are lots of fun and stylish ways to maximise the space even in the smallest of rooms. Here are 6 clever and creative ideas for small kids bedrooms: