I’m in love with this new French design studio – how great is their art? I love discovering new designers for a range of things but especially for kids art. Art like this that may be aimed at kids but really it’s ageless and will be loved by adults too. I’m loving the posters as well as those quirky animal trophies. Every child should have some art on their walls and I’m planning to have a lot in Anya’s new room – the only trouble is choosing from all the amazing kids art out there. But I think those animal trophies and that adorable juggler print are going to be hard to pass up! Visit Melanie, the designer’s shop to see the rest of her striking collection of kids art.
It’s Wednesday and that means time for more photography tips. This week it’s all about styling your photos. I will start by saying I am no styling expert but over the years of writing this blog I have learned quite a lot about styling. I used to drool over the photos you find on pinterest and wonder how they did it. Then I decided to see if I could teach myself through some basic courses and practice. We all know one part of a great photo is the photography but the other part is how and where you place everything. Ordinary, everyday objects can look stunning with just a few styling tricks. As bloggers we all know how important our photo and styling skills are but also if you’re just interested in photography and want to learn a bit more about taking better looking shots, then these photo styling tips for beginners will help you create beautiful images.
1. Get inspired! Before you even touch your camera and start trying to compose images, gather lots of inspiration. You can do this online or offline but with pinterest it’s so easy to do. I have set up 5-6 different secret boards by subjects that I’m interested in learning to style like food, toys and beauty. Any styled shot that appeals to me gets added to these boards and over time I have built up quite an inspiring selection of images. The plan here isn’t to copy but to get inspired and get ideas of ways to style your shots. In addition I write notes on each pin as you can see from the snapshot of my food styling board. I write what I like about that shot or why it’s inspiring me – is it the colours or the positioning of something or an unexpected touch that brings the image to life.
2. Practice, practice, practice Once you’ve gathered some inspiration, grab your camera pick a few objects and get styling. The first few times you try, it may look nothing like you had hoped – I’ve been there! But don’t give up. As with most things, the more you practice the better you will get at it. And by practice I mean take a few household objects and put them together and photograph them. Move them around, put them on a different table, put them on the floor, on the bed, add objects, remove objects and just keep trying till you get a shot you like. This won’t happen in a day but over time you will train your eye in to learning which compositions work and which don’t.
3. Keep it simple This is key. When you are starting to develop your styling skills, keeping it simple and small helps a lot. So to start with take a vase, a jar of make-up, one toy or a book and start styling that object with a few props. If you start trying to style a whole bedroom as a beginner it will feel overwhelming. Styling entire rooms or big gatherings or anything on a big scale comes with a lot more time and practice.
4. What’s your style? Styling is all about style. As you practice, you will find that you are drawn to a particular style. This could be bright and light or dark and moody, it could be minimal, monochrome shots or shots bursting with colour. So choose your style and experiment with it. You are much more likely to produce great shots with a style you are naturally drawn to.
5. The props Don’t go out and buy props – just look around you. Regular household objects can make fantastic props. The kitchen is my favourite place to go to find props and another great source of props are Anya’s toys especially the smaller ones. Also look in your garden (or a nearby park) – leaves, twigs, flowers all make great little props to add to a photo.
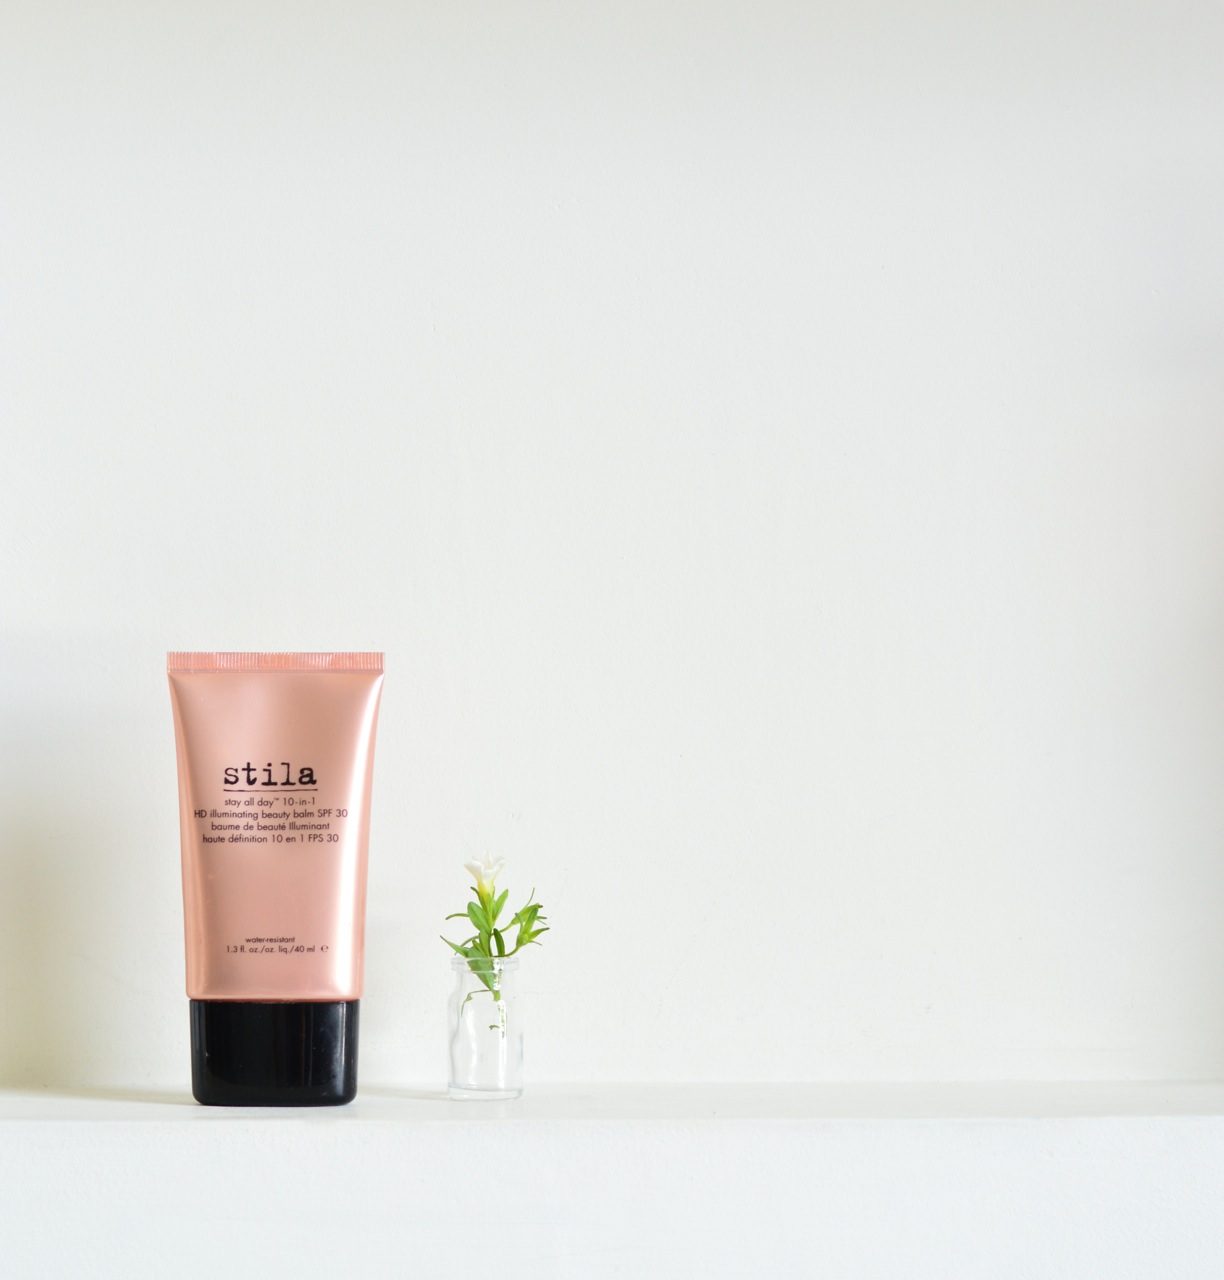
Speaking of props, if I buy something that comes in nice packaging or a nice jar, I always keep the jar once I’ve used up the product. I never go out and buy props as styling isn’t my job. Instead I collect interesting boxes, bottles, toy parts – anything that has a bit of beauty in it. For e.g. in the shot above that little glass bottle was some hair oil I bought and after using the oil I hung on to the bottle. I also went to a park next to my home and found a little flower to put in to it. The little vase just adds a bit more interest to the shot but it’s still a very simply styled shot.
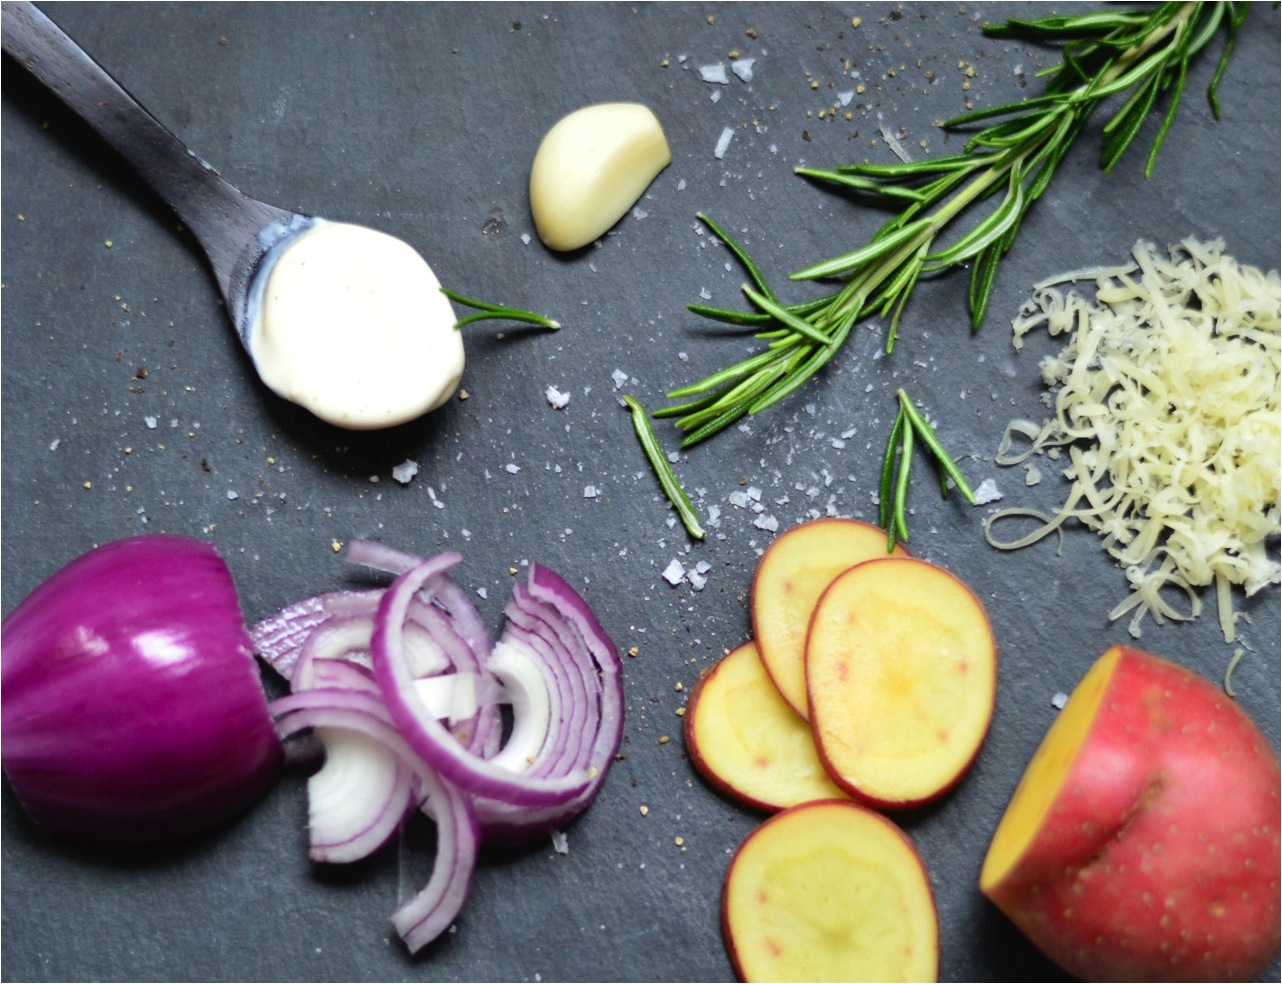
6. Backgrounds and backdrops Props are one aspect of styling a shot and another is the background. Look around your home – do you have a wall painted in a colour that would make a good background? Do you have a wallpapered wall? Do you have some interesting floor tiles? Or even some fun wrapping paper that you can use as a background? A tablecloth maybe? I use anything and everything that I can find in my home from walls to scraps of cloth that I can make a backdrop out of. I also occasionally buy some pretty tissue paper or wrapping paper if I come across something that catches my eye. Or else I just use a white wall as I love keeping my shots simple, white and bright. For e.g. In the picture above, I wanted to show some ingredients against a dark background to help them stand out. I found a piece of slate I had lying around and it made the perfect background. Don’t forget you will always crop your photo’s so the background doesn’t have to be huge.
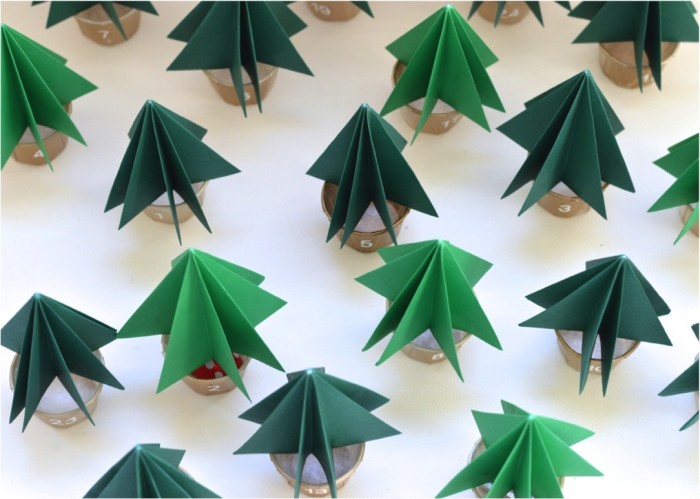
7. Play with your angles You’ve set up a shot and you keep clicking but it’s just not working. Of course you can move things around but instead try moving yourself! Photograph from above, from below, from the side, straight on, go in closer or take a step back and just keep playing with your angles. The same objects in a shot can look completely different when you change the angle just like in the example above. I didn’t move the trees at all when I took those two shots, I only moved myself and you can see how different each shot looks. The first just doesn’t work while the second is so much better as the little trees look like a forest which is the intention of the shot.
8. Just start Nobody can become an amazing photo stylist in a day or a week or even a month. And the idea isn’t to become a top stylist but just to lift your photos and make them more interesting. You will see a huge improvement in you styling skills over a period of a few months if you practice often. Remember to take your first styled shot and keep it hidden away then after six months take a look at it and compare it to your latest shot. You will see a world of difference. The secret here is to get started so why not look around you now and see what you can photograph today.
So those are my top photo styling tips for beginners. For us bloggers it’s an important skill to have but also for anyone interested in photography or anyone who just wants to take better photos. Once you learn how to style your photo’s it will become addictive and you will realise it’s not so hard to make an ok photo look amazing just by adding a little thought and effort.
If you’ve read this blog for a while, you’ll know how much I love kids books. And every time I come across a great book, I love sharing it here. While I love many of the better known kids books, I also love searching for lesser known gems and today I have one such gem for you. The The Wolf’s Whistle is a book I am so glad I came across. At it’s simplest form it is a twisted tale of the Three Little Pigs and the big bad wolf. But this book is so much more. It could be the story of how the wolf came to be so bad or even how superheroes are made. It features a lone wolf called Albert who is a bit of a misfit. He and his group of three friends, none of whom really fit in, are tormented by the ‘honeyroast brothers’ – three enormous pigs! Albert has a dream of becoming a comic book artist and his story continues from childhood in to his adulthood where tragedy befalls him and yes the ‘honeyroast brothers’ are involved.
The Wolf’s Whistle is not only a great read but also the illustrations are beautiful. The drawings are created in a retro style which works so well with the story. The book is aimed at 5 to 8 year old kids but I think the upper end of this age group will appreciate it better. Anya enjoyed the story and loved looking at the pictures but couldn’t fully understand the subtleties in the book. For her it is a simple story of a good wolf and bad pigs but that is what is so appealing about this book – it will grow with her and I see her reading it several times over the years. I love this book for it’s originality and the beautiful illustrations.
Have you come across any lesser know kids books that are unmissable? Do let me know in the comments.
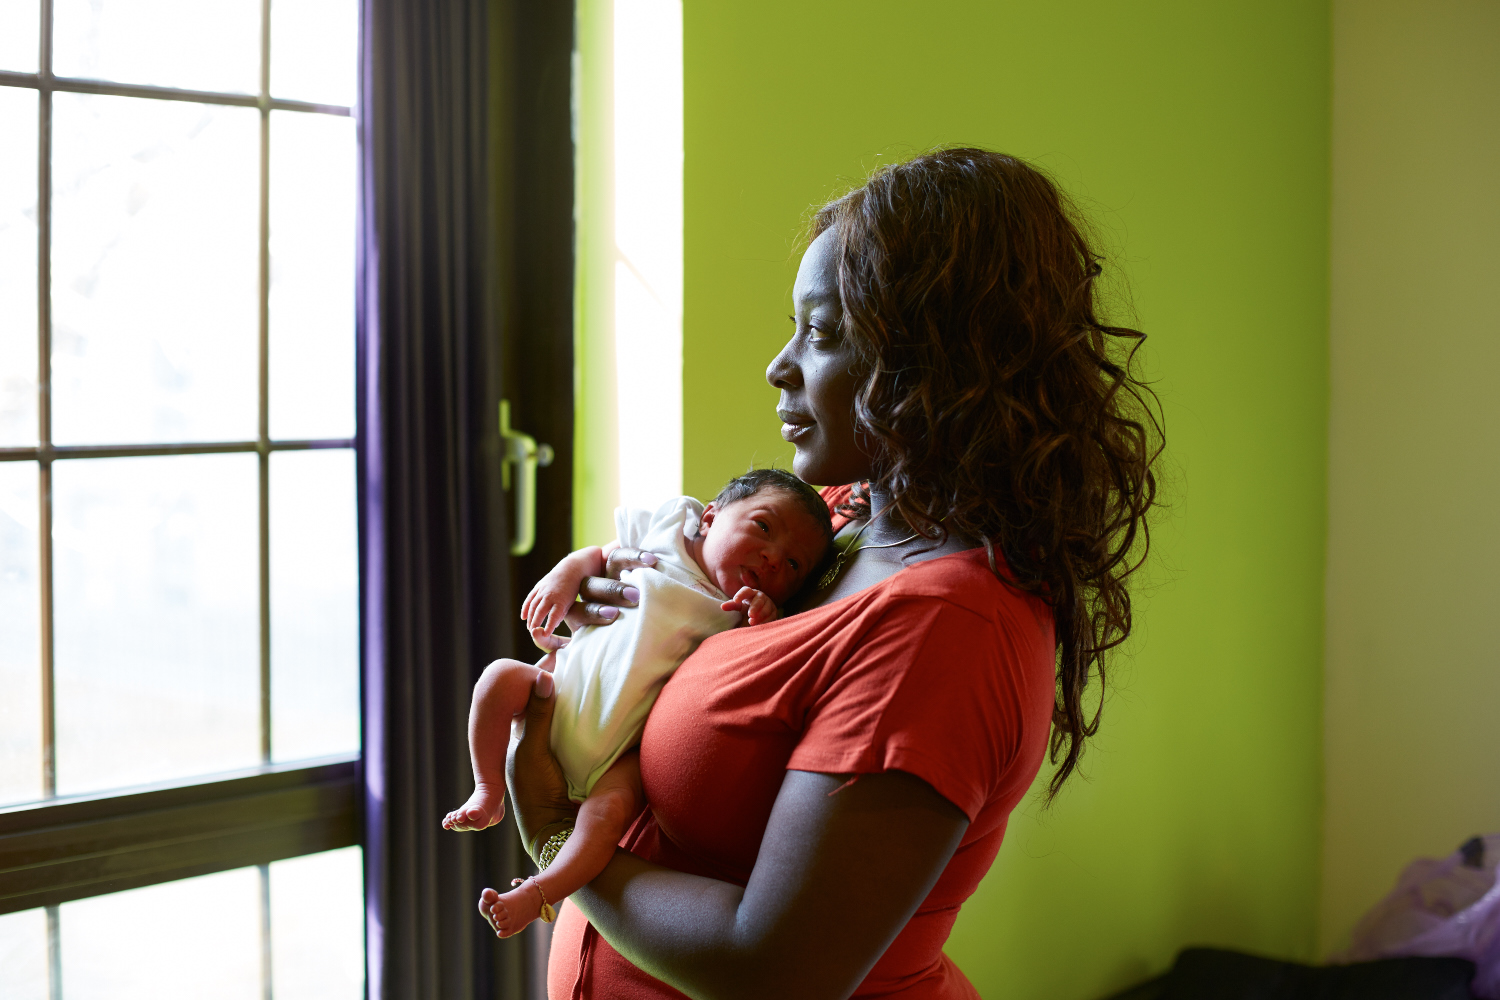
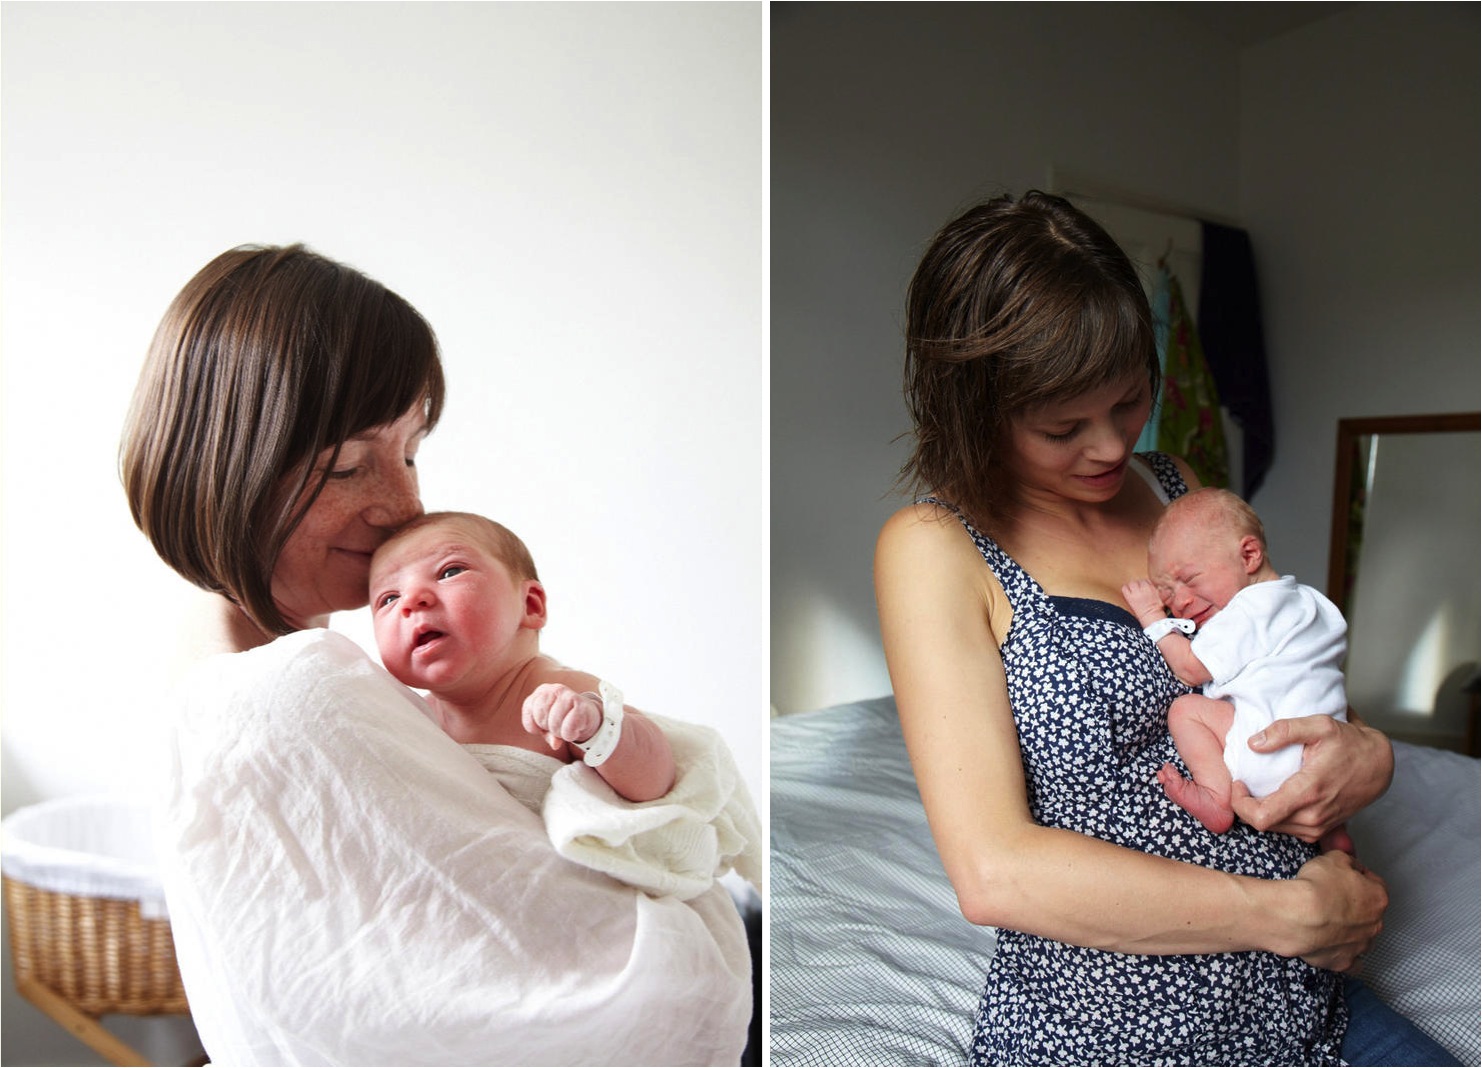
With royal baby fever hitting new highs in the UK, I can’t seem to get newborns off my mind this week. Earlier int the week I shared some great tips for photographing newborns in the first few days of their life. And that reminded me of a beautiful photo series that I had come across last year. Jenny Lewis, a photographer, had the idea of photographing mothers with their one day old babies. The series called ‘one day young’ is incredibly heartwarming.
Jenny Lewis felt that there are far too many negative birth stories floating around, there is fear and mystery surrounding birth especially with first time mums. We hear all the horror stories about birth but positive birth stories aren’t so easy to come across. And there are a large number of births which are positive so Jenny wanted to show this happy, beautiful and fulfilling side of giving birth and becoming a mother for the first time. I love the idea behind this as I myself was told a lot about what could go wrong before giving birth and that did put the fear in to me. Towards the end of my pregnancy I worried constantly about the birth and about all the things that could go wrong rather than focusing on the beautiful miracle I was about to experience.
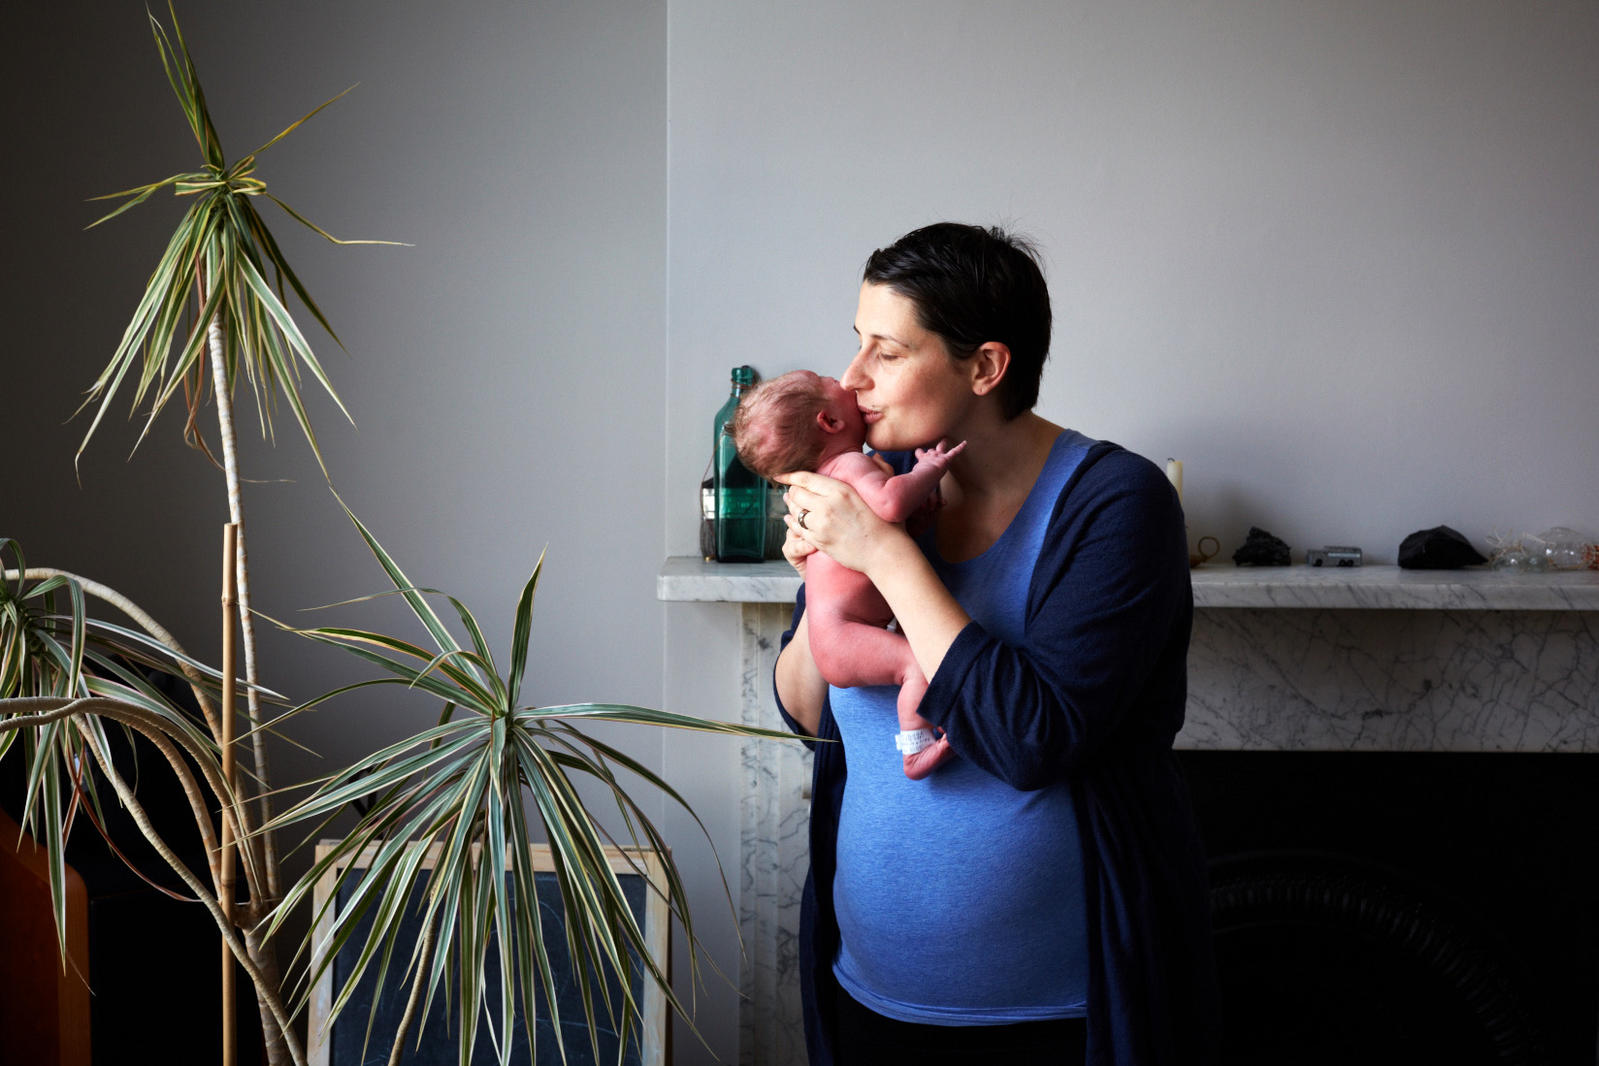
I wanted to share this photo series because I think it sends an important message to women and also it’s just to lovely to see. And with the royal baby due any day, it’s yet another excuse to celebrate the miracle of birth. Of course things can and do go wrong while giving birth and this photo series isn’t about taking away from women who have experienced a traumatic birth but instead it’s about knowing that things can go right and birth shouldn’t be feared. And look at what you get at the end of it – there really can be no better experience in life. There are lots more photo’s on Jenny’s site so take a look for a guaranteed warm & fuzzy feeling!
How did you feel about giving birth? Were you worried? And if you are soon to give birth, hopefully these photo’s will make you feel a bit more at ease.
Have a wonderful long weekend and enjoy your little miracles – nomita x
Ebabee Likes is a style guide for babies, kids, teens and their mamas. It’s all about inspiration, ideas and indulging yourself and your brood. It’s written by me ~ Nomita ~ a style loving girl from Mumbai who now live’s in London. Read More...